

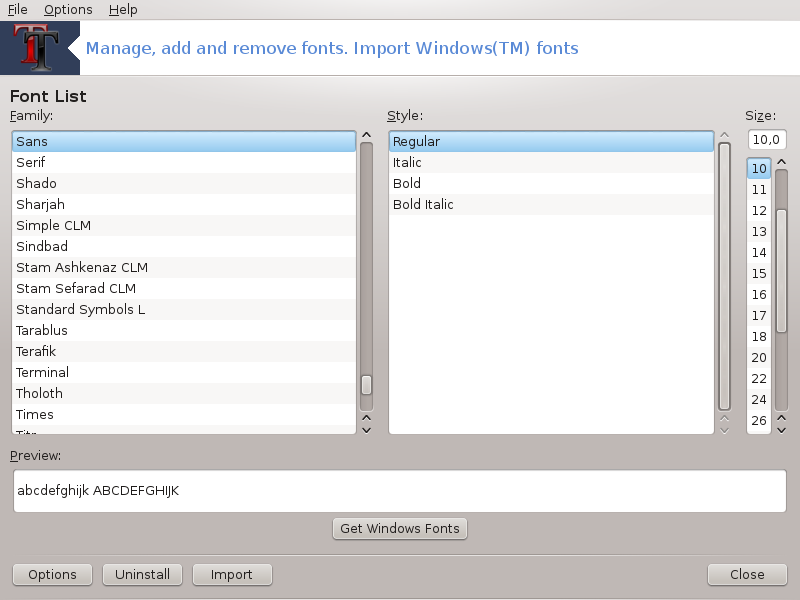
This tool is present in the Mageia Control Center under the System tab. It allows you to manage the fonts available on the computer. The main screen above shows:
the installed font names, styles and sizes.
a preview of the selected font.
some buttons explained here later.
Get Windows Fonts:
This button automatically adds the fonts found on the Windows partition. You must have Microsoft Windows installed.
Options:
It allows you to specify the applications or devices (printers mostly) able to use the fonts.
Uninstall:
This button is to remove installed fonts and possibly save some place. Be careful when removing fonts because it may have serious consequences on the documents that use them.
Import:
Allows you to add fonts from a third party (CD, internet, ...). The supported formats are ttf, pfa, pfb, pcf, pfm and gsf. Click on the Import button and then on Add, a file manager pops up where you can select the fonts to install, click on Install when done. They are installed in the folder /usr/share/fonts.
If the newly installed (or removed) fonts doesn't appear in the Drakfont main screen, close and re open it to see the modifications.
You can start this tool from the command line, by typing drakfont as root.
