

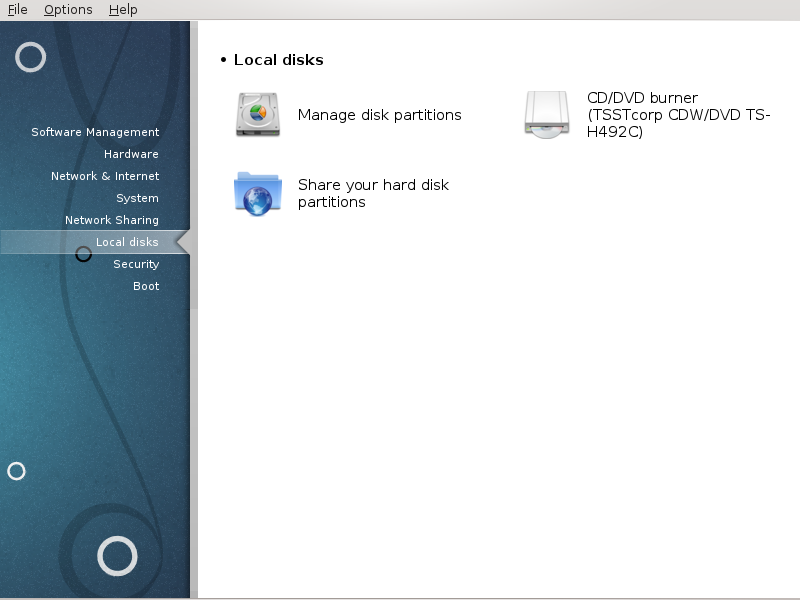
In this screen you can choose between several tools to manage or share your local disks. Click on a link below to learn more.
Discs locals

Avís
This tool[40] is very powerful, a tiny error or a cat jumping on your keyboard can lead to losing all data on a partition or even to erasing the entire hard disk. For that reason, you'll see the screen above on top of the tool screen. Click on Exit if you're not sure you want to continue.
If you have more than one hard disk, you can switch to the hard disk you want to work on by selecting the correct tab (sda, sdb, sdc etc).
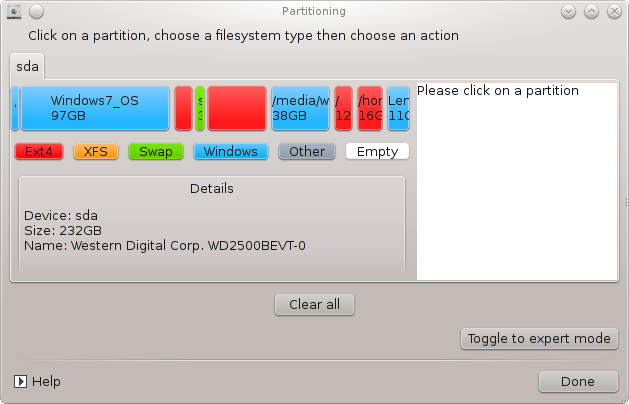
You can choose from many actions to adjust your hard disk to your preferences. Wiping an entire hard disk, splitting or merging partitions, resizing them or changing the filesystem, formatting or viewing what is in a partition: it is all possible. The button at the bottom is to erase the complete disk, the other buttons become visible on the right after you click on a partition.
Nota
If you have an UEFI system, you can see a small partition called "EFI System Partition" and mounted on /boot/EFI. Never delete it, because it contains all your different operating systems bootloaders.
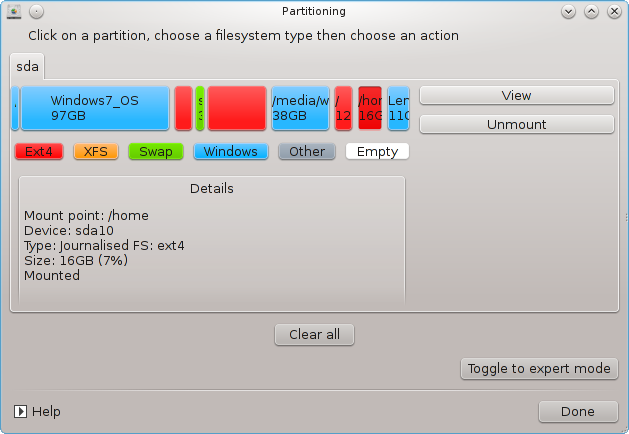
If the selected partition is mounted, like in the example below, you cannot choose to resize, format or delete it. To be able to do that the partition must be unmounted first.
It is only possible to resize a partition on its right side
To change a partition type (change ext3 to ext4 for example) you have to delete the partition and then re-create it with the new type. The button appears when a disk empty part is selected
You can choose a mount point that doesn't exist, it will be created.
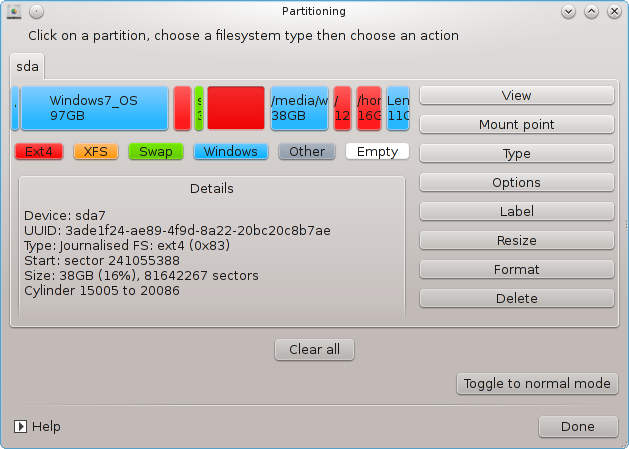
Selecting gives some extra available actions, like labeling the partition, as can be seen in the screenshot below.
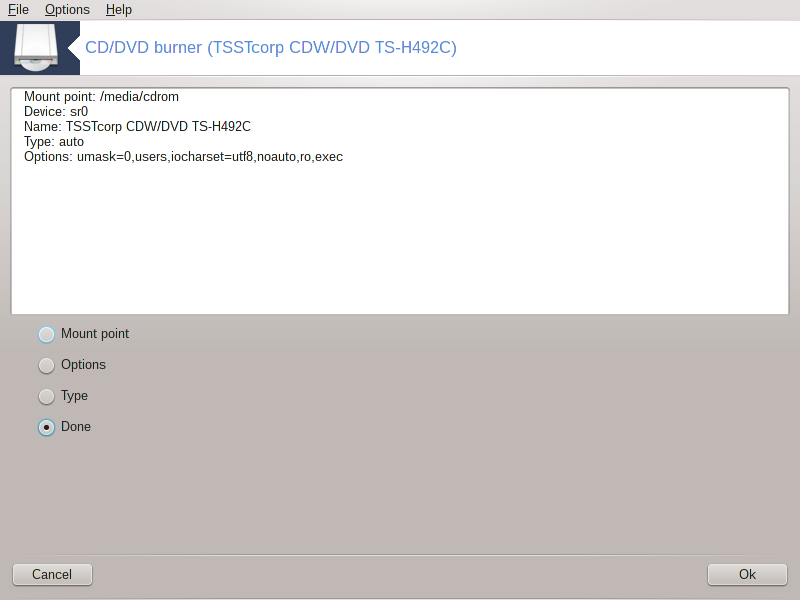
Aquesta eina [41] es troba sota la pestanya dels discs locals al centre de control de Mageia etiquetats d'acord amb el maquinari extraïble (només reproductors CD/DVD i gravadores i unitats de disquets).
El seu objectiu és definir la forma en què es munta el disc extraïble.
A la part superior de la finestra hi ha una breu descripció del maquinari i les opcions triades per muntar-lo. Utilitzeu el menú de la part inferior per canviar-los. Marqueu l'element que voleu canviar i després feu clic al botó .
Marqueu aquesta opció per canviar el punt de muntatge. L'opció per defecte és /media/cdrom.
Moltes opcions de muntatge es poden triar aquí, sigui directament a la llista o mitjançant el submenú Avançat. Els principals són:
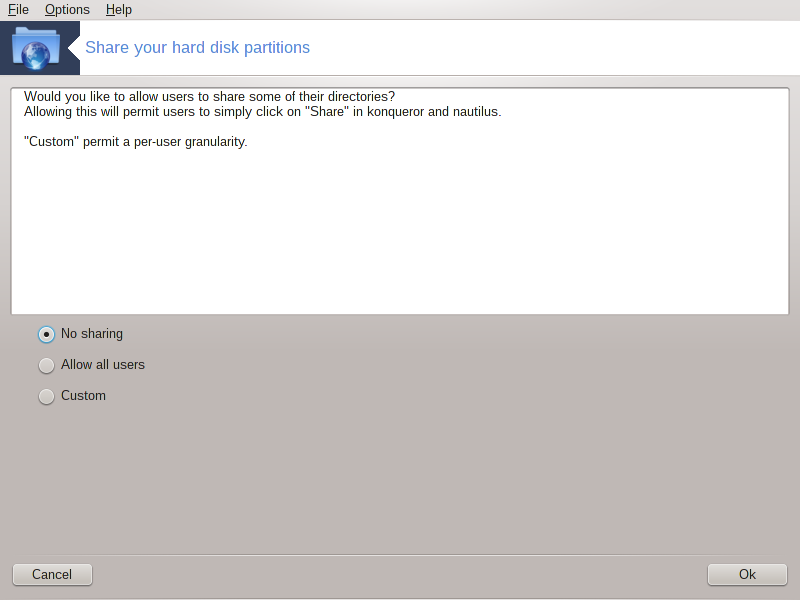
Aquesta eina senzilla [42] us permet, a l'administrador, que els usuaris comparteixin parts dels seus propis subdirectoris de /home amb altres usuaris d'una mateixa xarxa local que poden tenir ordinadors executant Linux o el sistema operatiu Windows.
Es troba al centre de control de Mageia, sota l'etiqueta de disc local, etiquetada com "Comparteix les vostres particions del disc dur".
En primer lloc, responeu a la pregunta: "Voleu que els usuaris puguin compartir alguns dels seus directoris?", feu clic a , si la resposta és no per a tots els usuaris, feu clic a per a tots els usuaris i feu clic a , si la resposta és no per alguns usuaris i sí per als altres. En aquest últim cas, els usuaris que estan autoritzats a compartir els seus directoris han de pertànyer al grup fileshare, que es crea automàticament al sistema. Se us demanarà sobre això més endavant.
Feu clic a D'acord, us apareixerà una segona pantalla que us demanarà que trieu entre o . Marqueu si Linux és l'únic sistema operatiu a la xarxa, marqueu si la xarxa inclou màquines Linux i Windows i després feu clic a . S'instal·laran els paquets requerits si és necessari.
The configuration is now complete unless the Custom option was chosen. In this case, an extra screen prompts you to open Userdrake. This tool allows you to add users authorised to share their directories to the fileshare group. In the User tab, click on the user to add to the fileshare group, then on , In the Groups tab. Check the fileshare group and click on . For more information about Userdrake, see: “Usuaris i grups”
Nota
Quan afegiu un nou usuari al grup fileshare, heu de desconnectar i tornar a connectar la xarxa per a les modificacions que s'han de tenir en compte.
A partir d'ara cada usuari que pertanyi al grup fileshare pot seleccionar en el seu/seva gestió de fitxers els directoris que siguin per compartir, encara que no tots els administradors d'arxius disposen d'aquest servei.
