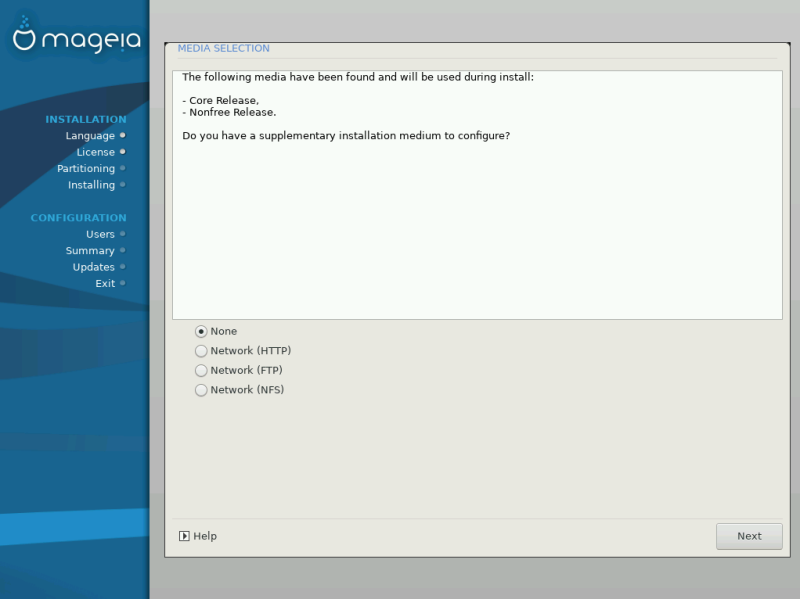
This screen shows you the list of already recognised repositories. You can add other sources for packages, like an optical-disc or a remote source. The source selection determines which packages will be available during the subsequent steps.
For a network source, there are two steps to follow:
Choosing and activating the network, if not already up.
Selecting a mirror or specifying a URL (very first entry). By selecting a mirror, you have access to the selection of all repositories managed by Mageia, like the Nonfree, the Tainted repositories and the Updates. With the URL, you can designate a specific repository or your own NFS installation.
Note
If you are updating a 64-bit installation which may contain some 32-bit packages, it is advised to use this screen to add an online mirror by selecting one of the Network protocols here. The 64-bit DVD ISO only contains 64-bit and noarch packages, it will not be able to update the 32-bit packages. However, after adding an online mirror, the installer will find the needed 32-bit packages there.
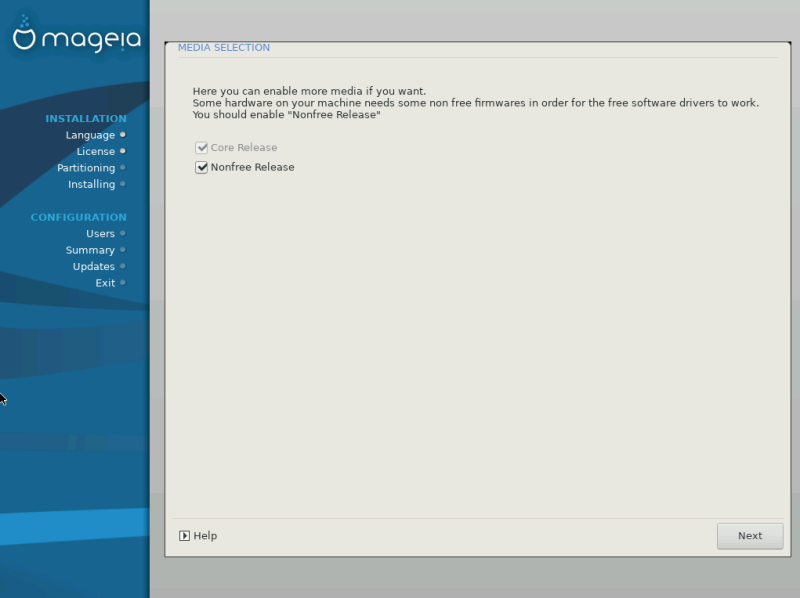
Here you have the list of available repositories. Not all repositories are available, according to which media you use for installing. The repositories selection determines which packages will be available for selection during the next steps.
The Core repository cannot be disabled as it contains the base of the distribution.
The Nonfree repository includes packages that are free-of-charge, i.e. Mageia may redistribute them, but they contain closed-source software (hence the name - Nonfree). For example this repository includes nVidia and AMD graphics card proprietary drivers, firmware for various WiFi cards, etc.
The Tainted repository includes packages released under a free license. The main criteria for placing packages in this repository is that they may infringe patents and copyright laws in some countries, e.g. multimedia codecs needed to play various audio/video files; packages needed to play commercial video DVD's, etc.
Some choices made here will open other screens with related options.
After the selection step(s), you will see a slideshow during the installation of required packages. The slideshow can be disabled by pressing the Details button.
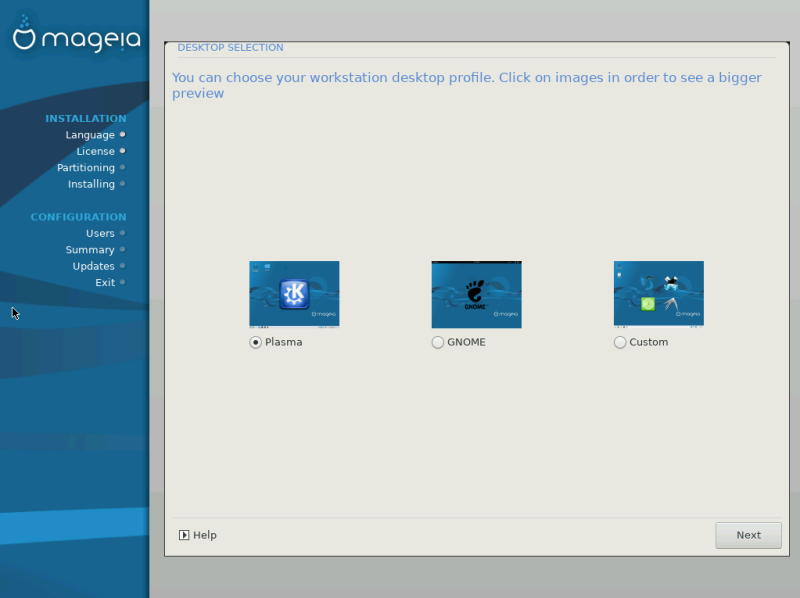
Choose whether you prefer to use the KDE Plasma or GNOME desktop environment. Both come with a full set of useful applications and tools.
Select Custom if you do not wish to use either (or, actually use both) of these, or if you want to modify the default software choices for these desktop environments. The LXDE desktop, for instance, is lighter than the previous two, sporting less eye candy and having fewer packages installed by default.
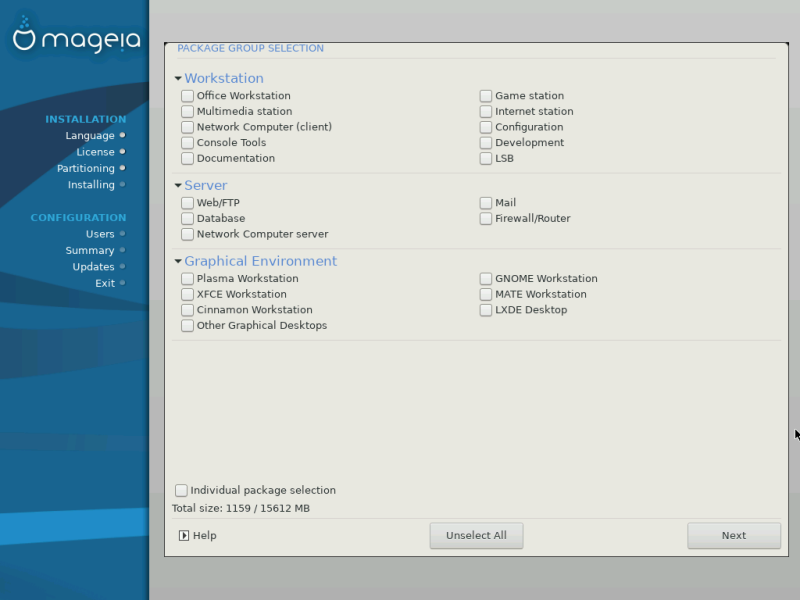
Packages are arranged into common groups, to make choosing what you need on your system a lot easier. The groups are fairly self explanatory, however more information about the content of each is available in tool-tips which become visible as the mouse is hovered over them.
Workstation
Server
Graphical Environment
Individual Package Selection: you can use this option to manually add or remove packages
See Minimal Install for instructions on how to do a minimal install (without or with X & IceWM).
Minimal Installation is intended for those with specific uses in mind for Mageia, such as a server or a specialised workstation. You will probably use this option combined with the Individual package selection option to fine-tune your installation. See Choose Individual Packages.
You can choose a Minimal Installation by de-selecting everything in the Package Group Selection screen, see Choose Package Groups.
If desired, you can additionally tick the Individual package selection option in the same screen.
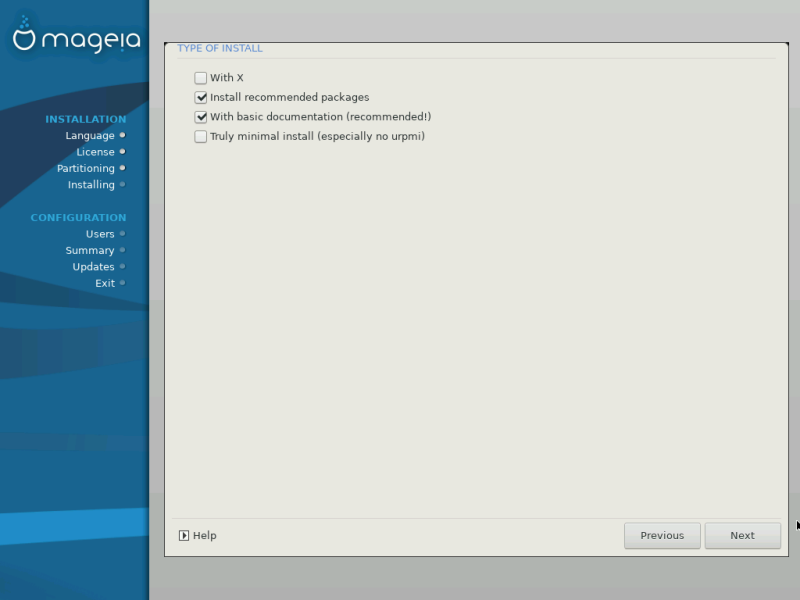
If you choose this installation method, then the relevant screen (see screenshot below) will offer you a few useful extras to install, such as documentation and “X”.
If the With X option is selected, then IceWM (a lightweight desktop environment) will also be included.
The basic documentation is provided in the form of “man” and “info” pages. It contains the man pages from the Linux Documentation Project and the GNU coreutils info pages.
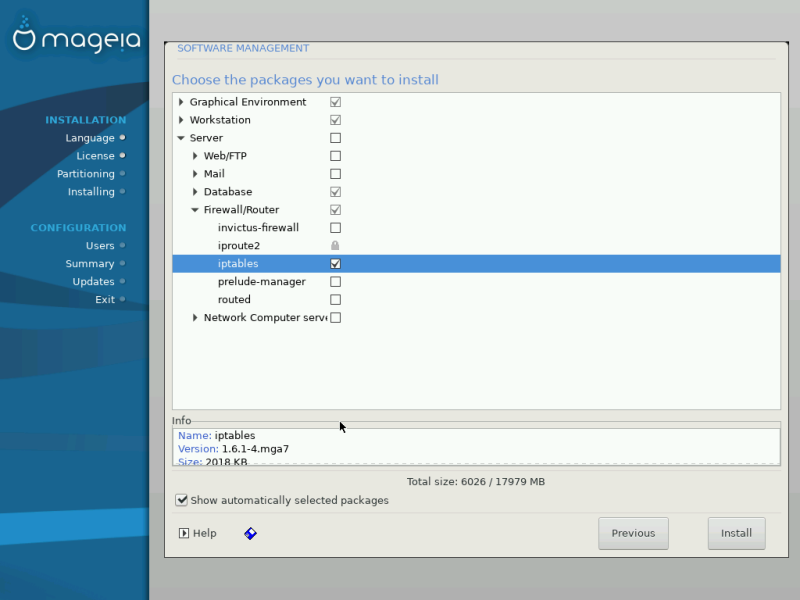
Here you can add or remove any extra packages to customize your installation.
After having made your choice, you can click on the floppy icon at the bottom of the page to save your choice of packages (saving to a USB key works, too). You can then use this file to install the same packages on another system, by pressing the same button during install and choosing to load it.


