

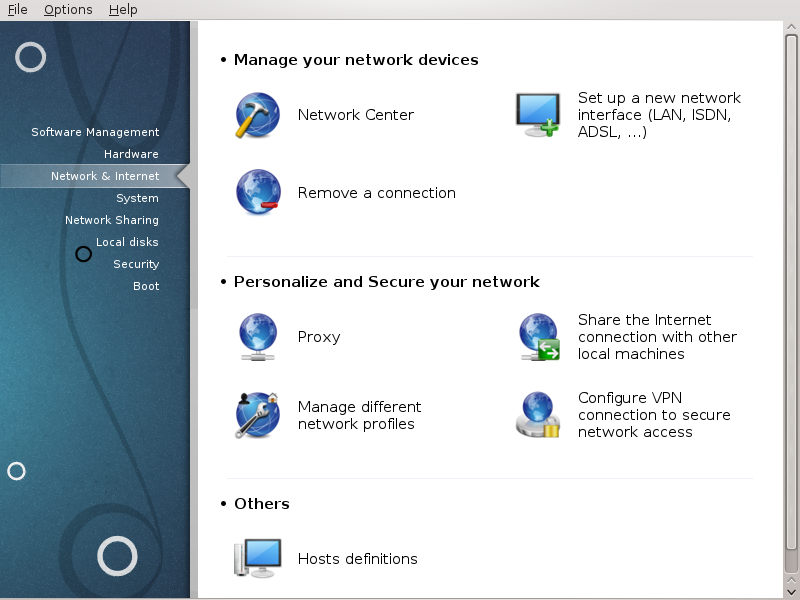
In questa schermata puoi scegliere tra diversi strumenti di rete. Clicca sul link seguente per saperne di più.
This tool[19] is found under the Network & Internet tab in the Mageia Control Center labelled "Network Center"
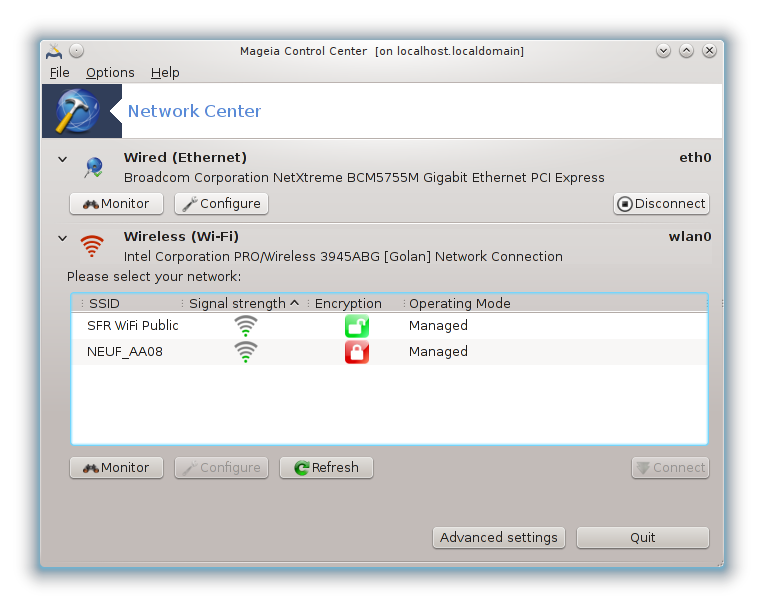
When this tool is launched, a window opens listing all the networks configured on the computer, whatever their type (wired, wireless, satellite, etc.). When clicking on one of them, three or four buttons appear, depending on the network type, to allow you to look after the network, change its settings or connect/disconnect. This tool isn't intended to create a network, for this see Set up a new network interface (LAN, ISDN, ADSL, ...) in the same MCC tab.
In the screenshot below, given as example, we can see two networks, the
first one is wired and connected, recognizable by this icon  (this one is not connected
 ) and the second section shows wireless
networks, not connected recognizable by this icon
) and the second section shows wireless
networks, not connected recognizable by this icon  and this one
  if connected. For the other network types,
the colour code is always the same, green if connected and red if not
connected.
if connected. For the other network types,
the colour code is always the same, green if connected and red if not
connected.
In the wireless part of the screen, you can also see all the detected networks, with the SSID, the Signal strengh, if they are encrypted (in red) or not (in green), and the Operating mode. Click on the chosen one and then either on , or . It is possible here to go from a network to another one. If a private network is selected, the Network Settings window (see below) will open and ask you for extra settings ( an encryption key in particular).
Click on to update the screen.
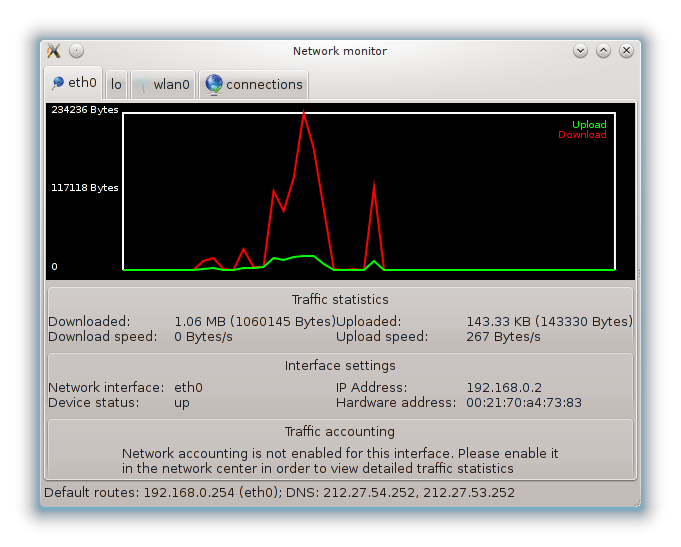
This button allows you to watch the network activity, downloads (toward the PC, in red) and uploads (toward the Internet, in green). The same screen is available by right clicking on the .
There is a tab for each network (here eth0 is the wired network, lo the local loopback and wlan0 the wireless network) and a tab connection which gives details about connection status.
Nota
At the bottom of the window is a title Traffic accounting, we will look at that in the next section.
A - Per una rete cablata
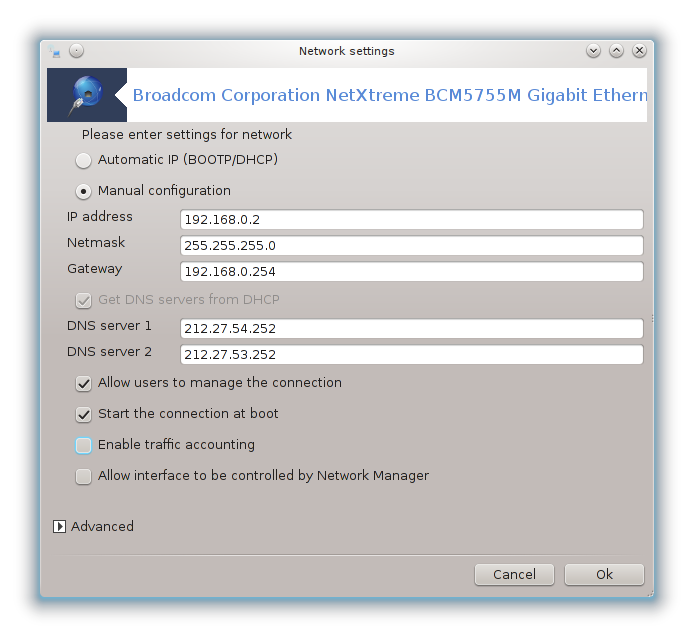
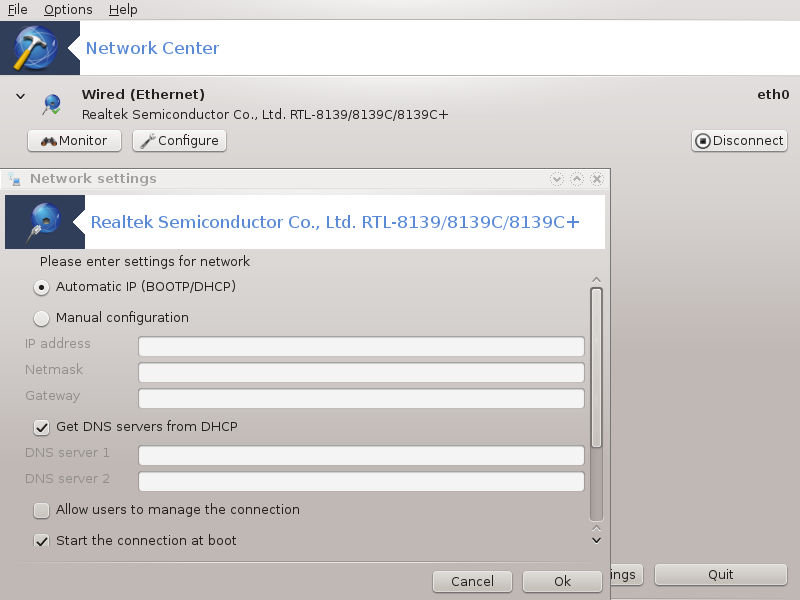
It is possible to change all the settings given during network creation. Most of the time, checking will do, but in case of problems, manual configuration may give better results.
For a residential network, the IP address always looks like 192.168.0.x, Netmask is 255.255.255.0, and the Gateway and DNS servers are available from your providers website.
if checked this will count the traffic on a hourly, daily or monthly basis. The results are visible in the Network monitor detailed in the previous section. Once enabled, you may have to reconnect to the network.
Allow interface to be controlled by Network Manager:
This section hasn't been written yet for lack of resources. If you think you can write this help, please contact the Doc team. Thanking you in advance.
This section hasn't been written yet for lack of resources. If you think you can write this help, please contact the Doc team. Thanking you in advance.
B - For a wireless network
Only the items not already seen above are explained.

Modalità operativa:
Select Managed if the connection is via an access point, there is an ESSID detected. Select Ad-hoc if it is a peer to peer network. Select Master if your network card is used as the access point, your network card needs to support this mode.
Encryption mode and Encryption key:
If it is a private network, you need to know these settings.
WEP uses a password and is weaker than WPA which uses a passphrase. WPA Pre-Shared Key is also called WPA personal or WPA home. WPA Enterprise is not often used in private networks.
Allow access point roaming:
Roaming is a technology which enables allows computer to change its access point while remaining connected to the network.
This page hasn't been written yet for lack of resources. If you think you can write this help, please contact the Doc team. Thanking you in advance.
This section hasn't been written yet for lack of resources. If you think you can write this help, please contact the Doc team. Thanking you in advance.

This tool[20] allows to configure much of local network or Internet access. You have to know some information from your access provider or your network administrator.
Seleziona il tipo di connessione che vuoi impostare in base a quale hardware e provider possiedi.
La prima finestra mostra le interfacce disponibili. Scegliere quella da configurare.
At this point, the choice is given between an automatic or a manual IP address.
IP automatico
Ethernet/IP settings: you have to select if DNS servers are declared by the DHCP server or are manually specified, as explained below. In the last case, the IP address of DNS servers has to be set. The HOSTNAME of the computer can be specified here. If no HOSTNAME is specified, the name
localhost.localdomainis attributed by default. The Hostname can also be provided by the DHCP server with the option Assign host name from DHCP server. Not all DHCP servers have such a function and if you're setting up your PC to get an IP address from a domestic ADSL router, it is unlikely.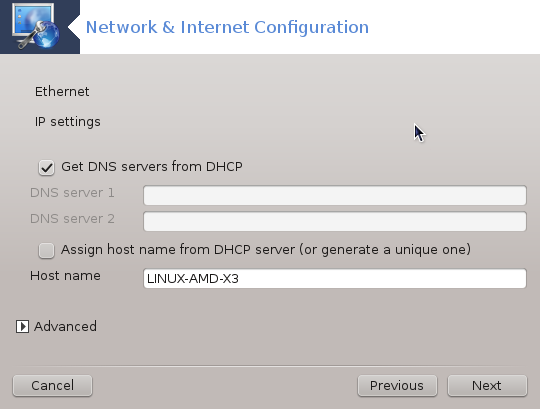
Il bottone avanzate permette di specificare:
Search domain (not accessible, as provided by the DHCP server)
il client DHCP
DHCP timeout
Get YP server from DHCP (checked by default): specify the NIS server
Get NTPD server from DHCP (synchronisation of clocks)
the HOSTNAME required by DHCP. Only use this option if the DHCP server requires the client to specify a hostname before receiving an IP address. This option is not dealt by some DHCP servers.
After accepting, the last steps which are common to all connection configurations are explained: la sezione chiamata «Concludendo la configurazione»
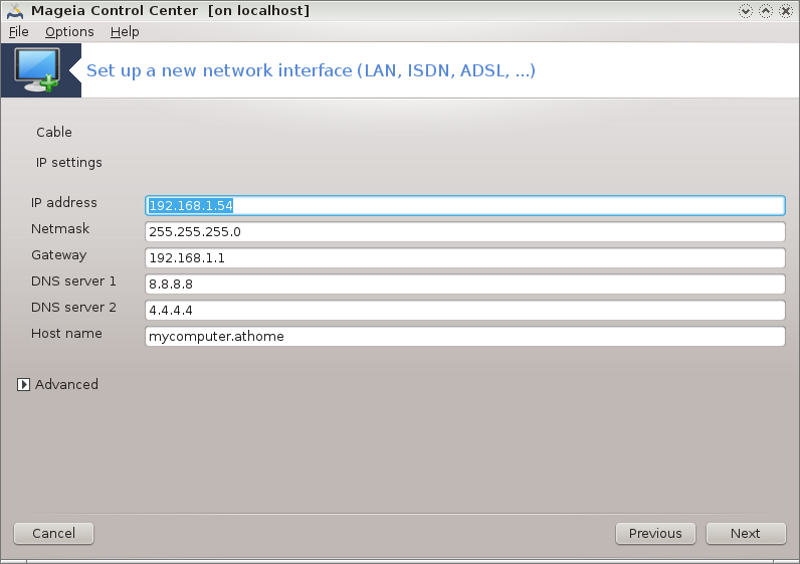
Configurazione manuale
Ethernet/IP settings: you need to declare what DNS servers to use. The HOSTNAME of the computer can be specified here. If no HOSTNAME is specified, the name
localhost.localdomainis attributed by default.For a residential network, the IP address usually looks like 192.168.x.x, Netmask is 255.255.255.0, and the Gateway and DNS servers are available from your service provider's website.
In advanced settings, you can specified a Search domain. It would usually be your home domain, i.e. if your computer is called "splash", and it's full domain name is "splash.boatanchor.net", the Search Domain would be "boatanchor.net". Unless you specifically need it, it's ok not to define this setting. Again, domestic ADSL would not need this setting.

The next steps are exposed at la sezione chiamata «Concludendo la configurazione»
This section hasn't been written yet for lack of resources. If you think you can write this help, please contact the Doc team. Thanking you in advance.
La prima finestra mostra le interfacce disponibili. Scegliere quella da configurare.
At this point, the choice is given between an automatic or a manual IP address.
You have to specify a authentication method:
Nessuno
BPALogin (necessary for Telstra). In this case you have to provide User name and password.
IP automatico
Cable/IP settings: you have to select if DNS servers are declared by the DHCP server or are manually specified, as explained below. In the last case, the IP address of DNS servers has to be set. The HOSTNAME of the computer can be specified here. If no HOSTNAME is specified, the name
localhost.localdomainis attributed by default. The Hostname can also be provided by the DHCP server with the option Assign host name from DHCP server. Not all DHCP servers have such a function and if you're setting up your PC to get an IP address from a domestic ADSL router, it is unlikely.Il bottone avanzate permette di specificare:
Search domain (not accessible, as provided by the DHCP server)
il client DHCP
DHCP timeout
Get YP server from DHCP (checked by default): specify the NIS server
Get NTPD server from DHCP (synchronisation of clocks)
the HOSTNAME required by DHCP. Only use this option if the DHCP server requires the client to specify a hostname before receiving an IP address. This option is not dealt by some DHCP servers.
After accepting, the last steps which are common to all connection configurations are explained: la sezione chiamata «Concludendo la configurazione»
Configurazione manuale
Cable/IP settings: you need to declare what DNS servers to use. The HOSTNAME of the computer can be specified here. If no HOSTNAME is specified, the name
localhost.localdomainis attributed by default.For a residential network, the IP address usually looks like 192.168.x.x, Netmask is 255.255.255.0, and the Gateway and DNS servers are available from your service provider's website.
In advanced settings, you can specified a Search domain. It would usually be your home domain, i.e. if your computer is called "splash", and it's full domain name is "splash.boatanchor.net", the Search Domain would be "boatanchor.net". Unless you specifically need it, it's ok not to define this setting. Again, domestic connection would not need this setting.
The next steps are exposed at la sezione chiamata «Concludendo la configurazione»
If the tool detects network interfaces, it offers to select one and to configure it.
A list of providers is proposed, classified by countries. Select your provider. If it is not listed, select the option Unlisted and then enter the options your provider gave.
Seleziona uno dei protocolli disponibili:
Protocollo Configurazione Dinamica Host (DHCP)
Configurazione TCP/IP manuale
PPP tramite ADSL (PPPoA)
PPP su Ethernet (PPPoE)
Point to Point Tuneling Protocol (PPTP)
Impostazioni di accesso
Login dell'account (nome utente)
Password dell'account
(Advanced) Virtual Path ID (VPI)
(Advanced) Virtual Circuit ID (VCI)
The next steps are exposed at la sezione chiamata «Concludendo la configurazione»
The wizard asks which device to configure:
Scelta manuale (scheda ISDN interna)
Modem ISDN esterno
A list of hardware is proposed, classified by category and manufacturer. Select your card.
Seleziona uno dei protocolli disponibili:
Protocollo per il resto del mondo, eccetto Europa (DHCP)
Protocollo per l'Europa (EDSS1)
A list of providers is then offered, classified by countries. Select your provider. If it is not listed, select the option Unlisted and then enter the options your provider gave you. Then it is asked for parameters:
Nome connessione
Numero telefonico
ID di accesso
Password dell'account
Metodo autenticazione
After that, you have to select if you get the IP address by automatic or manual method. In the last case, specify IP address and Subnet mask.
The next step is to choose how DNS servers address are obtained, by automatic or manual method. In the case of manual configuration, you have to put:
Nome dominio
Primo e secondo DNS Server
Select if the hostname is set from IP. This option is to select only if you are sure that your provider is configured to accept it.
The next step is to choose how the gateway address is obtained, by automatic or manual method. In the case of manual configuration, you have to enter the IP address.
The next steps are exposed at la sezione chiamata «Concludendo la configurazione»
A first window lists the interfaces which are available and an entry for Windows driver (ndiswrapper). Select the one to configure. Use ndiswrapper only if the other configuration methods did not work.
At this step, the choice is given between the different access points that the card has detected.
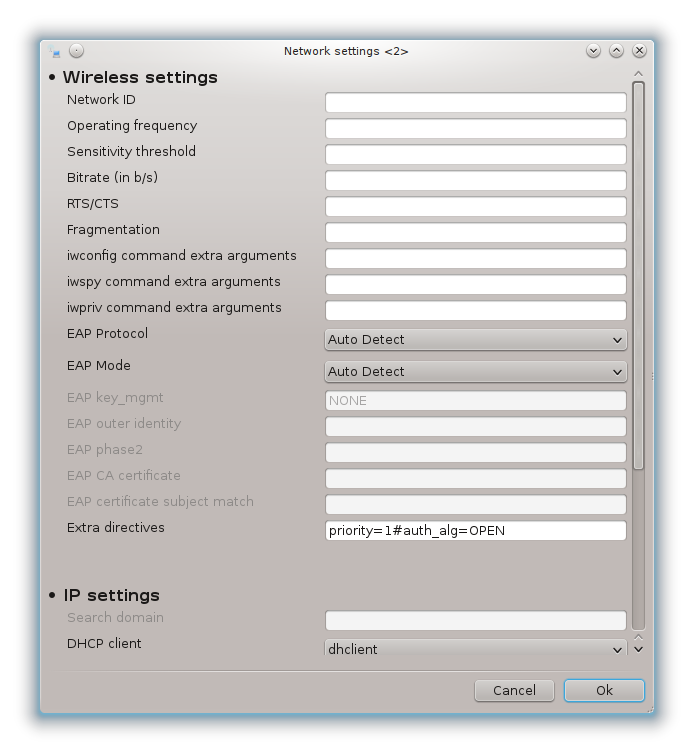
Specific parameter for the wireless card are to provide:
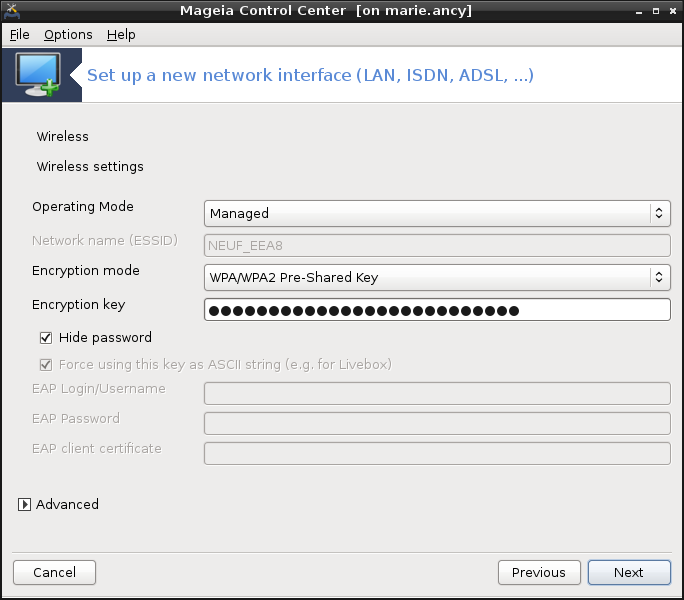
Operating mode:
- Con access point (Managed)
Per accedere ad un punto di accesso esistente (il più frequente).
- Ad-Hoc
Per configurare una connessione diretta fra computers.
Nome del network (ESSID)
Encryption mode: it depends of how the access point is configured.
- WPA/WPA2
Questa modalità di crittografia è da preferire se il tuo hardware te lo consente.
- WEP
Alcuni vecchi hardware funzionano solo con questo metodo di crittografia.
Chiave di cifratura
E' solitamente fornito con l'hardware che da il punto di accesso.
A questo punto la scelta è tra un indirzzo IP automatico oppure un indirizzo IP manuale.
IP automatico
IP settings: you have to select if DNS servers are declared by the DHCP server or are manually specified, as explained below. In the last case, IP address of DNS servers has to be set. The HOSTNAME of the computer can be specified here. If no HOSTNAME is specified, the name localhost.localdomain is attributed by default. The Hostname can also be provided by the DHCP server with the option Assign host name from DHCP server
Il bottone avanzate permette di specificare:
Search domain (not accessible, as provided by the DHCP server)
il client DHCP
DHCP timeout
Get YP server from DHCP (checked by default): specify the NIS servers
Get NTPD server from DHCP (synchronisation of clocks)
the HOSTNAME required by DHCP. Only use this option if the DHCP server requires the client to specify a hostname before receiving an IP address. This option is not dealt by some DHCP servers.
After accepting the configuration the step, which is common to all connection configurations, is explained: la sezione chiamata «Concludendo la configurazione»
Configurazione manuale
IP settings: you have to declare DNS servers. The HOSTNAME of the computer can be specified here. If no HOSTNAME is specified, the name
localhost.localdomainis attributed by default.For a residential network, the IP address always looks like 192.168.x.x, Netmask is 255.255.255.0, and the Gateway and DNS servers are available from your providers website.
In advanced settings, you can specified a Search domain. It must seem to your hostname without the first name, before the period.
The next steps are exposed at la sezione chiamata «Concludendo la configurazione»
Se lo strumento trova un'interfaccia wireless, da l'oppurtinità di selezionarne una e di configurarla.
Il pin è richiesto. Lasciare vuoto se il PIN non è necessario.
The wizard asks for network. If it is not detected, select the option Unlisted.
A list of providers is proposed, classified by countries. Select your provider. If it is not listed, select the option Unlisted and then enter the options your provider gave.
Fornire impostazioni di accesso
Nome dell'access point
Login dell'account (nome utente)
Password dell'account
The next steps are exposed at la sezione chiamata «Concludendo la configurazione»
This section hasn't been written yet for lack of resources. If you think you can write this help, please contact the Doc team. Thanking you in advance.
The wizard asks which device to configure:
Scelta manuale
Hardware identificato, se esistente.
Una lista di porte è proposta. Seleziona la tua.
If not yet installed, it will be suggested that you install the package kppp-provider.
A list of providers is proposed, classified by countries. Select your provider. If it is not listed, select the option Unlisted and then enter the options your provider gave. Then it is asked for Dialup options:
Nome della connessione
Numero di telefono
ID di accesso
Password
Autenticazione, scegli tra:
PAP/CHAP
Basata su script
PAP
Basata su terminale
CHAP
The next steps are exposed at la sezione chiamata «Concludendo la configurazione»
Nel prossimo step puoi specificare:
Permetti agli utenti di gestire la connessione
Avviare la connessione al boot
Enable traffic accounting
Permetti all'interfaccia di essere controllata da Network Manager
In the case of a wireless connection, a supplemental box is Allow access point roaming which give the possibility to switch automatically between access point according to the signal strength.
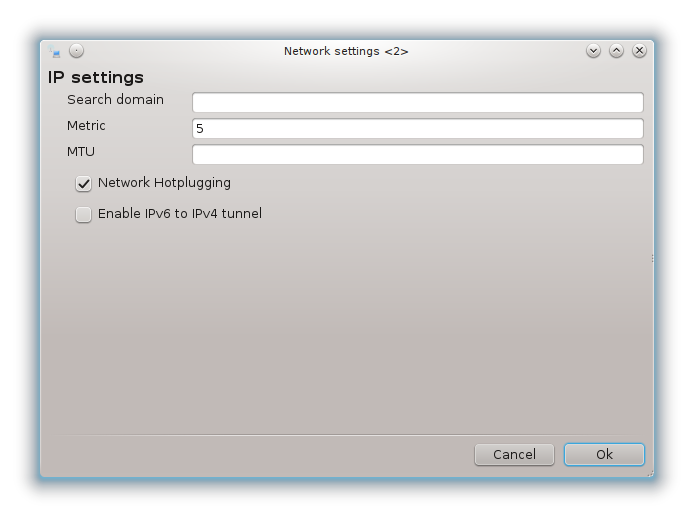
Con il pulsante avanzate puoi specificare:
Metric (10 by default)
MTU
Collegamento a caldo della rete
Attiva istradamento IPV6 su IPV4
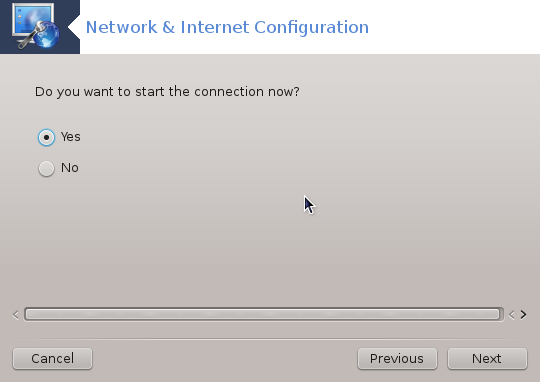
L'ultimo step ti permetterà di specificare se avviare la connessione immediatamente oppure no.
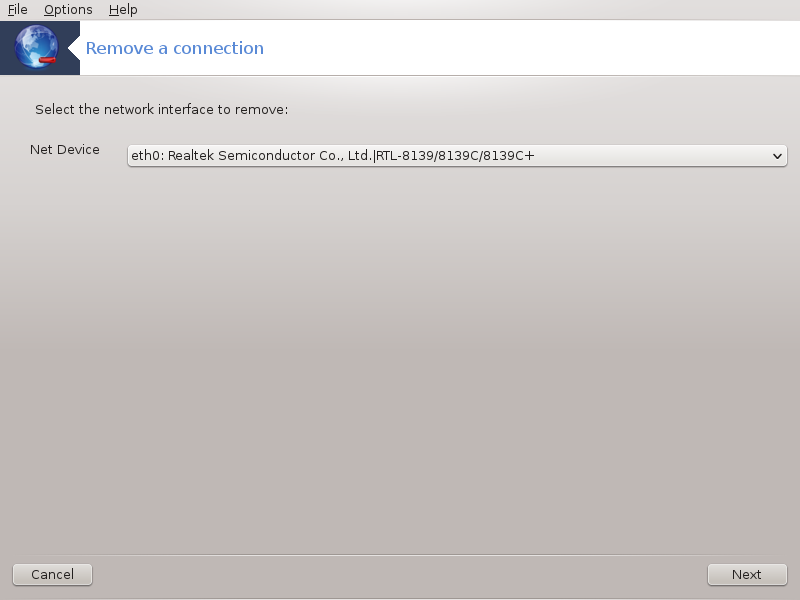
Qui puoi cancellare un'interfaccia network[21].
Click on the drop down menu, choose the one you want to remove and then click next.
Vedrai un messaggio che l'interfaccia network è stata cancellata con successo.
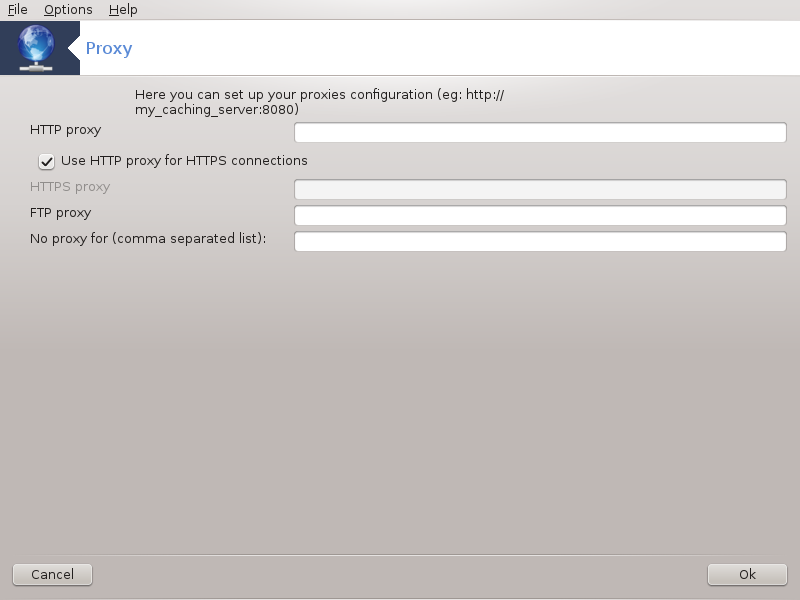
If you have to use a proxy server to access to the internet, you can use this tool[22] to configure it. Your net administrator will give you the information you need. You can also specify some services which can be accessed without the proxy by exception.
From Wikipedia, on 2012-09-24, article Proxy server: In computer networks, a proxy server is a server (a computer system or an application) that acts as an intermediary for requests from clients seeking resources from other servers. A client connects to the proxy server, requesting some service, such as a file, connection, web page, or other resource available from a different server. The proxy server evaluates the request as a way to simplify and control their complexity.
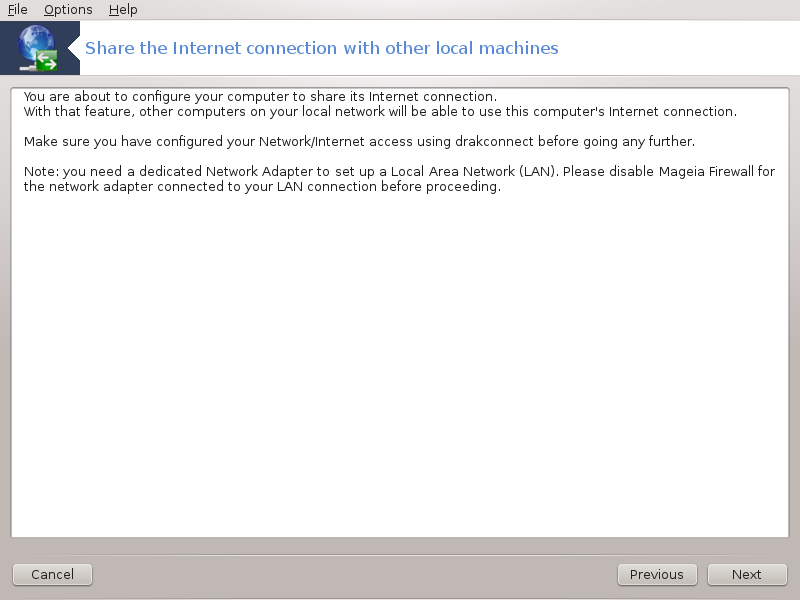
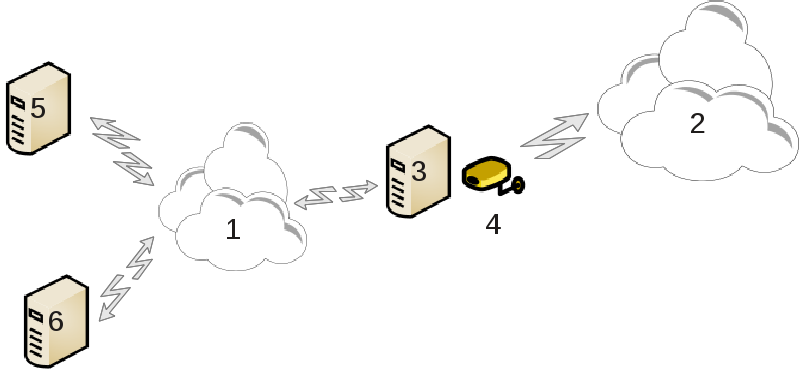
This is useful when you have a computer (3) which has Internet (2) access and is connected also to a local network (1). You can use computer (3) as a gateway to give that access to other workstations (5) and (6) in the local network (1). For this, the gateway must have two interfaces; the first one such as an ethernet card must be connected to the local network, and the second one (4) connected to the Internet (2).
The first step is to verify that the network and the access to Internet are set up, as documented in la sezione chiamata «Rete e Internet».
The wizard[23] offers successive steps which are shown below:
If the wizard does not detect at least two interfaces, it warns about this and asks to stop the network and configure the hardware.
specify the interface used for the Internet connection. The wizard automatically suggests one of the interfaces, but you should verify that what is proposed is correct.
specify which interface is used for the Lan access. The wizard also proposes one, check that this is correct.
The wizard proposes parameters for the Lan network, such as IP address, mask and domain name. Check that these parameters are compatible with the actual configuration. It is recommended that you accept these values.
specify if the computer has to be used as a DNS server. If yes, the wizard will check that
bindis installed. Otherwise, you have to specify the address of a DNS server.specify if the computer is to be used as a DHCP server. If yes, the wizard will check that
dhcp-serveris installed and offer to configure it, with start and end addresses in the DHCP range.specify if the computer is to be used as a proxy server. If yes, the wizard will check that
squidis installed and offer to configure it, with the address of the administrator (admin@mydomain.com), name of the proxy (myfirewall@mydomaincom), the port (3128) and the cache size (100 Mb).The last step allows you to check if the gateway machine is connected to printers and to share them.
Verrai avvisato sulla necessità di controllare se il firewall è attivo.
If you have configured the gateway machine with DHCP, you only need to specify in the network configuration tool that you get an address automatically (using DHCP). The parameters will be obtained when connecting to the network. This method is valid whatever operating system the client is using.
If you must manually specify the network parameters, you must in particular specify the gateway by entering the IP-address of the machine acting as the gateway.

This page hasn't been written yet for lack of resources. If you think you can write this help, please contact the Doc team. Thanking you in advance.
You can start this tool from the command line, by typing draknetprofile as root.
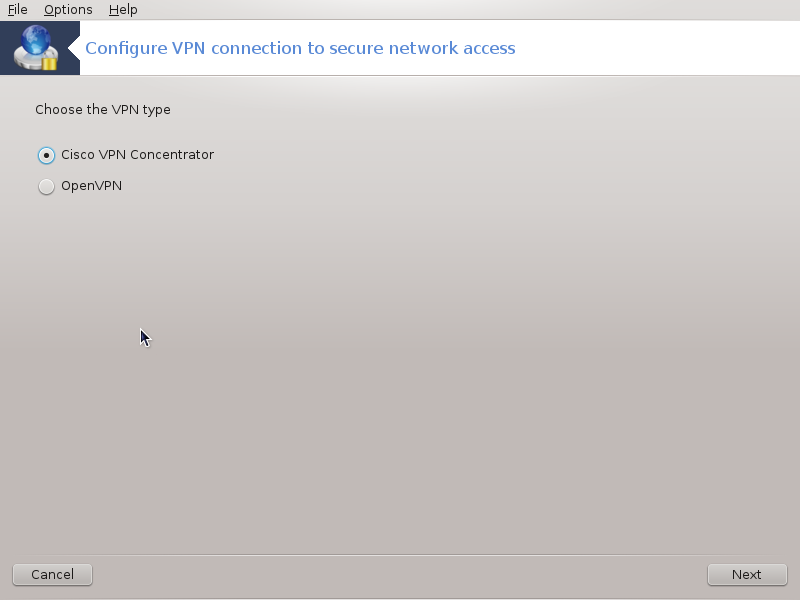
This tool[24] allows to configure secure access to a remote network establishing a tunnel between the local workstation and the remote network. We discuss here only of the configuration on the workstation side. We assume that the remote network is already in operation, and that you have the connection information from the network administrator, like a .pcf configuration file .
First, select either Cisco VPN Concentrator or OpenVPN, depending on which protocol is used for your virtual private network.
In seguito dai un nome alla connessione.
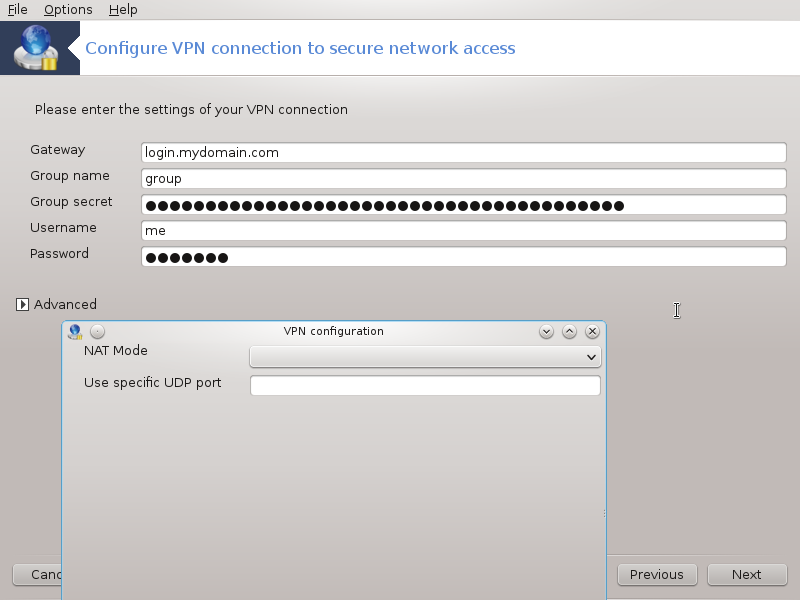
Alla prossima schermata dare i dettagli della tua connessione VPN.
Per VPN Cisco
Per openvpn. Il pacchetto openvpn e le sue dipendenze verranno installate la prima volta che lo strumento verrà usato.
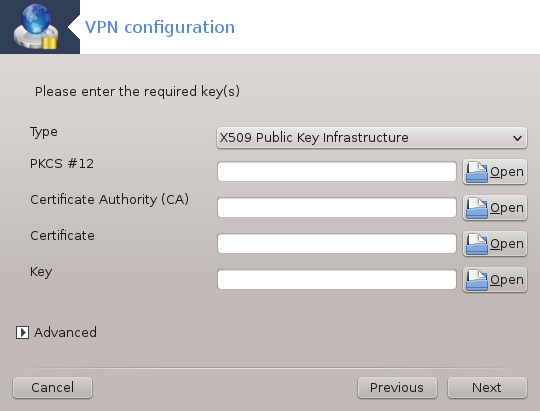
Select the files that you received from the network administrator.
Parametri avanzati:
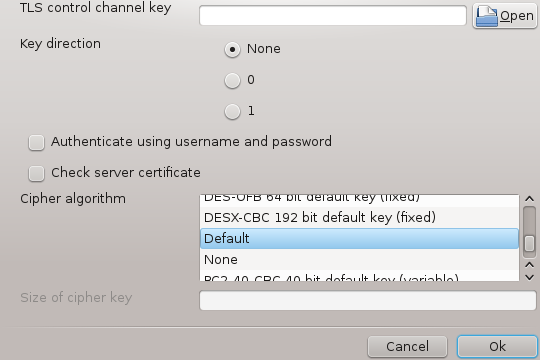
La prossima schermata chiede l'indirizzo IP del gateway.
When the parameters are set, you have the option of starting the VPN connection.
This VPN connection can be set to start automatically with a network connection. To do this, reconfigure the network connection to always connect to this VPN.
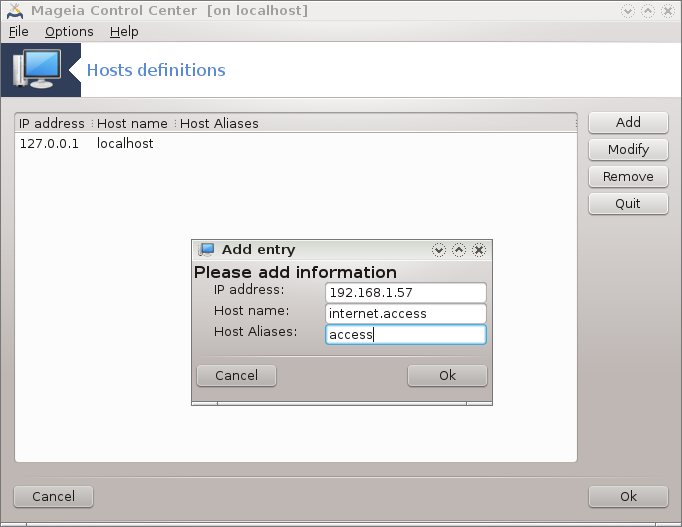
If some systems on your network grant you services, and have fixed IP-addresses, this tool[25] allows to specify a name to access them more easily. Then you can use that name instead of the IP-address.
With this button, you add the name for a new system. You will get a window to specify the IP-address, the host name for the system, and optionally an alias which can be used in the same way that the name is.
You can access the parameters of an entry previously defined. You get the same window.
[19] You can start this tool from the command line, by typing draknetcenter as root.
[20] Puoi avviare questo tool da linea di comando scrivendo drakconnect come root.
[21] You can also start this tool from the command line, by typing drakconnect --del as root.
[22] You can start this tool from the command line, by typing drakproxy as root.
[23] You can start this tool from the command line, by typing drakgw as root.
[24] You can start this tool from the command line, by typing drakvpn as root.
[25] Puoi avviare questo strumento dalla linea di comando digitando drakhosts come root:
