

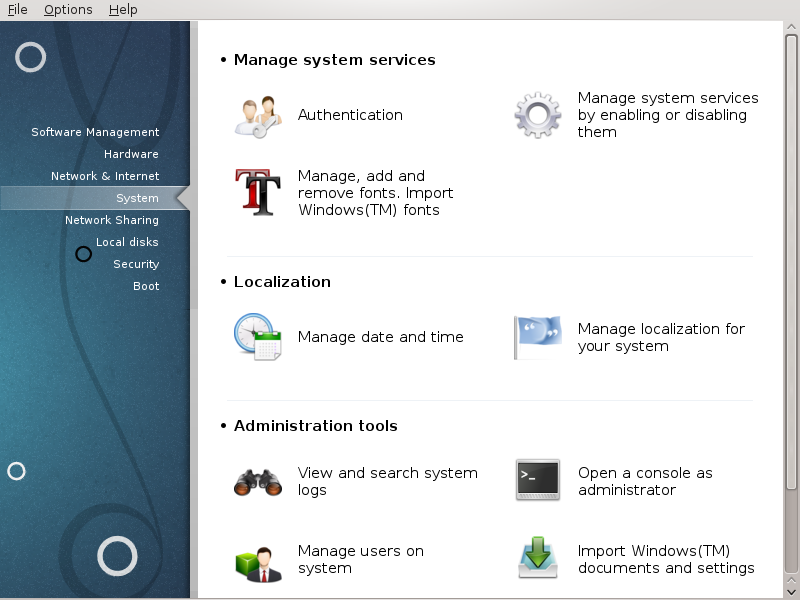
In this screen you can choose between several system and administration tools. Click on a link below to learn more.
Eines d'administració
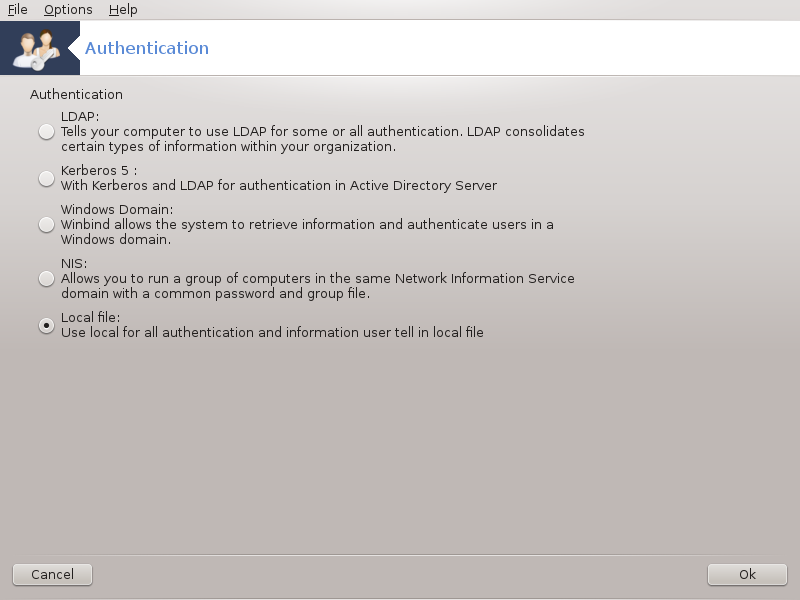
Aquesta eina[26] li permet modificar la manera en què pot ser reconegut com a usuari de la màquina o en la xarxa.
Per defecte, la informació per la seva autentificació s'emmagatzema en un arxiu en el seu ordinador. Modifica-ho solament si l'administrador de la xarxa el convida a fer-ho i li dona informació al respecte.
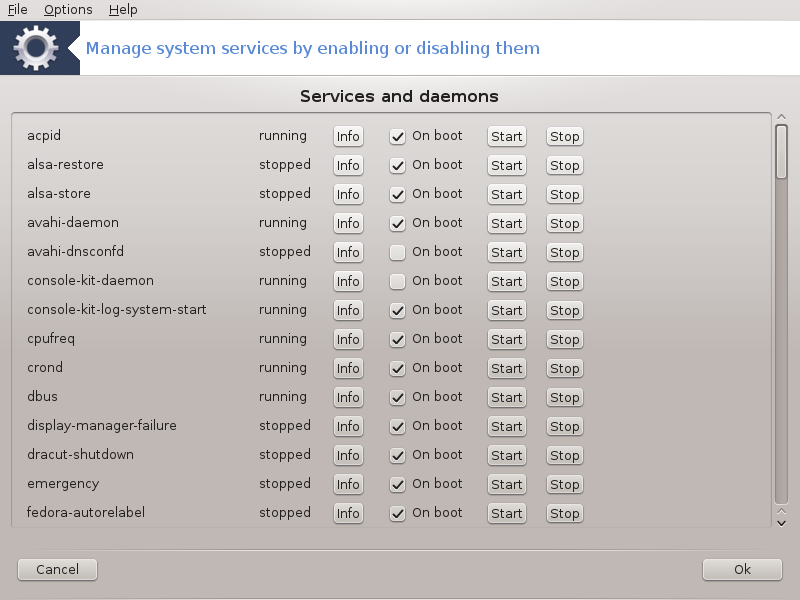 |
This page hasn't been written yet for lack of resources. If you think you can write this help, please contact the Doc team. Thanking you in advance.
You can start this tool from the command line, by typing drakxservices as root.
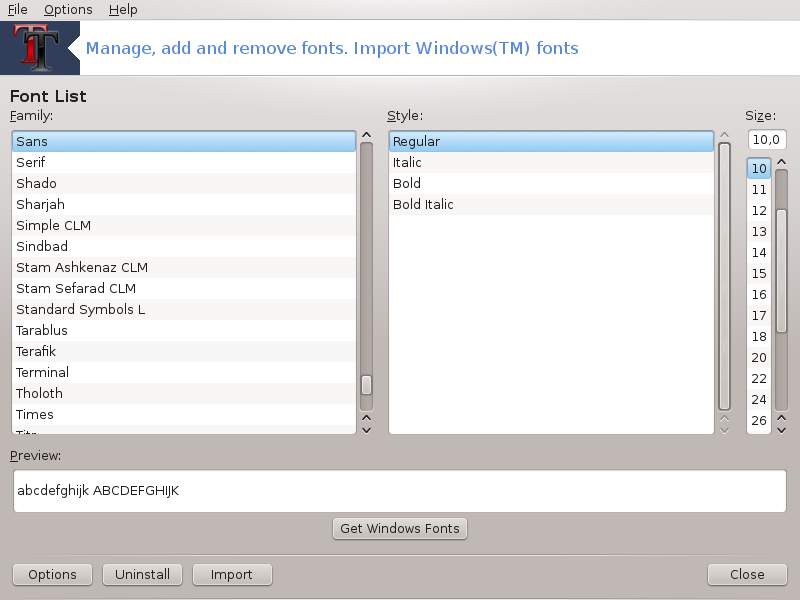
This tool[27] is present in the Mageia Control Center under the System tab. It allows you to manage the fonts available on the computer. The main screen above shows:
the installed font names, styles and sizes.
a preview of the selected font.
some buttons explained here later.
Get Windows Fonts:
This button automatically adds the fonts found on the Windows partition. You must have Microsoft Windows installed.
Options:
It allows you to specify the applications or devices (printers mostly) able to use the fonts.
Uninstall:
This button is to remove installed fonts and possibly save some place. Be careful when removing fonts because it may have serious consequences on the documents that use them.
Import:
Allows you to add fonts from a third party (CD, internet, ...). The supported formats are ttf, pfa, pfb, pcf, pfm and gsf. Click on the Import button and then on Add, a file manager pops up where you can select the fonts to install, click on Install when done. They are installed in the folder /usr/share/fonts.
If the newly installed (or removed) fonts doesn't appear in the Drakfont main screen, close and re open it to see the modifications.

Aquesta eina[28] es troba sota la pestanya Sistema al centre de control de Mageia amb l'etiqueta "Administra la data i l'hora". En alguns entorns d'escriptori també ho trobem disponible fent clic al botó dret / Ajusteu data i hora ... en el rellotge de la safata del sistema.
És una eina molt senzilla.
A la part superior esquerra, trobem el calendari. A la captura de pantalla anterior, la data es Setembre (a la part superior esquerra), el segon (en blau) i és diumenge. Seleccioneu el mes (o l'any) fent clic a les petites fletxes a cada costat de Setembre (o 2012). Seleccioneu el dia fent clic en el seu número.
A la part inferior esquerra hi ha la sincronització del Protocol de Temps de Xarxa, és possible tenir un rellotge sempre a temps mitjançant la sincronització amb un servidor. Marqueu Habilita Protocol de Temps de Xarxa i trieu el servidor més proper.
A la part dreta hi ha el rellotge. És inútil ajustar el rellotge si NTP està activat. Tres caixes mostren les hores, minuts i segons (15, 28 i 22 a la captura de pantalla). Fer servir les fletxes per ajustar el rellotge a l'hora correcta. El format no pot canviar-se aquí, veure la configuració de l'entorn de l'escriptori per això.
Almenys, a la part inferior dreta, seleccioneu la vostra zona horària, feu clic al botó i selecciona a la llista la ciutat més propera.
Nota
Fins i tot si no és possible seleccionar un format de data o hora en aquesta eina, es mostrarà a l'escriptori d'acord amb la configuració de localització.
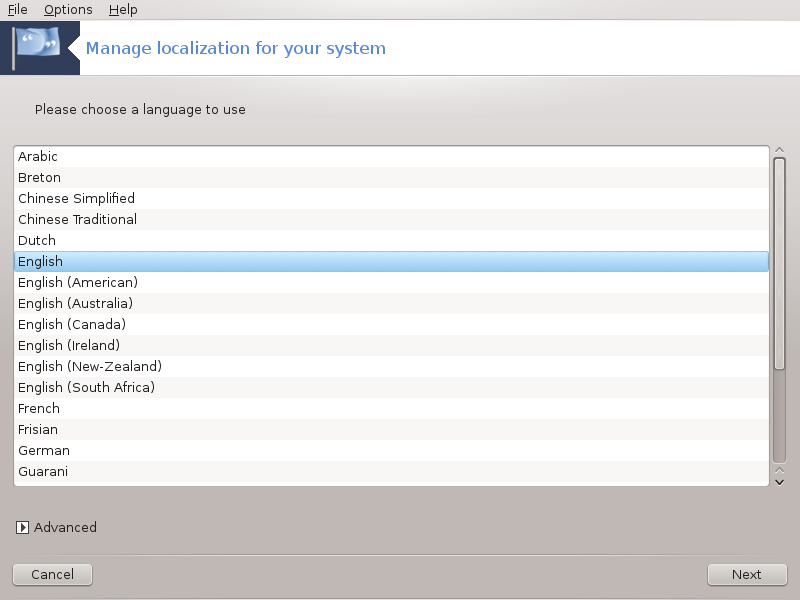
This tool[29] can be found in the System section of the Mageia Control Center (MCC) labelled "Manage localization for your system". It opens with a window in which you can choose your language. The choice is adapted to languages selected during installation.
The button give access to activate compatibility with old encoding (non UTF8).
The second window shows a list of countries according to the selected language. The button gives access to countries not listed.
You have to restart your session after any modifications.
In the Other Countries screen you can also select an input method (from the drop-down menu at the bottom of the list). Input methods allow users to input multilingual characters (Chinese, Japanese, Korean, etc).
For Asian and African locales, IBus will be set as default input method so users should not need to configure it manually.
Other input methods (SCIM, GCIN, HIME, etc.) also provide similar functions and can, if not available from the drop-down menu, be installed in another part of the Mageia Control Center. See “Software Management (Install and Remove Software)”.
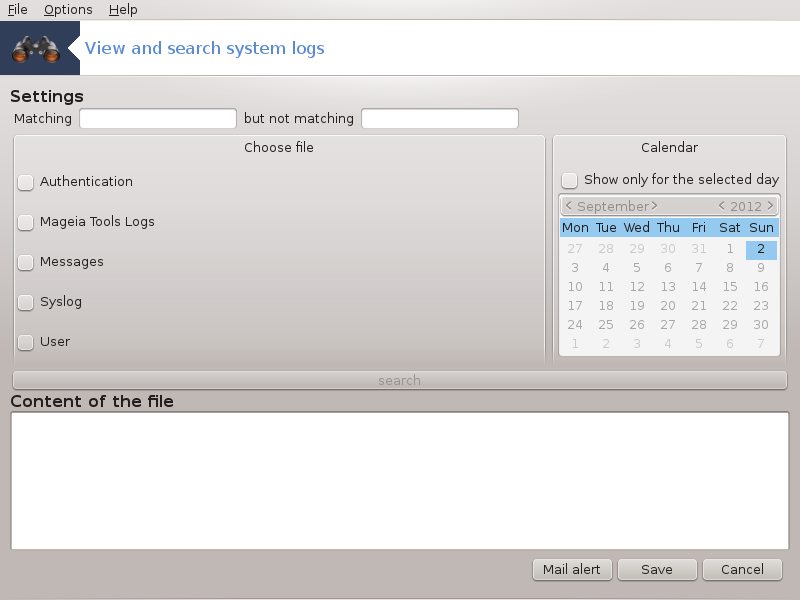
This tool[30] is found in the Mageia Control Center System tab, labelled "View and search system logs".
First, enter the key string you want to look for in the Matching field and/or the key string you want to do not wish to see amongst the answers in the field but not matching. Then select the file(s) to search in the Choose file field. Optionally, it is possible to limit the search to only one day. Select it in the Calendar, using the little arrows on each side of the month and year, and check "". At last, click on the button to see the results in the window called Content of the file. It is possible to save the results in the .txt format by clicking on the Save button.
Nota
The houses the logs from the Mageia configuration tools such as the Mageia Control Center tools. These logs are updated each time a configuration is modified.
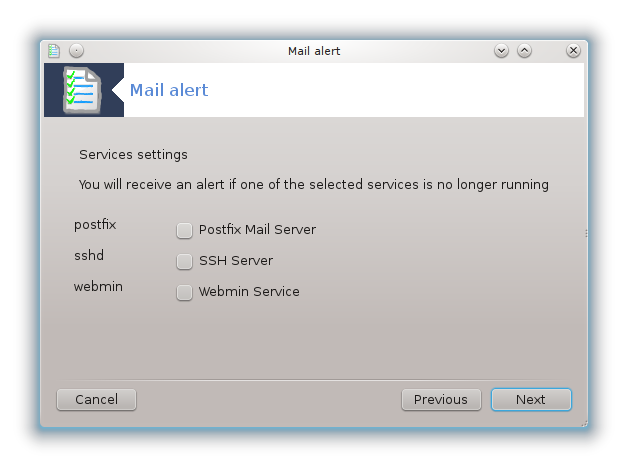
automatically checks the system load and the services every hour and if necessary sends an e-mail to the configured address.
To configure this tool, click on the Mail Alert button and then, in the next screen, on the drop down button. Here, all the running services are displayed and you can choose which ones you want to look watch. (See screenshot above).
The following services can be watched :
Servei Webmin
Servidor de correu Postfix
Servidor FTP
Servidor World Wide Web Apache
Servidor SSH
Servidor Samba
Servei Xinetd
BIND Domain Name Resolve
In the next screen, select the Load value you consider unacceptable. The load represents the demand to a process, a high load slows the system down and a very high load may indicate that a process has gone out of control. The default value is 3. We recommend setting the load value to 3 times the number of processors.
In the last screen, enter the Email address of the person to be warned and the Email server to use (local or on the Internet).
This tool[31] gives you access to a console which is directly opened as root. We do not think that you need more information about that.
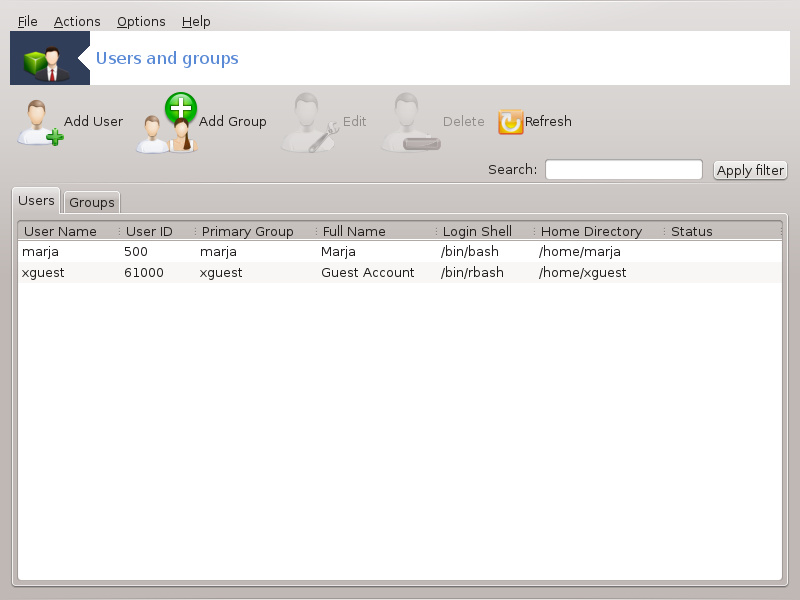
This tool[32] is found under the System tab in the Mageia Control Center labelled "Manage users on system"
The tool allows an administrator to manage the users and the groups, this means to add or delete a user or group and to modify user and group settings (ID, shell, ...)
When userdrake is opened, all the users existing on the system are listed in the tab, and all the groups in the tab. Both tabs operate the same way.
This button opens a new window with all fields shown empty:
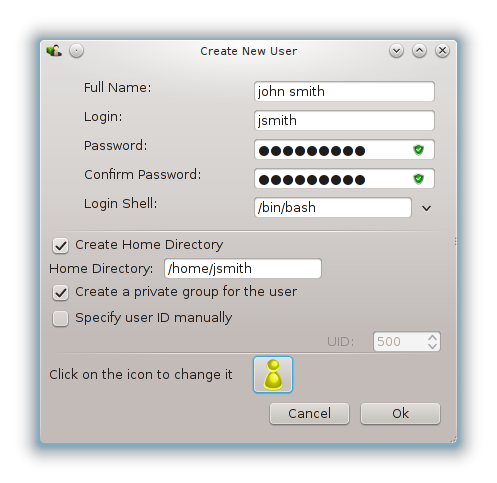
The field Full Name is intended for the entry of a family name and first name, but it is possible to write anything or nothing as well!
Login is the only required field.
Setting a Password is highly recommended. There is a little shield on the right, if it is red, the password is weak, too short or is too similar to the login name. You should use figures, lower and upper case characters, punctuation marks, etc. The shield will turn orange and then green as the password strength improves.
Confirm Password field is there to ensure you entered what you intended to.
Login Shell is a drop down list that allows you to change the shell used by the user you are adding, the options are Bash, Dash and Sh.
Create a private group for the user, if checked will automatically create a group with the same name and the new user as the only member (this may be edited).
The other options should be obvious. The new user is created immediately after you click on .
2 Add Group
You only need to enter the new group name, and if required, the specific group ID.
3 Edit (a selected user)
: Allows you to modify all the data given for the user at creation (the ID can't be changed).
Account Info:
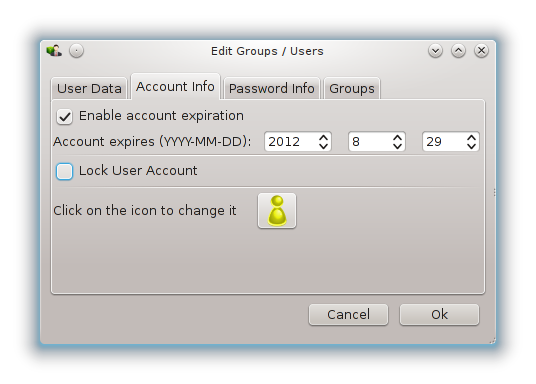
The first option is for setting an expiration date for the account. Connection is impossible after this date. This is useful for temporary accounts.
The second option is to lock the account, connection is impossible as long as the account is locked.
It is also possible to change the icon.
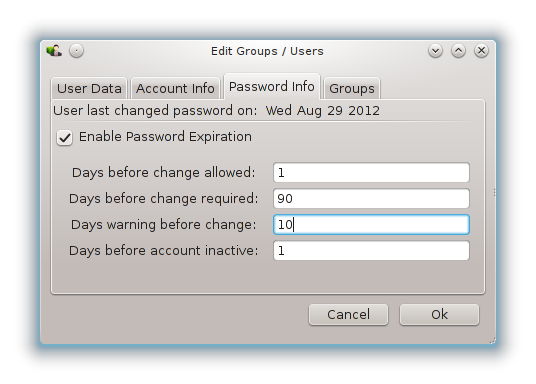
Password Info: Allows you to set an expiration date for the password, this forces the user to change his password periodically.
Group: Here you can select the groups that the user is a member of.
Nota
If you are modifying a connected user account, modifications will not be effective until his/her next login.
4 Edit (with a group selected)
Group Data: Allows you to modify the group name.
Group Users: Here you can select the users who are members of the group
5 Delete
Select a user or a group and click on Delete to remove it. For a user, a window appears to ask if home directory and mailbox must also be deleted. If a private group has been created for the user, it will be deleted as well.
Avís
It is possible to delete a group which is not empty.
6 Refresh
The User database can be changed outside of Userdrake. Click on this icon to refresh the display.
7 Guest Account
guest is a special account. It is intended to give somebody temporary access to the system with total security. Login is xguest, there is no password, and it is impossible to make modifications to the system from this account. The personal directories are deleted at the end of the session. This account is enabled by default, to disable it, click in the menu on.
This tool[33] is found under the System tab in the Mageia Control Center labeled Import Windows(TM) documents and settings
The tool allows an administrator to import the user documents and settings from a Windows® 2000, Windows® XP or Windows® Vista™ installation on the same computer as the Mageia installation.
Avís
Please note that all the changes will be applied by transfugdrake immediately after pressing .
After starting transfugdrake you will see the first wizard page with some explanation about the tool and import options.
As soon as you read and understand the instructions, press the button. This should run a detection of Windows® installation.
When the detection step is complete you will see a page which allows you to choose accounts in Windows® and Mageia for the import procedure. It is possible to choose other user account than yours own.
Nota
Please take into account that due to migrate-assistant (the backend of transfugdrake) limitations Windows® user account names with special symbols can be displayed incorrectly.
Nota
Migration may take some time depending on the size of the document folders.
Avís
Some Windows® applications (especially drivers) may create user accounts for different purposes. For example, NVidia drivers in Windows®are updated using UpdatusUser. Please do not use such accounts for the import purposes.
When you finished with the accounts selection press button. The next page is used to select a method to import documents:
Transfugdrake is designed to import Windows® data from My Documents, My Music and My Pictures folders. It is possible to skip import by selecting the appropriate item in this window.
When you finished with the document import method choosing press button. The next page is used to select a method to import bookmarks:
Transfugdrake can import Internet Explorer and Mozilla Firefox bookmarks into the bookmarks of Mageia Mozilla Firefox instance.
Choose the preferred import option and press the button.
The next page allows you to import desktop background:
Choose the preferred option and press the button.
The last page of wizard shows some congratulation message. Just press the button.
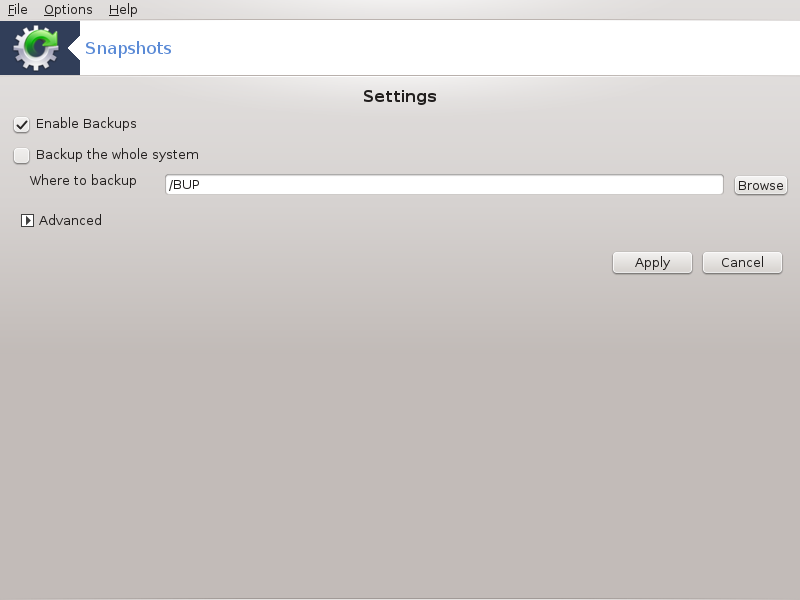
This tool[34] is available in MCC's System tab, in the Administration tools section.
When you start this tool in MCC for the first time, you will see a message about installing draksnapshot. Click on to proceed. Draksnapshot and some other packages it needs will be installed.
Click again on Snapshots, you will see the Settings screen. Tick Enable Backups and, if you want to backup the whole system, Backup the whole system.
If you only want to backup part of your directories, then choose Advanced. You will see a little pop-up screen. Use the and buttons next to the Backup list to include or exclude directories and files from the backup. Use the same buttons next to the Exclude list to remove subdirectories and/or files from the chosen directories, that should not be included in the backup. Click on when you are done.
Now give the path to Where to backup, or choose the button to select the correct path. Any mounted USB-key or external HD can be found in /run/media/your_user_name/.
Click on to make the snapshot.
[26] Podeu iniciar aquesta eina des de la línia d'ordres, escrivint drakauth com a root.
[27] You can start this tool from the command line, by typing drakfont as root.
[28] Podeu iniciar aquesta eina des de la línia d'ordres, escrivint drakclock com a root.
[29] You can also start this tool from the command line, by typing localedrake as root.
[30] You can start this tool from the command line, by typing logdrake as root.
[31] You can start this tool from the command line, by typing drakconsole as root.
[32] You can start this tool from the command line, by typing userdrake as root.
[33] You can start this tool from the command line, by typing transfugdrake as root.
[34] You can start this tool from the command line, by typing draksnapshot-config as root.
