

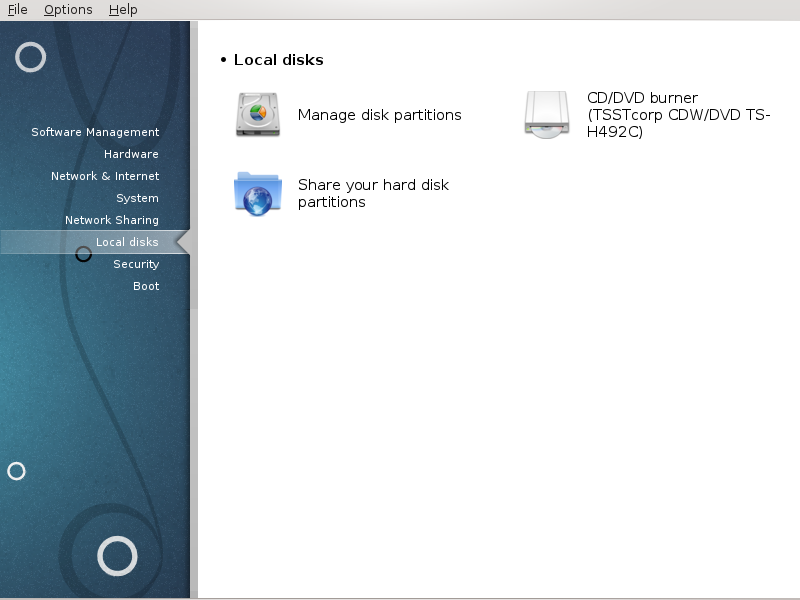
In this screen you can choose between several tools to manage or share your local disks. Click on a link below to learn more.
Local disks

Warning
This tool[40] is very powerful, a tiny error or a cat jumping on your keyboard can lead to losing all data on a partition or even to erasing the entire hard disk. For that reason, you'll see the screen above on top of the tool screen. Click on Exit if you're not sure you want to continue.
If you have more than one hard disk, you can switch to the hard disk you want to work on by selecting the correct tab (sda, sdb, sdc etc).
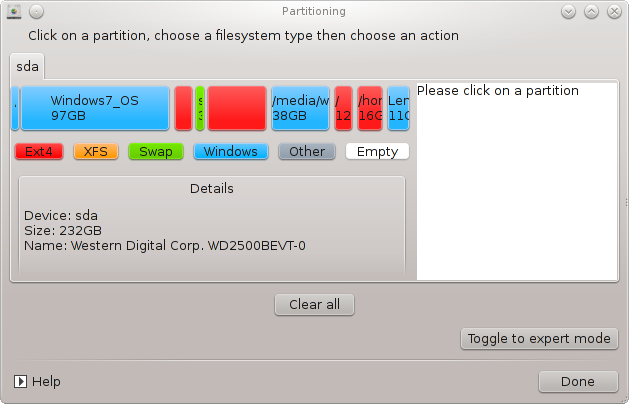
You can choose from many actions to adjust your hard disk to your preferences. Wiping an entire hard disk, splitting or merging partitions, resizing them or changing the filesystem, formatting or viewing what is in a partition: it is all possible. The button at the bottom is to erase the complete disk, the other buttons become visible on the right after you click on a partition.
Note
If you have an UEFI system, you can see a small partition called "EFI System Partition" and mounted on /boot/EFI. Never delete it, because it contains all your different operating systems bootloaders.
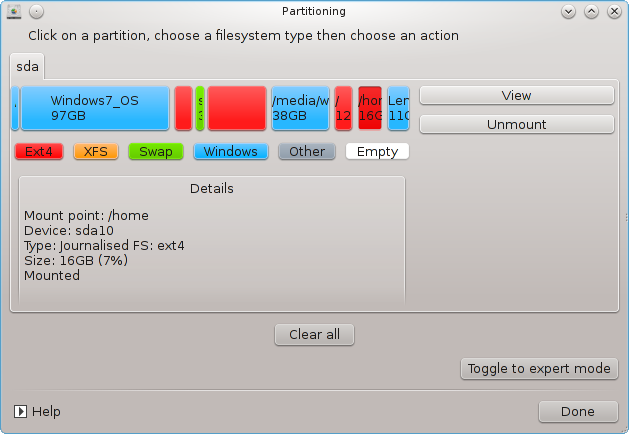
If the selected partition is mounted, like in the example below, you cannot choose to resize, format or delete it. To be able to do that the partition must be unmounted first.
It is only possible to resize a partition on its right side
To change a partition type (change ext3 to ext4 for example) you have to delete the partition and then re-create it with the new type. The button appears when a disk empty part is selected
You can choose a mount point that doesn't exist, it will be created.
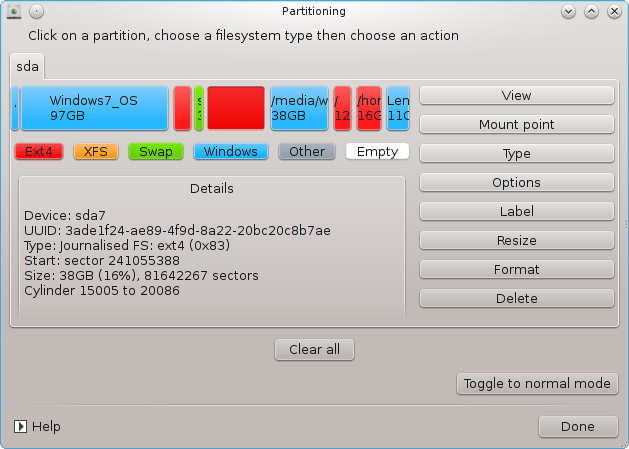
Selecting gives some extra available actions, like labeling the partition, as can be seen in the screenshot below.
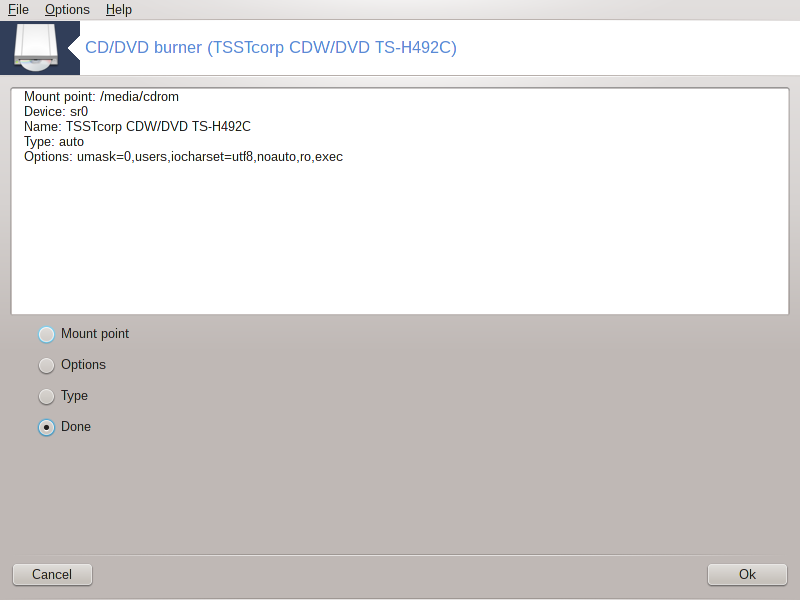
This tool [41]is found under the tab Local disks in the Mageia Control Center labelled accordingly with your removable hardware (CD/DVD players and burners and floppy drives only).
Its goal is to define the way your removable disk is mounted.
At the top of the window there is a short description of your hardware and the chosen options to mount it. Use the menu on the bottom to change them. Check the item to be changed and then on the button.
Many mount options can be chosen here either directly in the list or via the Advanced submenu. The main are:
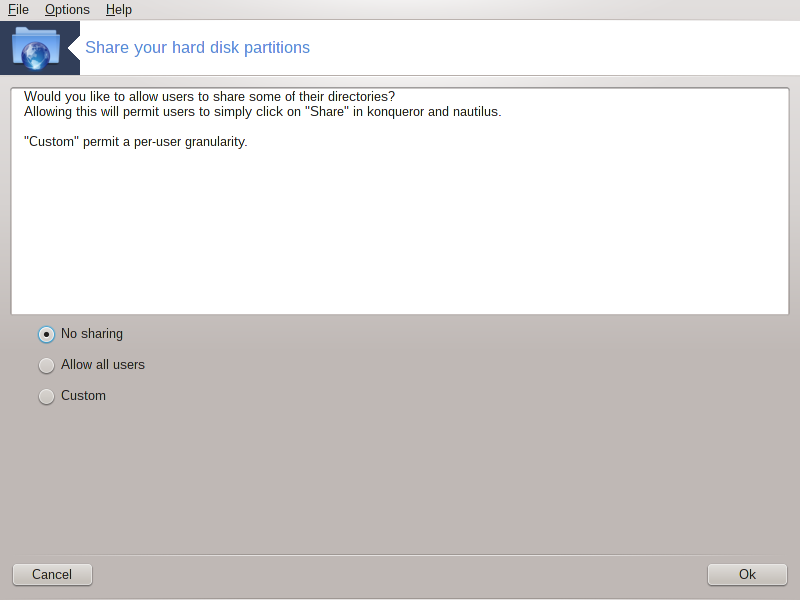
This simple tool[42] allows you, the administrator, to allow users to share parts of their own /home subdirectories with other users of a same local network which may have computers running either Linux or Windows operating system.
It is found in the Mageia Control Center, under the Local Disk tab, labelled "Share your hard disk partitions".
First, answer the question : "Would you like to allow users to share some of their directories ?", click on if the answer is no for all users, click on for all users and click on if the answer is no for some users and yes for the others. In this last case, the users that are authorised to share their directories must belong to the fileshare group, which is automatically created by the system. You will be asked about this later.
Click on OK, a second screen appears which asks you choose between or . Check if Linux is the only operating system on the network, check if the network includes both Linux and Windows machines and then click on . Any required packages will be installed if necessary.
The configuration is now complete unless the Custom option was chosen. In this case, an extra screen prompts you to open Userdrake. This tool allows you to add users authorised to share their directories to the fileshare group. In the User tab, click on the user to add to the fileshare group, then on , In the Groups tab. Check the fileshare group and click on . For more information about Userdrake, see the section called “Users and Groups”
Note
When adding a new user to the fileshare group, you have to disconnect and reconnect the network for the modifications to be taken into account.
From now on each user belonging to the fileshare group can select in his/her file manager the directories to be shared, although not all file managers have this facility.
