In this screen you can see the content of your hard drive(s) along with the DrakX partitioning proposals for where to install Mageia.
The actual options available from those shown below will vary according to the layout and content of your particular hard drive(s).
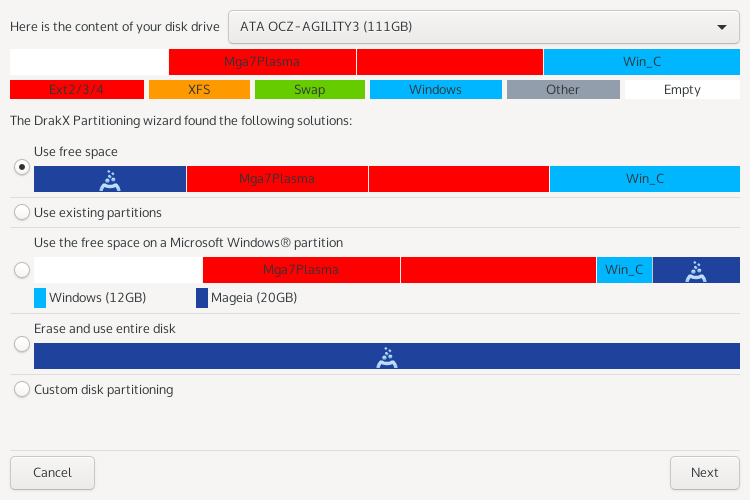
Main Options
Als deze optie beschikbaar is, werden bestaande Linux compatibele partities gevonden die gebruikt kunnen worden voor het installeren.
Als u ongebruikte ruimte op uw harde schijf heeft die u voor uw nieuwe Mageia-installatie wilt gebruiken, kies dan deze optie.
Use Free Space on a Windows Partition
If you have unused space on an existing Windows partition, the installer may offer to use it. This can be a useful way of making room for your new Mageia installation, but is a risky operation so you should make sure you have backed up all important files!
With this option, the installer displays the remaining Windows partition in light blue and the proposed Mageia partition in dark blue with their intended sizes just underneath. You have the option to modify these sizes by clicking and dragging the gap between both partitions. See the following screenshot:
This option will allocate the entire drive for Mageia
Waarschuwing
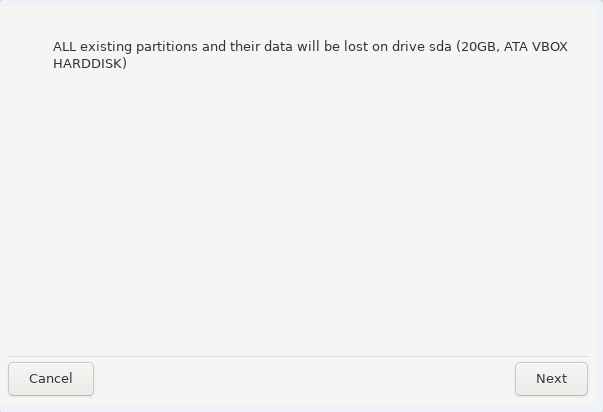
This will erase ALL data on the selected hard drive. Take care! If you intend to use part of the disk for something else, or you already have data on the drive that you are not prepared to lose, then do not use this option.
Belangrijk
Merk op dat de Windows partitie hiervoor kleiner gemaakt moet worden, wat niet zonder enig risico is. De partitie moet "schoon" zijn, wat inhoudt dat Windows correct afgesloten moet zijn toen het voor het laatst gebruikt werd en dat het gedefragmenteerd moet zijn. Dit is echter geen garantie dat alle bestanden op de partitie uit het gebied gehaald zijn dat op het punt staat gebruikt te worden. Het wordt sterk aanbevolen om vooraf een kopie van uw persoonlijke bestanden te maken op een andere schijf of lokatie.
Hiermee krijgt u volledige controle over het plaatsen van de installatie op uw harde schijf of schijven.

If you are not using the Custom disk partitioning option, then the installer will allocate the available space according to the following rules:
If the total available space is less than 50 GB, then only one partition is created. This will be the
/(root) partition.If the total available space is greater than 50 GB, then three partitions are created
6/19 of the total available place is allocated to
/with a maximum of 50 GB1/19 is allocated to
swapwith a maximum of 4 GBthe rest (at least 12/19) is allocated to
/home
This means that from 160 GB or greater available space, the installer will create three partitions:
50 GB for
/4 GB for
swapand the remainder for
/home
Opmerking
If you are using a UEFI system, the ESP (EFI System Partition) will be
automatically detected - or created if it does not exist yet - and mounted
on /boot/EFI. The Custom disk
partitioning option is the only one that allows to check it has
been correctly done.
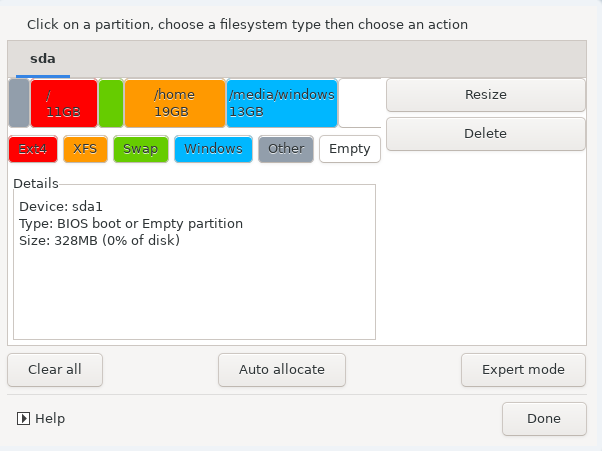
If you are using a Legacy (also known as BIOS) system with a GPT partitioned disk, you need to create a BIOS boot partition if it doesn't already exist. It should be about 1 MiB with no mount point. It can be created with the Installer, under Custom disk partitioning, like any other partition. Be sure to select “BIOS boot partition” for filesystem type.
See DiskDrake for information on how to proceed.

Belangrijk
Some newer drives are now using 4096 byte logical sectors, instead of the previous standard of 512. Due to lack of available hardware, the partitioning tool used in the installer has not been tested with such a drive.
Some SSD devices now use an erase block size over 1 MB. If you have such a device we suggest that you partition the drive in advance, using an alternative partitioning tool like gparted, and to use the following settings:
Align to = MiB
Free space preceding (MiB) = 2
Also make sure all partitions are created using an even number of megabytes.
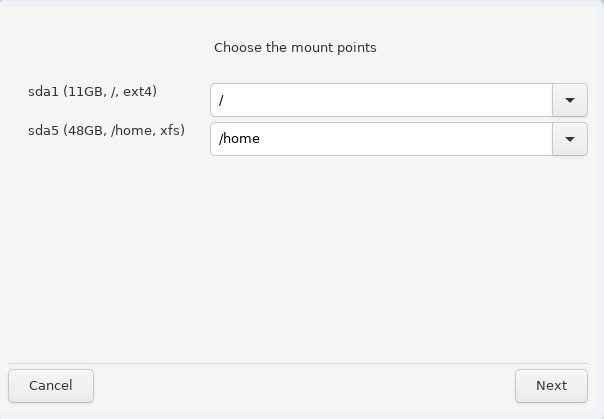
Hier ziet u de Linux-partities die op de computer gevonden zijn. Als u het niet eens bent met de koppelpunten die DrakX voorstelt, kunt u ze veranderen.
Links van de keuzevelden staan de beschikbare partities. Bijvoorbeeld:
sdais een harde schijf en5is een partitienummer, gevolgd door (grootte, koppelpunt, bestandssysteemtype) van de partitie.Als u meerdere partities heeft, kunt u verscheidene koppelpunten kiezen uit de uitvouwlijsten, zoals
/,/homeen/var. U kunt zelfs uw eigen koppelpunten maken, bijvoorbeeld/videovoor een partitie waarop u uw films wilt bewaren, of/Datavoor al uw gegevensbestanden.U kunt het koppelpuntveld leeg laten voor partities waarvan u geen gebruik hoeft te maken.
Waarschuwing
Als u veranderingen aanbrengt, zorg dan dat u tenminste een
/ (root)partitie houdt.
Tip
If you are not sure what to choose, click Previous to go back and then tick Custom disk partitioning, where you can click on a partition to see its type and size.
Als u zeker bent dat de koppelpunten goed zijn, klik dan op Volgende en kies of u enkel de partities wilt formatteren die DrakX voorstelt, of meer.
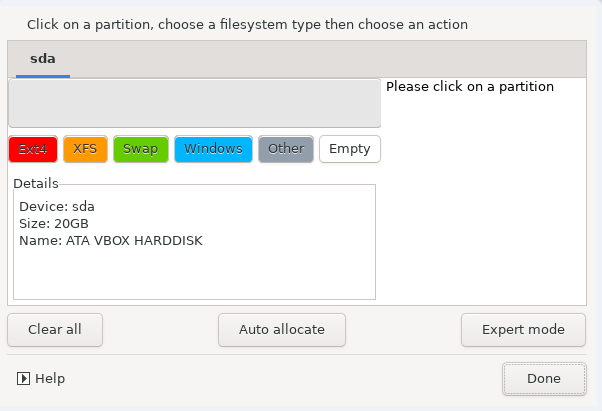
Modify the layout of your disk(s) here. You can remove or create partitions, change the filesystem or size of a partition and even view their details before you start.
There is a tab at the top for every detected hard disk (or other storage device, like a USB key). In the screenshot above there are two available devices:
sdaandsdb.For all other actions: click on the desired partition first. Then view it, or choose a filesystem and a mount point, resize it or wipe it. Expert mode provides more options such as to label (name) a partition, or to choose a partition type.
Continue until you have adjusted everything to your satisfaction, then click Done when you're ready.
Waarschuwing
Take care with the Clear all option, use it only if you are sure you want to wipe all partitions on the selected storage device.
If you wish to use encryption on your
/partition you must ensure that you have a separate/bootpartition. The encryption option for the/bootpartition must NOT be set, otherwise your system will be unbootable.
Belangrijk
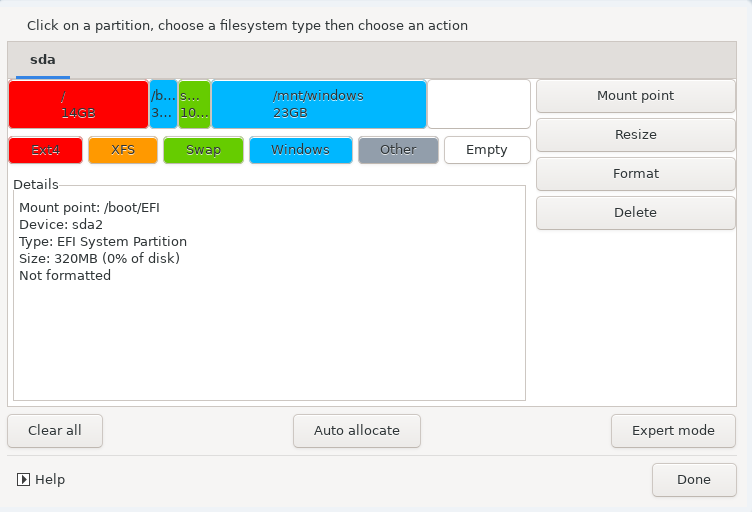
If you are installing Mageia on a UEFI system, check that an ESP (EFI System Partition) is present and correctly mounted on
/boot/EFI. See Figure 1 below.If you are installing Mageia on a Legacy/GPT system, check that a BIOS boot partition is present and of the correct type. See Figure 2 below.
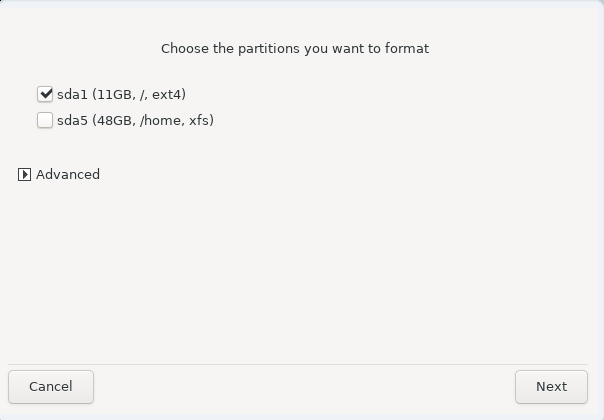
Here you can choose which partition(s) you wish to format. Any data on partitions not marked for formatting will be preserved.
Usually, at least the partitions that DrakX selected need to be formatted.
Click on Advanced to choose the partitions you want to check for so-called bad blocks
Tip
If you're not sure you have made the right choice, you can click on Previous, again on Previous and then on Custom to get back to the main screen, where you can choose to view details of your partitions.
When you are confident about the selections, click on Next to continue.


