

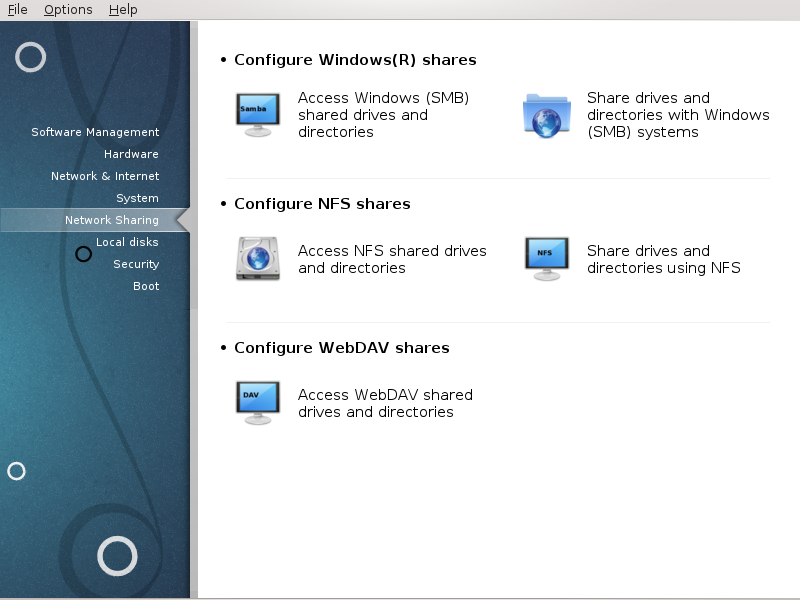
In this screen you can choose between several tools for sharing drives and directories. Click on a link below to learn more.
Configura les comparticions Windows(R)
“Accedeix a discs i directoris compartits amb Windows (SMB)”
“Share directories and drives with Samba” = Share drives and directories with Windows (SMB) systems
Configura les comparticions NFS
Configura les comparticions WebDAV
Aquesta eina[35] permet declarar que va compartir directoris per a ser accessibles a tots els usuaris de la màquina. El protocol utilitzat per això és SMB que s'ha popularitzat als sistemes Windows(R). El directori compartit estarà disponible directament en l'arrencada. Es pot accedir als directoris compartits directament en una sola sessió per un usuari amb les eines com ara l'explorador de fitxers.
Abans d'iniciar l'eina, és una bona idea declarar els noms dels servidors disponibles, per exemple amb “Definicions dels amfitrions”
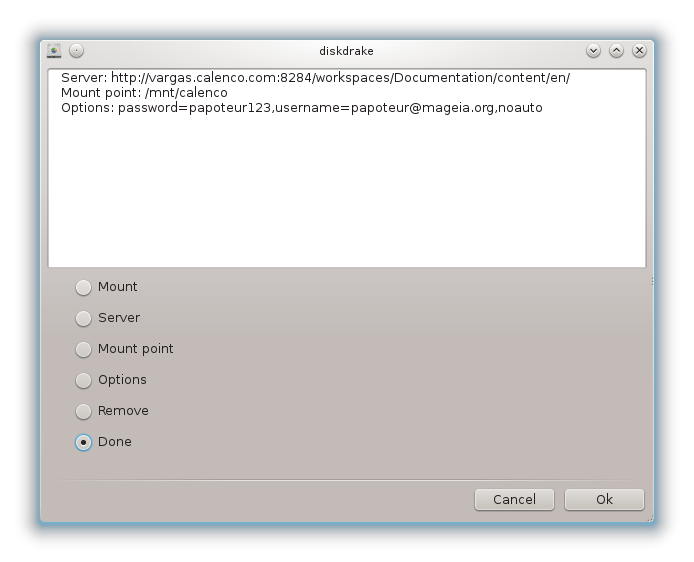
Seleccioneu per obtenir una llista de servidors que comparteixen directoris.
Feu clic al nom del servidor i en > abans que el nom del servidor per mostrar la llista dels directoris compartits i seleccioneu el directori el qual vol accedir.
El botó estarà disponible, ha d'especificar on muntar el directori.
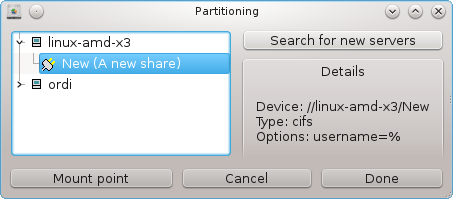
Després d'escollir el punt de muntatge, es pot muntar amb el botó . També pot verificar i canviar algunes opcions amb el botó .
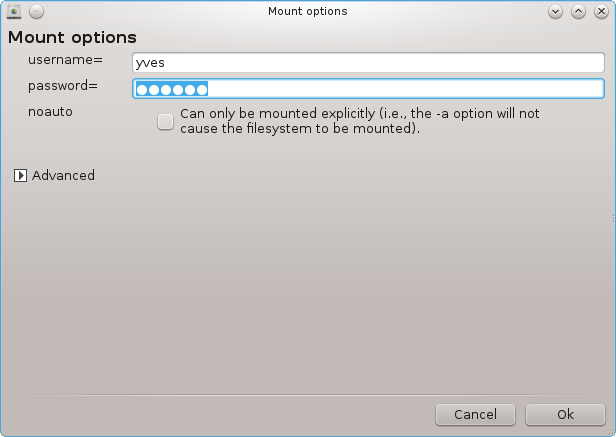
En opcions, podeu especificar el nom d'usuari i la contrasenya dels que poden connectar-se al servidor SMB. Després de muntar el directori, pots desmuntar el directori amb el mateix botó.

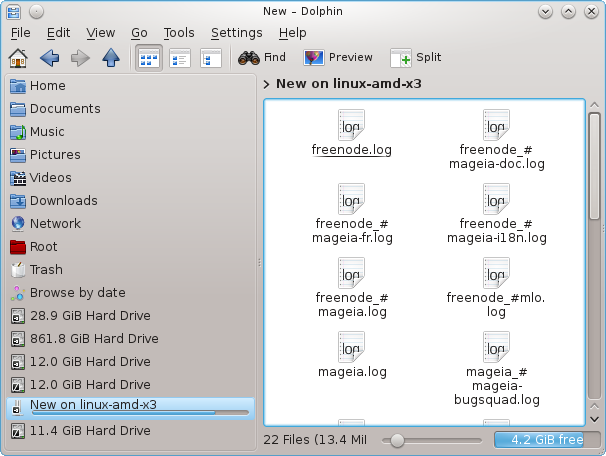
Després d'acceptar la configuració amb el botó Llest. un missatge us preguntarà "Voleu deixar les modificacions a /etc/fstab". Això permetrà al directori romandre disponible a cada arrancada, si la xarxa és accessible.
Samba is a protocol used in different Operating Systems to share some resources like directories or printers. This tool allows you to configure the machine as a Samba server using the protocol SMB/CIFS. This protocol is also used by Windows(R) and workstations with this OS can access the resources of the Samba server.
To be accessed from other workstations, the server has to have a fixed IP address. This can be specified directly on the server, for example with “Centre de xarxes”, or at the DHCP server which identifies the station with its MAC-address and give it always the same address. The firewall has also to allow the incoming requests to the Samba server.
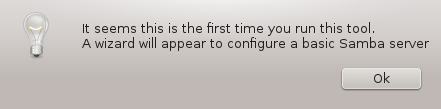
At the first run, the tools [36] checks if needed packages are installed and proposes to install them if they are not yet present. Then the wizard to configure the Samba server is launched.
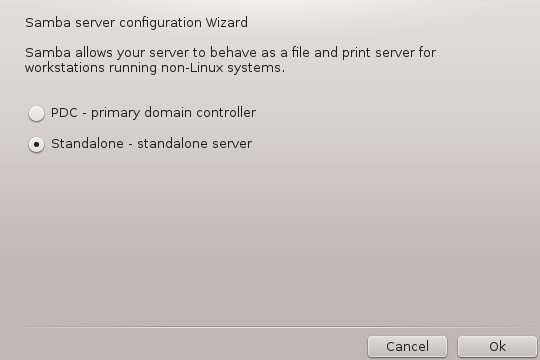
In the next window the Standalone server configuration option is already selected.
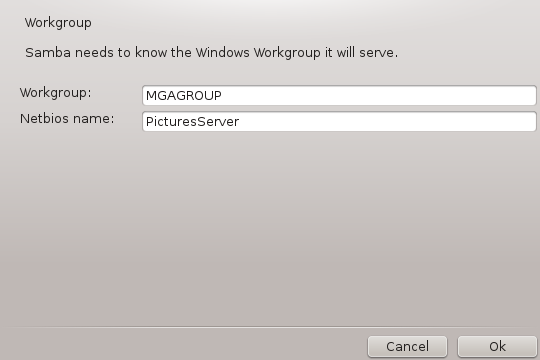
Then specify the name of the workgroup. This name should be the same for the access to the shared resources.
The netbios name is the name which will be used to designate the server on the network.
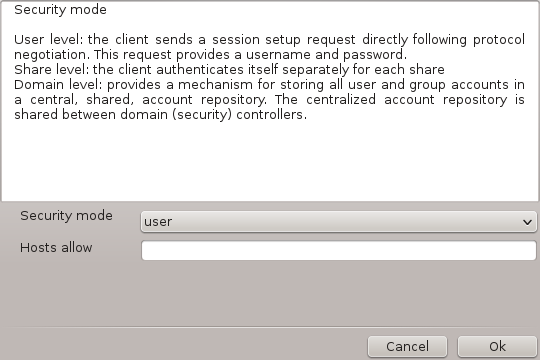
Choose the security mode:
user: the client must be authorized to access the resource
share: the client authenticates itself separately for each share
You can specify which hosts are allowed to access the resources, with IP address or host name.
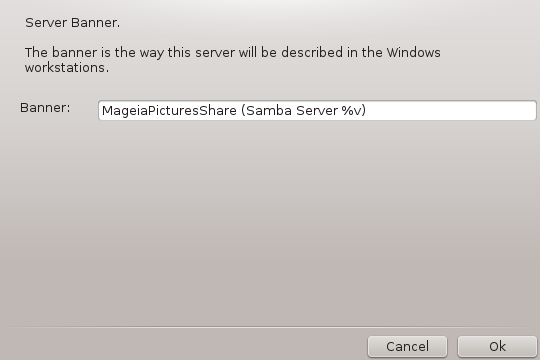
Specify the server banner. The banner is the way this server will be described in the Windows workstations.
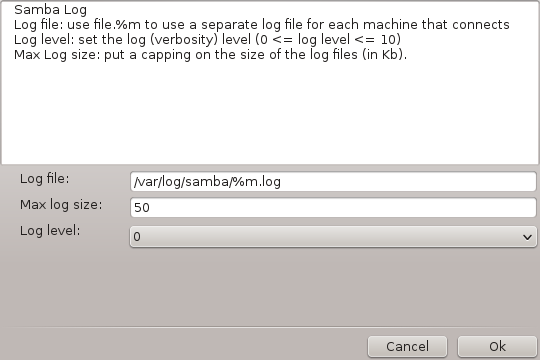
The place where Samba can log information can be specified at the next step.
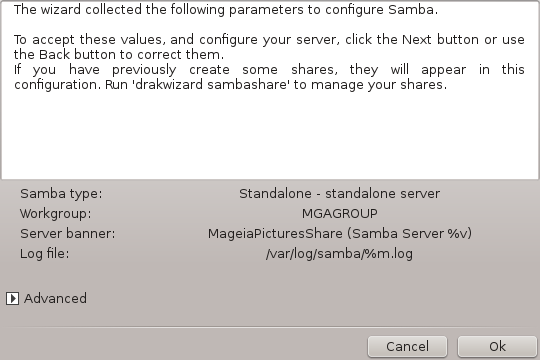
The wizard displays a list of the chosen parameters before you accept the
configuration. When accepted, the configuration will be written in
/etc/samba/smb.conf.
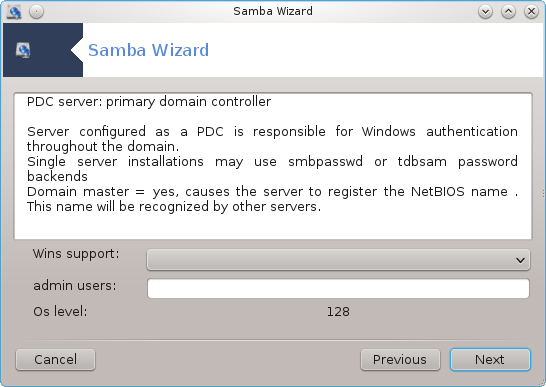
If the "Primary domain controller" option is selected, the wizard asks for indication if Wins is to support or not and to provide admin users names. The following steps are then the same as for standalone server, except you can choose also the security mode:
domain: provides a mechanism for storing all user and group accounts in a central, shared, account repository. The centralized account repository is shared between (security) controllers.
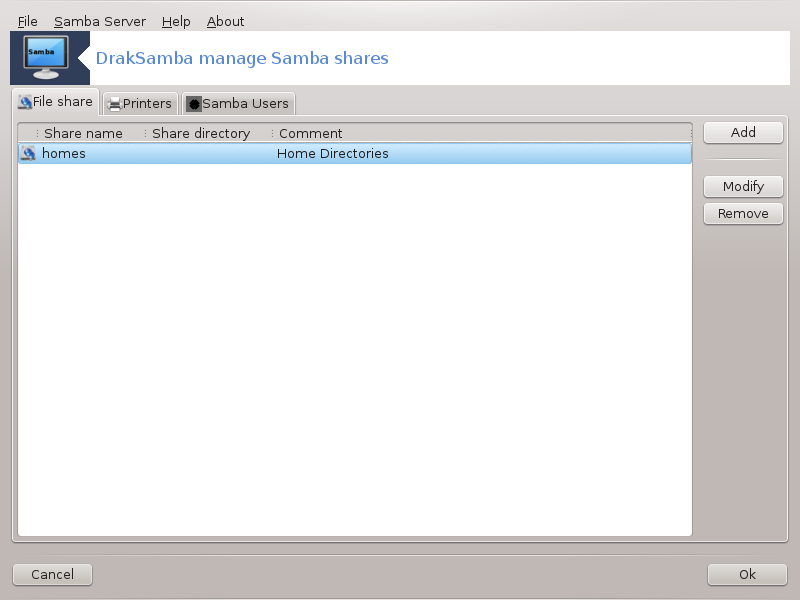
With the button, we get:
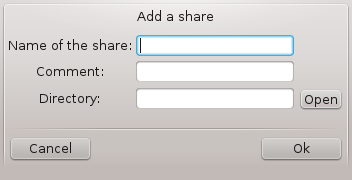
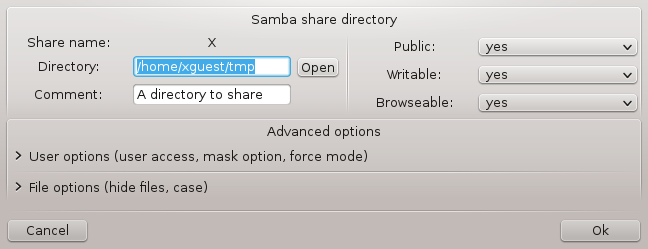
A new entry is thus added. It can be modified with the button. Options can be edited, such as whether the directory is visible to the public, writable or browseable. The share name can not be modified.
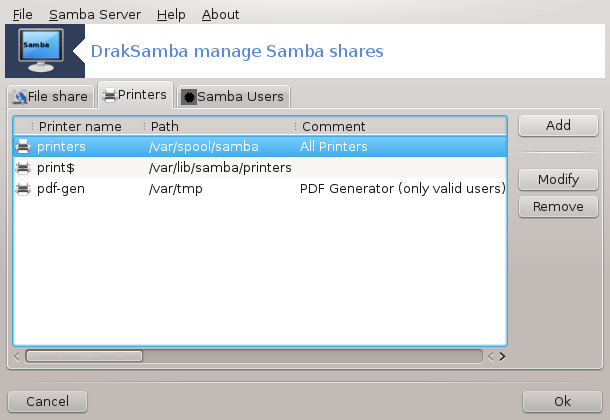
When the list has at least one entry, menu entries can be used.
File|Write conf. Save the current configuration in /etc/samba/smb.conf.
Samba server|Configure. The wizard can be run again with this command.
Samba server|Restart. The server is stopped and restarted with the current configuration files.
Samba Server|Reload. The configuration displayed is reloaded from the current configuration files.
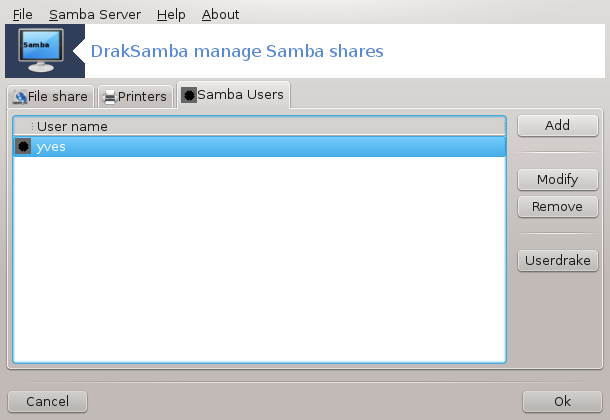
In this tab, you can add users who are allowed to access the shared resources when authentication is required. You can add users from “Usuaris i grups”
.
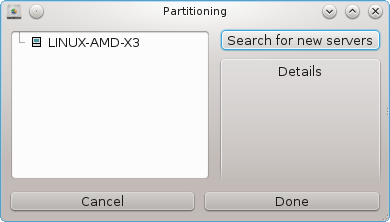
Aquesta eina [37] permet declarar alguns directoris compartits per ser accessibles a tots els usuaris de la màquina. El protocol utilitzat per això és NFS que està disponible a la majoria de sistemes Linux o UNIX. El directori compartit serà així directament a l'arrencada. Directoris compartits poden ser també accessibles directament en una única sessió amb les eines com ara els exploradors de fitxers.
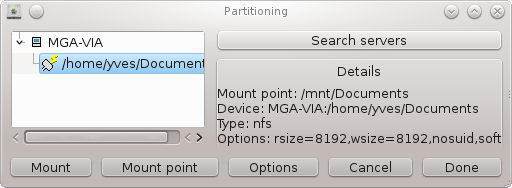
Seleccioneu per obtenir una llista de servidors que comparteixen directoris.
Feu clic al símbol > abans que el nom del servidor per mostrar la llista de directoris compartits i seleccioneu el directori al qual voleu accedir.
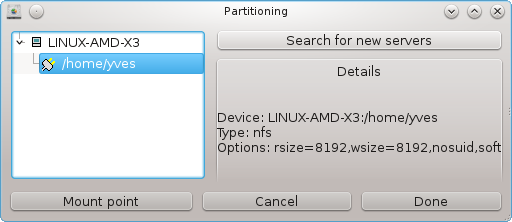
El botó estarà disponible i cal especificar el lloc per muntar el directori.
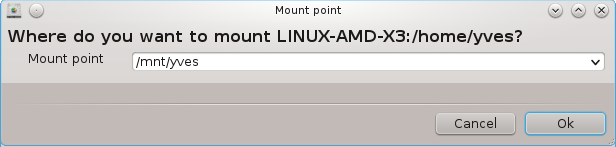
Després d'escollir el punt de muntatge, el podeu muntar. També podeu verificar i canviar algunes opcions amb el botó . Després de muntar el directori, podeu desmuntar-ho amb el mateix botó.
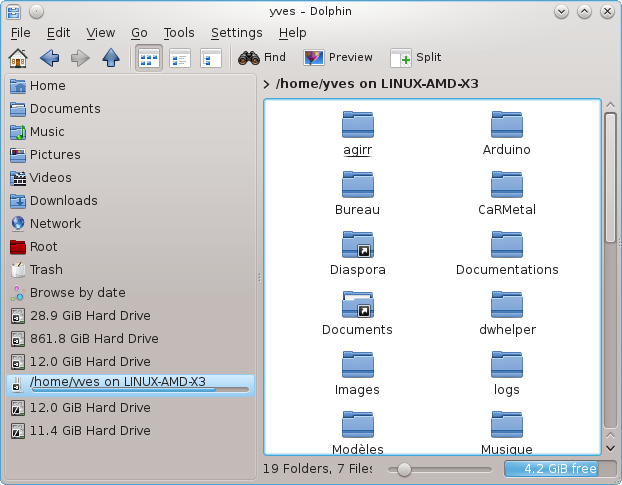
En acceptar la configuració amb el botó , apareixerà un missatge en pantalla, preguntant "Voleu deixar les modificacions a /etc/fstab". Això farà el directori disponible a cada arrancada, si la xarxa és accessible. El nou directori estarà disponible en l'explorador de fitxers, per exemple al Dolphin.
When the wizard[38] is launched for the first time, it may display the following message:
The package nfs-utils needs to be installed. Do you want to install it?
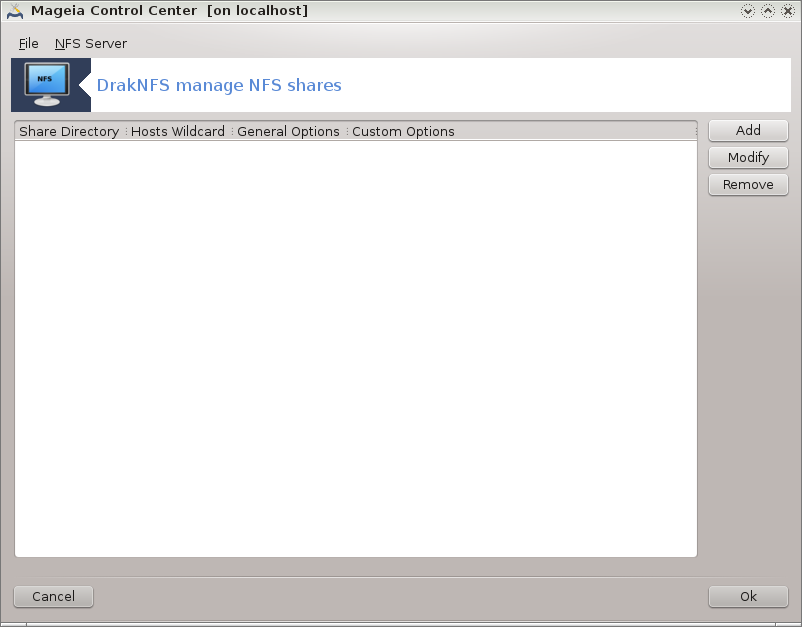
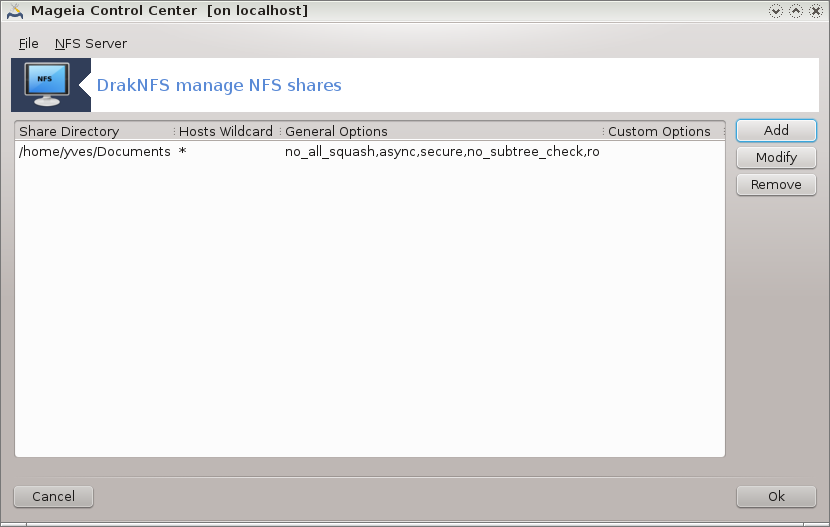
After completing the installation, a window with an empty list is displayed.
Es mostra una llista de directoris que són compartits. En aquest pas, la llista es buida. El botó dona accés a una eina de configuració.
L'eina de configuració s'anomena "Modificar les dades". També es pot posar en marxa amb el botó . Els següents paràmetres estan disponibles.
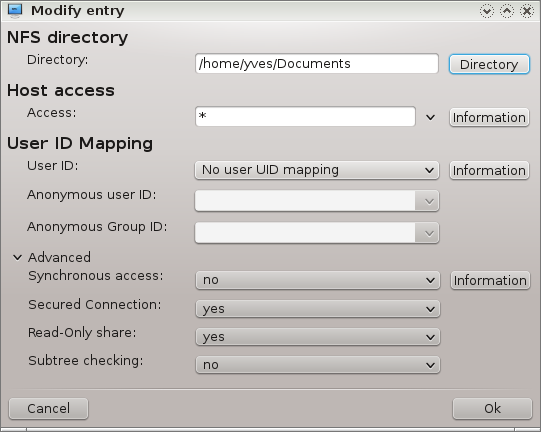
Aquí podeu especificar quin directori es va compartir. El botó dona accés a un navegador per seleccionar-ho.
Aquí podeu especificar els amfitrions que estan autoritzats per accedir al directori compartit.
Els clients NFS poden especificar-se en un nombre de maneres:
únic amfitrió: un amfitrió, ja sigui per un àlies reconegut, el nom del domini complet o una adreça IP.
netgroups: NIS netgroups may be given as @group.
wildcards: machine names may contain the wildcard characters * and ?. For instance: *.cs.foo.edu matches all hosts in the domain cs.foo.edu.
IP networks: you can also export directories to all hosts on an IP (sub-)network simultaneously. For example, either `/255.255.252.0' or `/22' appended to the network base address.
map root user as anonymous: maps requests from uid/gid 0 to the anonymous uid/gid (root_squash). The root user from the client cannot read or write to the files on the server which are created by root on the server itself.
allow real remote root access: turn off root squashing. This option is mainly useful for diskless clients (no_root_squash).
map all users to anonymous user: maps all uids and gids to the anonymous user (all_squash). Useful for NFS-exported public FTP directories, news spool directories, etc. The opposite option is no user UID mapping (no_all_squash), which is the default setting.
anonuid and anongid: explicitly set the uid and gid of the anonymous account.
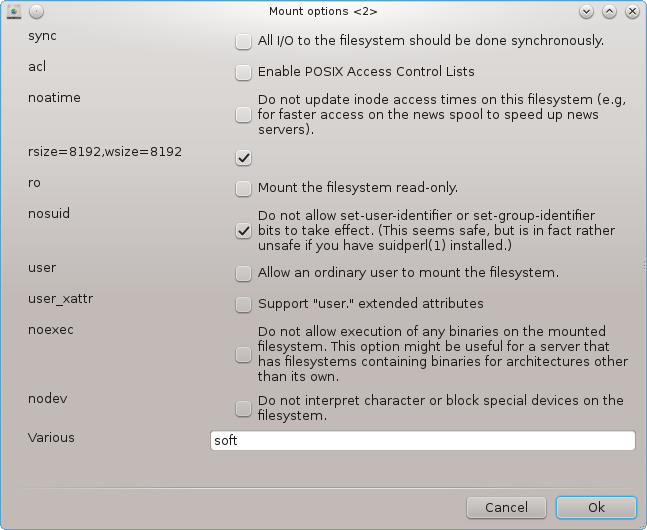
Secured Connection: this option requires that requests originate on an internet port less than IPPORT_RESERVED (1024). This option is on by default.
Read-Only share: allow either only read or both read and write requests on this NFS volume. The default is to disallow any request which changes the filesystem. This can also be made explicit by using this option.
Synchronous access: prevents the NFS server from violating the NFS protocol and to reply to requests before any changes made by these requests have been committed to stable storage (e.g. disc drive).
Subtree checking: enable subtree checking which can help improve security in some cases, but can decrease reliability. See exports(5) man page for more details.
Aquesta eina[39] es troba al centre de control de Mageia, sota la pestanya Compartició en xarxa, amb l'etiqueta Configura les comparticions WebDAV.
WebDAV és un protocol que permet muntar el directori d'un servidor web localment, de manera que aparegui com un directori local. Cal que l'equip remot executi un servidor WebDAV. Això no és l'objectiu d'aquesta eina per configurar el servidor WebDAV.
La primera pantalla de l'eina mostra les entrades que estan configurades, si escau, i un botó . S'utilitza per crear una entrada. Introduïu l'URL del servidor en el camp de la nova pantalla.
Aleshores obtindreu una pantalla amb els botons de les opcions per seleccionar algunes accions. Continueu amb l'acció en fer clic al botó després de seleccionar el botó d'opció, com el ja està configurat. No obstant això, és possible corregir-ho, si cal.
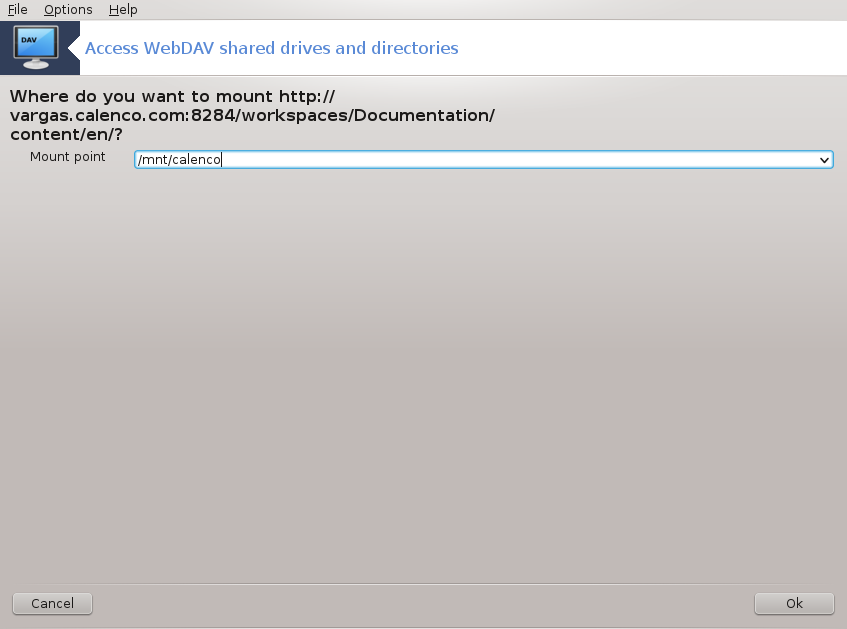
El contingut del directori remot serà accessible a través d'aquest punt de muntatge.
En el següent pas, doneu el vostre nom d'usuari i la vostra contrasenya. Si necessiteu algunes altres opcions, podeu donar-les a la pantalla .

L'opció us permet muntar immediatament l'accés.
Després que accepteu la configuració amb el botó d'opció , la primera pantalla es mostra de nou i el vostre nou punt de muntatge es llista. Després de triar , us demanarà si voleu o no desar les modificacions al /etc/fstab. Seleccioneu aquesta opció si voleu que el directori remot estigui disponible en cada arrancada. Si la configuració és per a l'ús d'una sola vegada, no la deseu.
[35] Podeu iniciar aquesta eina des de la línia d'ordres, escrivint diskdrake --smb com a root.
[36] You can start this tool from the command line, by typing draksambashare as root.
[37] Podeu iniciar aquesta eina des de la línia d'ordres, escrivint diskdrake --nfs com a root.
[38] You can start this tool from the command line, by typing draknfs as root.
[39] Podeu iniciar aquesta eina des de la línia d'ordres, escrivint diskdrake --dav com a root.
