

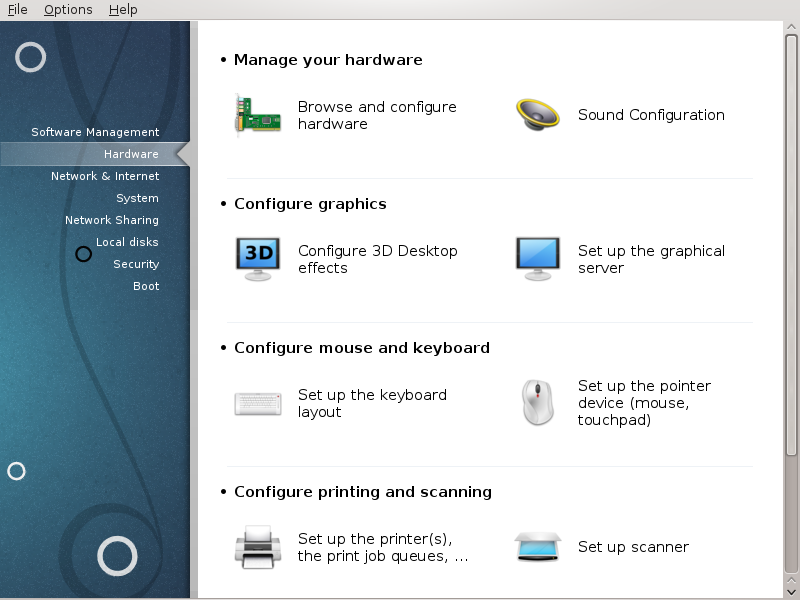
In this screen you can choose between several tools to configure your hardware. Click on a link below to learn more.
Administra el maquinari
“Hardware configuration” = Browse and configure hardware
Configura els gràfics
“3D Desktop Effects” = Configure 3D Desktop effects
Configura teclat i ratolí
Configura impressió i escaneig
“Install and configure a printer” = Set up the printer(s), the print job queues, ...
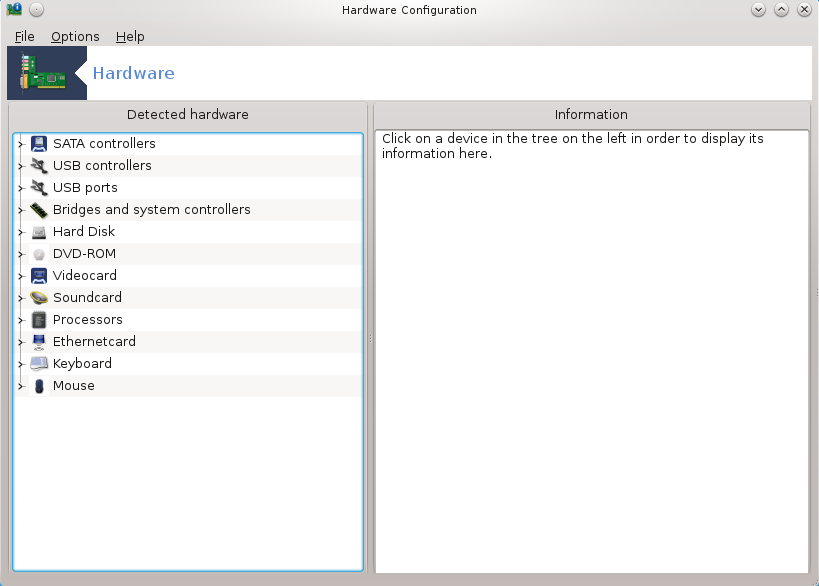
This tool[11] gives a general view of the
hardware of your computer. When the tool is launched, it executes a job to
look for every element of the hardware. For that, it uses the command
ldetect which refers to a list of hardware in
ldetect-lst package.
The window is divided in two columns.
The left column contains a list of the detected hardware. The devices are grouped by categories. Click on the > to expand the content of a category. Each device can be selected in this column.
The right column displays information about the selected device. The gives some information about the content of the fields.
According to which type of device is selected, either one or two buttons are available at the bottom of the right column:
: this can be used to parameterize the module which is used in relation to the device. This must used by experts only.
: access to the tool which can configure the device. The tool can often be accessed directly from the MCC.
Opcions
The menu gives the opportunity to check boxes to enable automatic detection:
modem
Jaz devices
Zip parallel devices
By default these detections are not enabled, because they are slow. Check the appropriate box(es) if you have this hardware connected. Detection will be operational the next time this tool is started.
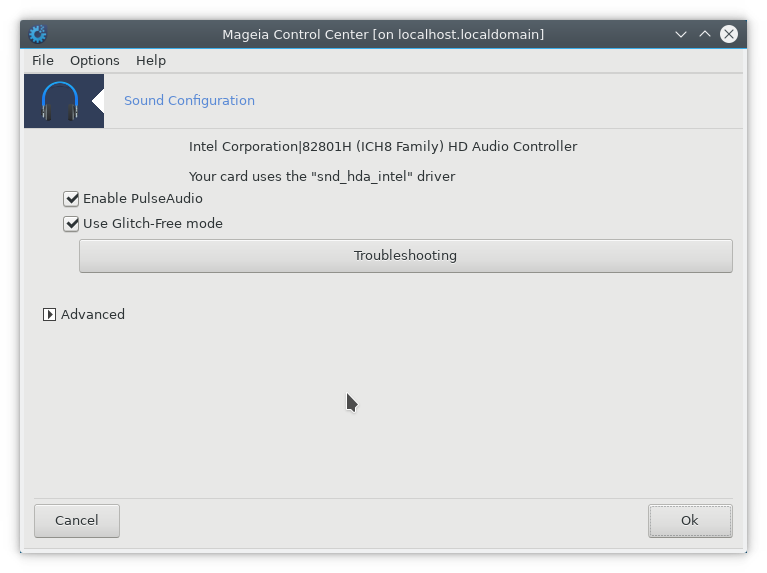
This tool[12] is present in the Mageia Control Center under the tab Hardware.
Draksound deals with the sound configuration, PulseAudio options and troubleshooting. It will help you if you experience sound problems or if you change the sound card.
PulseAudio is a sound server. It receives all the sound inputs, mixes them according to the user preferences and sends the resulting sound to the output. See to set these preferences.
PulseAudio is the default sound server and it is recommended to leave it enabled.
Glitch-Free improves PulseAudio with some programs. It is also recommended to leave it enabled.
The button gives assistance with fixing any problems you may have. You will find it helpful to try this before asking the community for help.
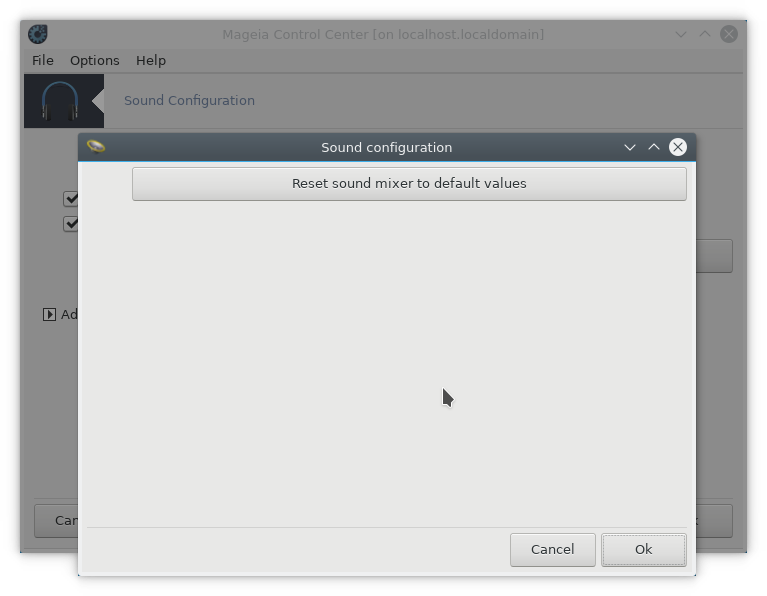
The button displays a new window with an obvious button.
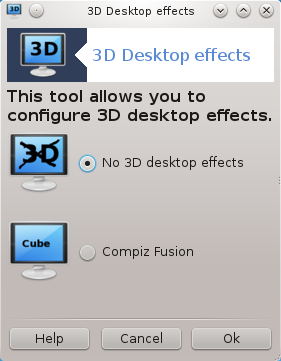
Aquesta eina[13] us permet administrar els efectes d'escriptori 3D al vostre sistema operatiu. Els efectes 3D estan desactivats per defecte.
Per utilitzar aquesta eina, cal tenir instal·lat el paquet glxinfo. Si el paquet no està instal·lat, us demanarà que ho feu abans de començar drak3d.
Després d'iniciar drak3d, se us proporcionarà una finestra de menú. Aquí es pot triar entre Sense efectes 3D o Compiz Fusion. Compiz Fusion és part d'un gestor de composició/finestra, que inclou efectes especials accelerats per maquinari per al seu escriptori. Trieu Compiz Fusion per començar.
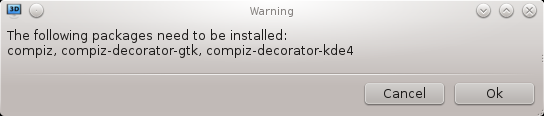
Si aquesta és la primera vegada que utilitzeu aquest programa després d'una instal·lació neta de Mageia, rebreu un missatge d'advertència que us diu quins paquets necessiten ser instal·lats per tal d'utilitzar Compiz Fussion. Feu clic al botó per continuar.
Un cop instal·lats els paquets apropiats, s'adonarà que s'ha seleccionat Compiz Fussion al menú drak3d, però ha de tancar la sessió i tornar a iniciar-la perquè els canvis tinguin efecte.
Després d'inicia sessió de nou, Compiz Fusion serà activat. Per configurar Compiz Fussion, vegeu la pàgina per l'eina ccssm (CompizConfig Settings Manager).
Si després d'activar Compiz Fusion intenta iniciar sessió en el seu escriptori, però no pot veure res, reiniciï l'equip per tornar a la pantalla d'accés. Un cop allà, feu clic a la icona d'escriptori i seleccioneu drak3d.
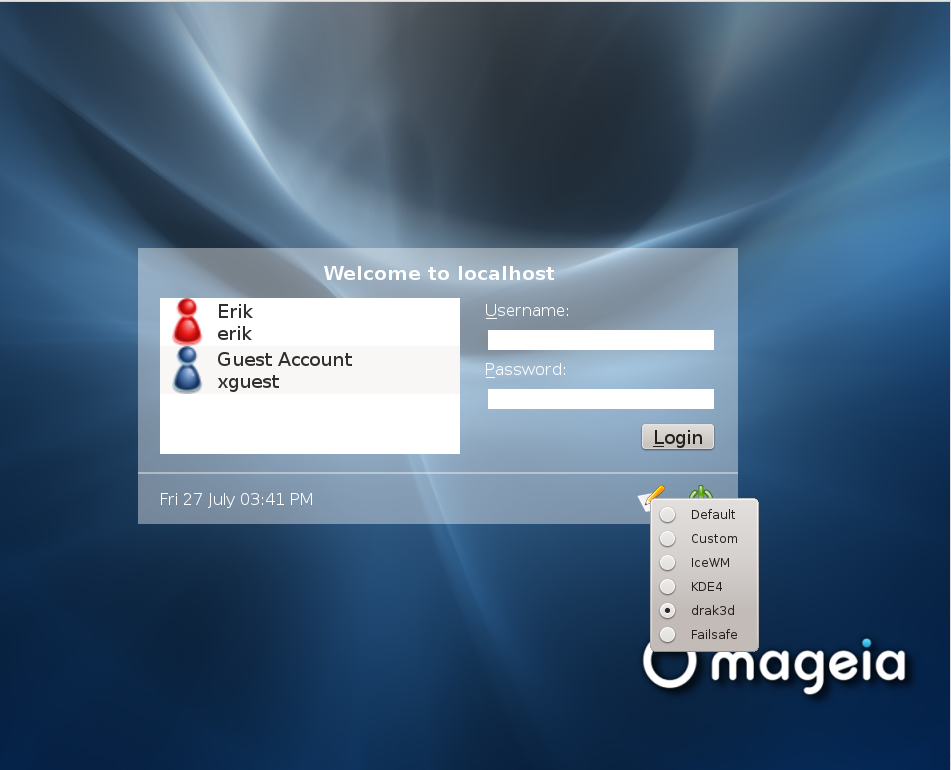
Quan us connecteu, si el vostre compte apareix com a administrador, se us demanarà la vostra contrasenya de nou. En cas contrari, utilitzeu el nom d'administrador amb el vostre compte. A continuació, podeu desfer els canvis que poden haver causat el problema d'inici de sessió.
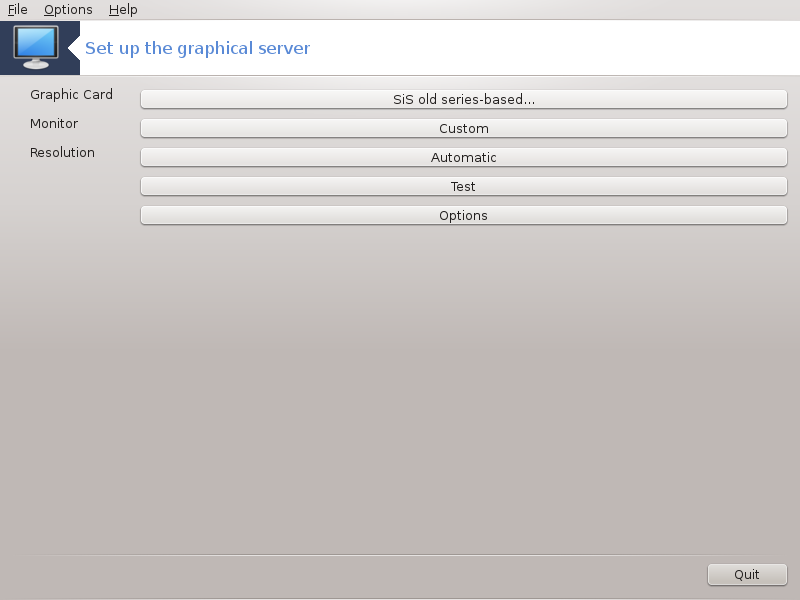
This tool is present in the Mageia Control Center under the tab Hardware. Select Set up the graphical server. [14]
The buttons allow you to change the graphical configuration.
Graphic card:
The graphic card currently detected is displayed and the matching server configured. Click on this button to change to another server, for example one with a proprietary driver.
The available servers are sorted under Vendor by manufacturer in alphabetical order and then by model also in alphabetical order. The free drivers are sorted by alphabetical order under Xorg.
Nota
In case of problems, Xorg - Vesa will work with most graphic cards and give you time to find and install the right driver while in your Desktop Environment.
If even Vesa doesn't work, choose Xorg - fbdev, which is used while installing Mageia, but doesn't allow you to change resolution or refresh rates.
If you made your choice for a free driver, you may be asked if you want to use a proprietary driver instead with more features (3D effects for example).
Monitor:
In the same way as above, the monitor currently detected is displayed and you can click on the button to change to another one. If the desired monitor isn't in the Vendor list, choose in the Generic list a monitor with the same features.
Resolution:
This button allows the choice of the resolution (number of pixels) and the colour depth (number of colours). It displays this screen:
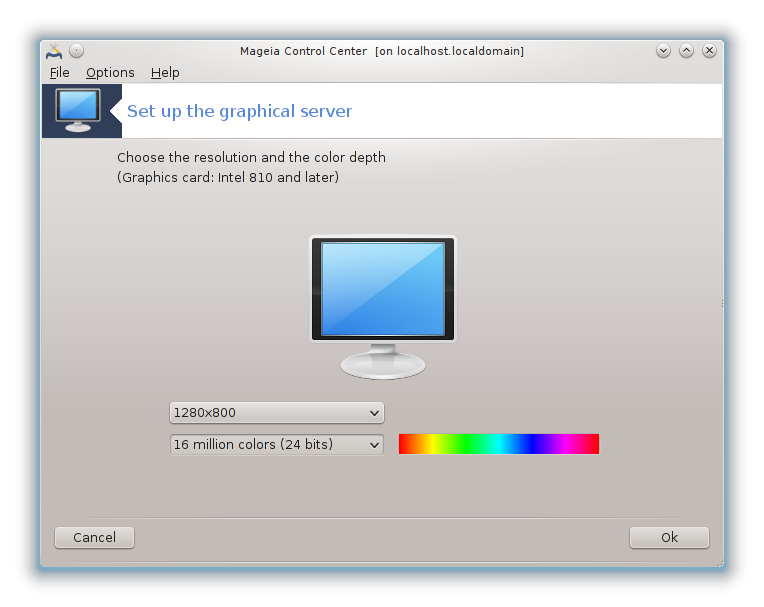
When you change the color depth, a multi-colored bar will appear next to the second button and show a preview of what the selected color depth looks like.
The first button shows the currently resolution, click to change for another one. The list gives all the possible choices according to the graphic card and the monitor, it is possible to click on Other to set other resolutions, but bear in mind that you can damage your monitor or select an uncomfortable setting.
The second button shows the currently colour depth, click to change this for another one.
Nota
Depending on the chosen resolution, it may be necessary to logout and restart the graphical environment for the settings to take effect.
Test:
Once the configuration done, it is recommended to do a test before clicking on OK because it is easier to modify the settings now than later if the graphical environment doesn't work.
Nota
In case of a non working graphical environment, type Alt+Ctrl+F2 to open a text environment, connect as root and type XFdrake (with the caps) to to use XFdrake's text version.
If the test fails, just wait until the end, if it works but you don't want to change after all, click on , if everything is right, click on .
Opcions:
Global options: If Disable Ctrl-Alt-Backspace is checked, it will no longer be possible to restart X server using Ctrl+Alt+Backspace keys.
Graphic card options: Allows you to enable or disable three specific features depending on the graphic card.
Graphical interface at startup: Most of the time, Automatically start the graphical interface (Xorg) upon booting is checked to make the boot switch to graphical mode, it may be unchecked for a server.
After a click on the button, the system will ask you to confirm. There is still time to cancel everything and keep the previous configuration, or to accept. In this case, you have to disconnect and reconnect to activate the new configuration.
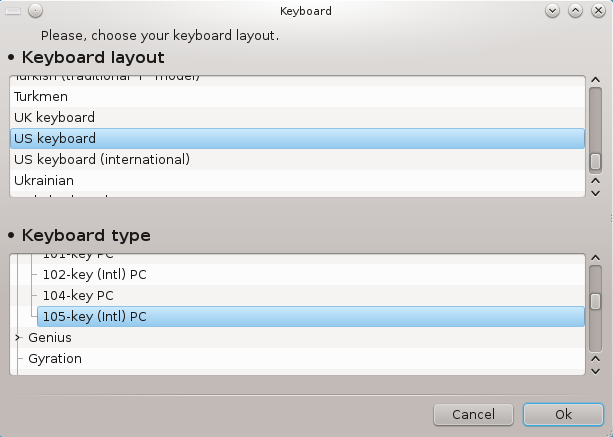
The keyboarddrake tool[15] helps you configure the basic layout for the keyboard that you wish to use on Mageia. It affects the keyboard layout for all users on the system. It can be found in the Hardware section of the Mageia Control Center (MCC) labelled "Configure mouse and keyboard".
Here you can select which keyboard layout you wish to use. The names (listed in alphabetical order) describe the language, country, and/or ethnicity each layout should be used for.
This tool[16] is present in the Mageia Control Center under the tab Hardware.
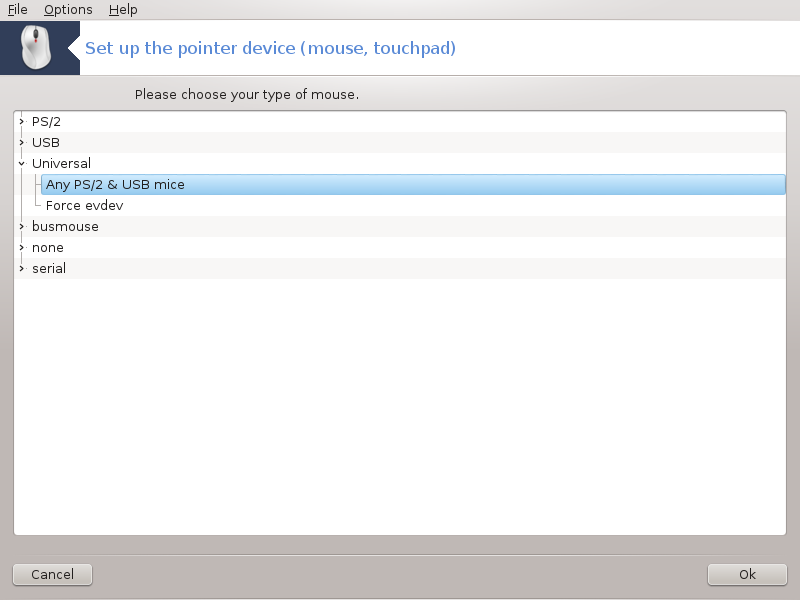
As you must have a mouse to install Mageia, that one is already installed by Drakinstall. This tool allows installation of another mouse.
The mice are sorted by connection type and then by model. Select your mouse and click on . Most of the time "Universal / Any PS/2 & USB mice" is suitable for a recent mouse. The new mouse is immediately taken into account.
Printing is managed on Mageia by a server named CUPS. It has its own configuration interface which is accessible via an Internet browser, but Mageia offers its own tool for installing printers called system-config-printer which is shared with other distributions such as Fedora, Mandriva, Ubuntu and openSUSE.
You should enable the non-free repository before proceeding with the installation, because some drivers may only be available in this way.
Printer installation is carried out in the Hardware section of the Mageia Control Centre. Select the Configure printing and scanning tool[17].
MCC will ask for the installation two packages:
task-printing-server
task-printing-hp
It is necessary to accept this installation to continue. Up to 230MB of dependencies are needed.
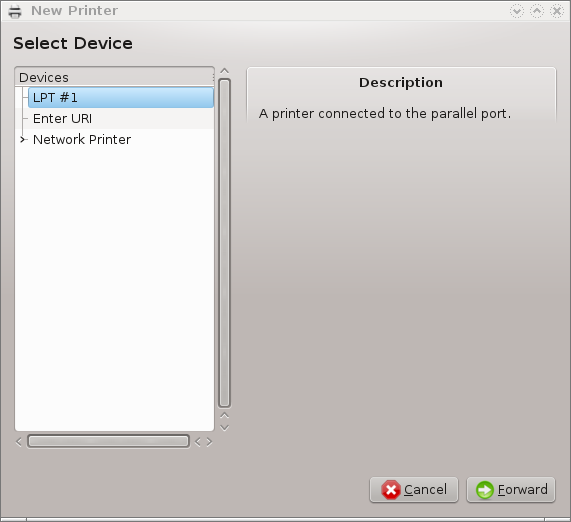
To add a printer, choose the "Add" printer button. The system will try to detect any printers and the ports available. The screenshot displays a printer connected to a parallel port. If a printer is detected, such as a printer on a USB port, it will be displayed on the first line. The window will also attempt to configure a network printer.
This usually refers to USB printers. The utility automatically finds the name of the printer and displays it. Select the printer and then click "Next". If there is a known driver associated for the printer, it will be automatically installed. If there is more than one driver or no known drivers, a window will ask you to select or furnish one, as explained in the next paragraph. Continue with “Complete the installation process”
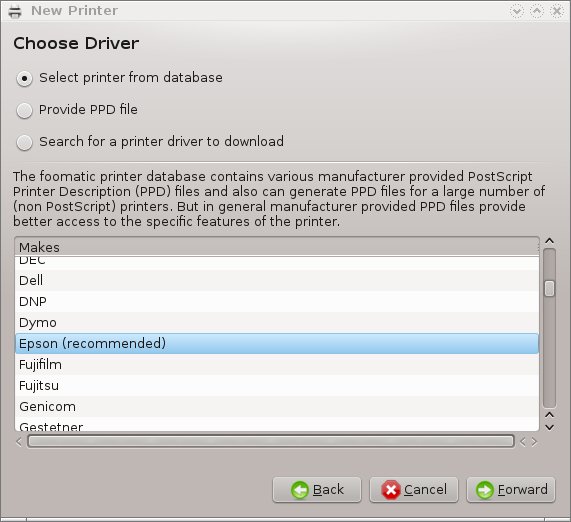
When you select a port, the system loads a driver list and displays a window to select a driver. The choice can be made through one of the following options.
Select printer from database
provide PPD file
search for a driver to download
By selecting from the database, the window suggests a printer manufacturer first, and then a device and a driver associated with it. If more than one driver is suggested, select one which is recommended, unless you have encountered some problems with that one before, in this case select the one which know to work.
After the driver selection, a window requests some information which will allow the system to designate and discover the printer. The first line is the name under which the device will appear in applications in the list of available printers. The installer then suggests printing a test page. After this step, the printer is added and appears in the list of available printers.
Network printers are printers that are attached directly to a wired or wireless network, that are attached to a printserver or that are attached to another workstation that serves as printserver.
Nota
Often, it is better to configure the DHCP server to always associate a fixed IP address with the printer's MAC-address. Of course that should be the same as the IP address the printer of printserver is set to, if it has a fixed one.
The printer's Mac-address is a serial number given to the printer or
printserver or computer it is attached to, that can be obtained from a
configuration page printed by the printer or which may be written on a label
on the printer or printserver. If your shared printer is attached to a
Mageia system, you can run ifconfig on it
as root to find the MAC-address. It is the sequence of numbers and letters
after "HWaddr".
You can add your network printer by choosing the protocol it uses to talk to your computer over the network. If you don't know which protocol to choose, you can try the Network Printer - Find Network Printer option in the Devices menu and give the IP address of the printer in the box on the right, where it says "host".
If the tool recognises your printer or printserver, it will propose a protocol and a queue, but you can choose a more appropriate one from the list below it or give the correct queue name if it isn't in the list.
Look in the documentation that came with your printer or printserver to find which protocol(s) it supports and for possible specific queue names.
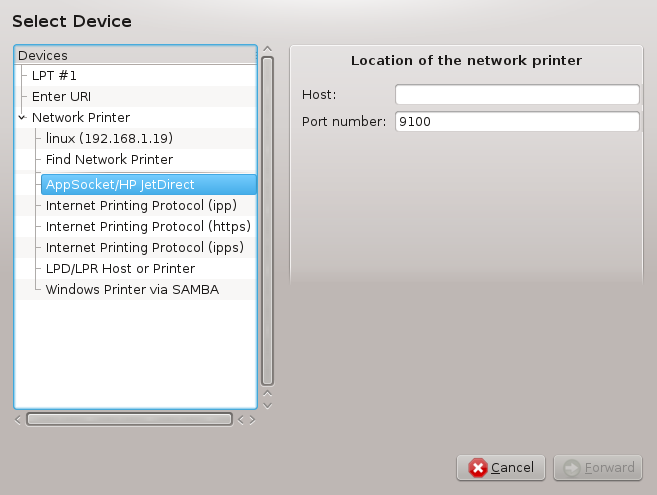
One current technique is one developed by Hewlett-Packard and known as JetDirect. It allows access to a printer directly connected to the network via an Ethernet port. You must know the IP-address at which the printer is known on the network. This technique is also used inside some ADSL-routers which contain an USB port to connect the printer. In this case, the IP-address is that of the router. Note that the tool "Hp Device manager" can manage dynamically configured IP-adress, setting an URI like hp:/net/<name-of-the-printer> . In this case, fixed IP-adress is not required.
Choose the option AppSocket/HP JetDirect as the protocol and set the address in Host:, do not change the Port Number, unless you know that it needs to be changed. After the selection of the protocol, the selection of the driver is the same as above.
The other protocols are:
Internet Printing Protocol (ipp): a printer which can be accessed on a TCP/IP network via the IPP protocol, for example a printer connected to a station using CUPS. This protocol may also be used also by some ADSL-routers.
Internet Printing Protocol (https): the same as ipp, but using http transport and with TLS secured protocol. The port has to be defined. By default, the port 631 is used.
Internet Printing Protocol (ipps): the same as ipp, but with TLS secured protocol.
LPD/LPR host or Printer: a printer which can be accessed on a TCP/IP network via the LPD protocol, for example a printer connected to a station using LPD.
Windows printer via SAMBA: a printer connected to a station running Windows or a SMB server and shared.
The URI can also be added directly. Here are some examples on how to form the URI:
Appsocket
socket://ip-address-or-hostname:portInternet Printing Protocol (IPP)
ipp://ip-address-or-hostname:port-number/resourcehttp://ip-address-or-hostname:port-number/resourceLine Printer Daemon (LPD) Protocol
lpd://username@ip-address-or-hostname/queue
Additional information can be found in the CUPS documentation.
You can access the properties of the device. The menu allows access to parameters for the CUPS server. By default a CUPS server is launched on your system, but you can specify a different one with the | menu, another window which gives access to the tuning of other specific parameters of the server, following |
You can find some information on occurring errors during printing by
inspecting /var/log/cups/error_log
You can also access to a tool to diagnose problems using the | Troubleshoot menu.
It is possible that some drivers for specific printers are not available in Mageia or are not functional. In this case, have a look at the openprinting site to check if a driver for your device is available. If yes, check if the package is already present in Mageia and in this case install it manually. Then, redo the installation process to configure the printer. In all cases, report the problem in bugzilla or on the forum if you are comfortable with this tool and furnish the model and driver information and whether the printer works or not after installation. Here are some sources to find other up-to-date drivers or for more recent devices.
Brother printers
This page give a list of drivers provided by Brother. Search the driver for your device, download the rpm(s) and install.
You should install Brother drivers before running the configuration utility.
Hewlett-Packard printers and All in one devices
These devices use the hplip tool. It is installed automatically after the detection or the selection of the printer. You can find other information here. The tool "HP Device Manager" is available in the System menu. Also view configuration for the management of the printer.
A HP All in one device must be installed as a printer and the scanner features will be added. Note that sometimes, the Xsane interface doesn't allow to scan films or slides (the lighting slid can't operate). In this case, it is possible to scan, using the standalone mode, and save the picture on a memory card or USB stick inserted in the device. Afterwards, open your favourite imaging software and load your picture from the memory card which is appeared in the /media folder.
Samsung colour printer
For specific Samsung and Xerox colour printers, this site provides drivers for the QPDL protocol.
Epson printers and scanners
Drivers for Epson printers are available from this search page. For the scanner part, you must install the "iscan-data" package first, then "iscan" (in this order). A iscan-plugin package can also be available and is to install. Choose the rpm packages according to your architecture.
It is possible that the iscan package will generate a warning about a conflict with sane. Users have reported that this warning can be ignored.
Canon printers
For Canon printers, it may be advisable to install a tool named turboprint available here .
This tool [18] allows you to configure a single scanner device or a multifunction device which includes scanning. It also allows you to share local devices connected to this computer with a remote computer or to access remote scanners.
When you start this tool for the first time, you may get the following message:
"SANE packages need to be installed to use scanners
Do you want to install the SANE packages?"
Choose Yes to continue. It will install
scanner-gui and task-scanning if they are not yet
installed.
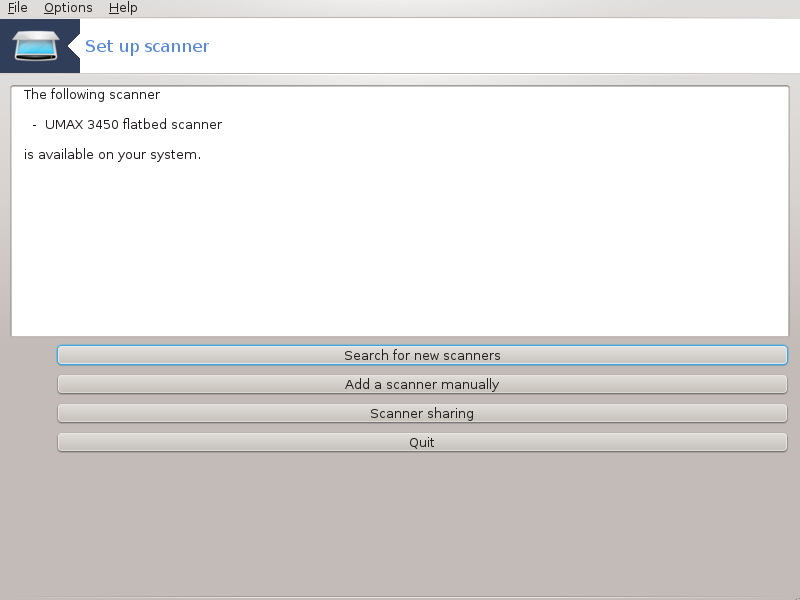
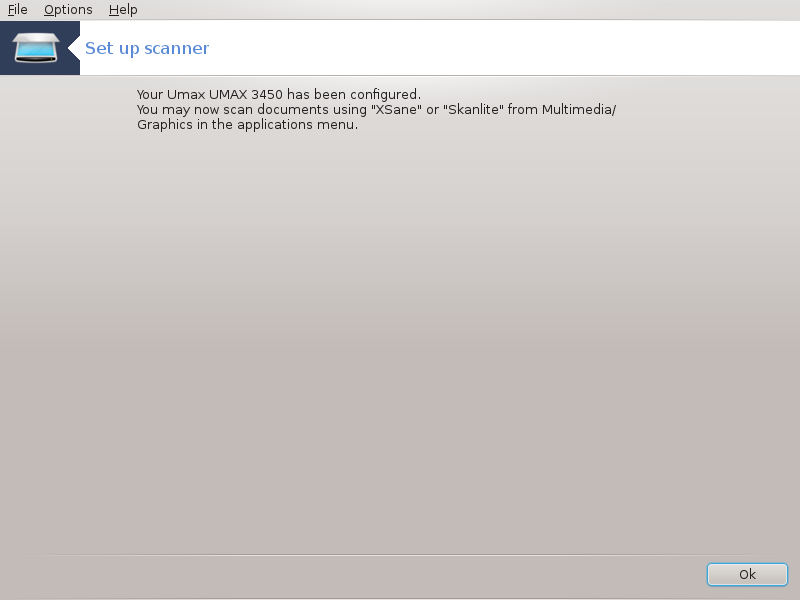
If your scanner is identified correctly, so if in the above screen you see the name of your scanner, the scanner is ready for use with, for instance, XSane or Simple Scan.
In that case, you might now want to want to configure the Scanner sharing option. You can read about it in the “Scannersharing”.
However, if your scanner hasn't been correctly identified, and checking its cable(s) and power switch and then pressing Search for new scanners doesn't help, you'll need to press Add a scanner manually.
Choose the brand of your scanner in the list you see, then its type from the list for that brand and click Ok
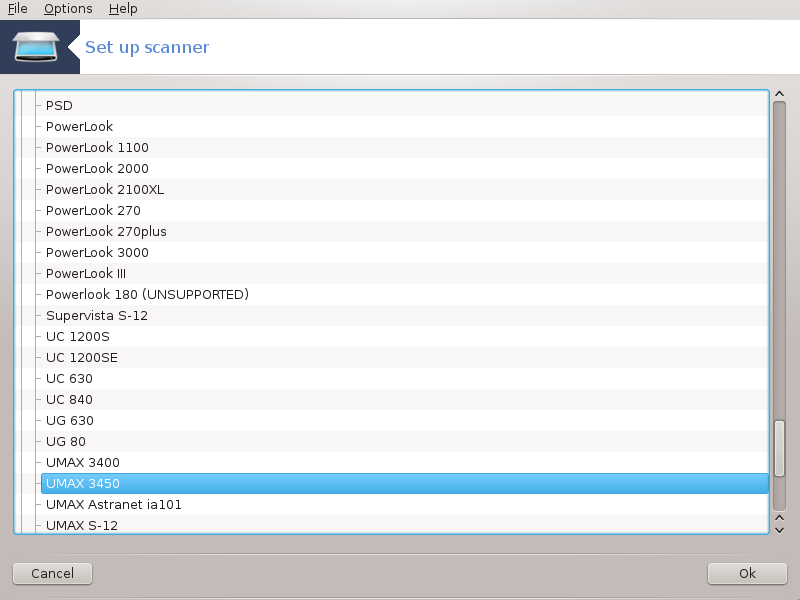
Nota
If you can't find your scanner in the list, then click Cancel
Please check whether your scanner is supported on the SANE: Supported Devices page and ask for help in the forums.
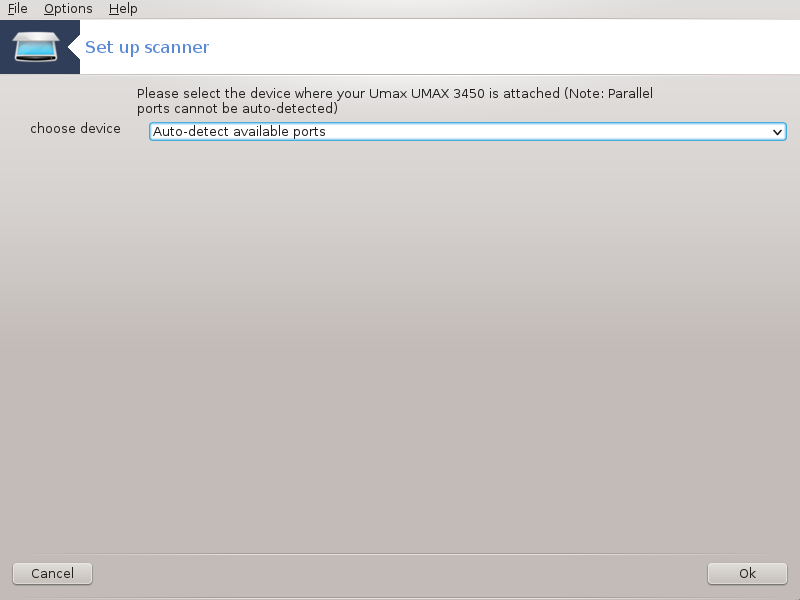
You can leave this setting to Auto-detect available ports unless your scanner's interface is a parallel port. In that case, select /dev/parport0 if you have only one.
After clicking Ok, in most cases you will see a screen similar to the one below.
If you don't get that screen, then please read the “Extra installation steps”.
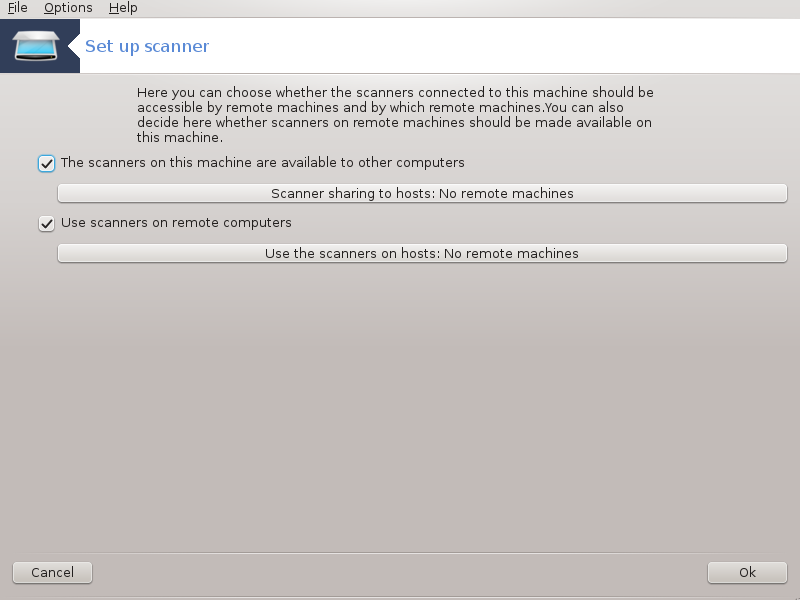
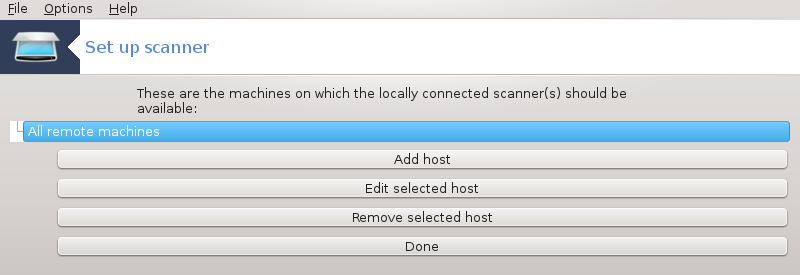
Here you can choose whether the scanners connected to this machine should be accessible by remote machines and by which remote machines. You can also decide here whether scanners on remote machines should be made available on this machine.
Scanner sharing to hosts : name or IP address of hosts can be added or deleted from the list of hosts allowed to access the local device(s), on this computer.
Usage of remote scanners : name or IP address of hosts can added or deleted from the list of hosts which give access to a remote scanner.
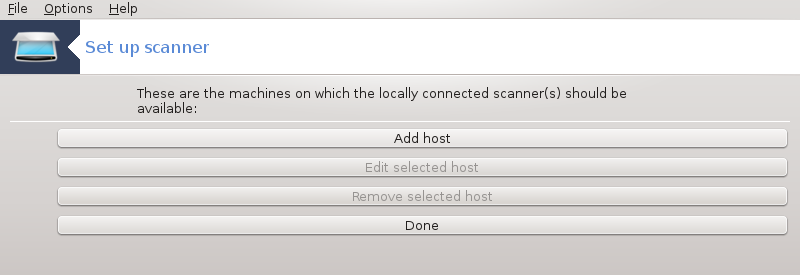
Scanner sharing to hosts: you can add host.
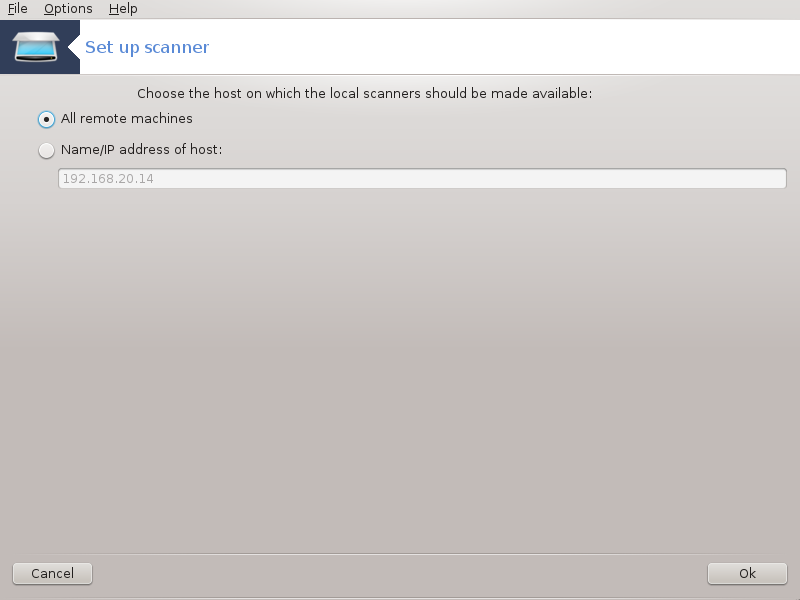
Scanner sharing to hosts: specify which host(s) to add, or allow all remote machines.
"All remote machines" are allowed to access the local scanner.
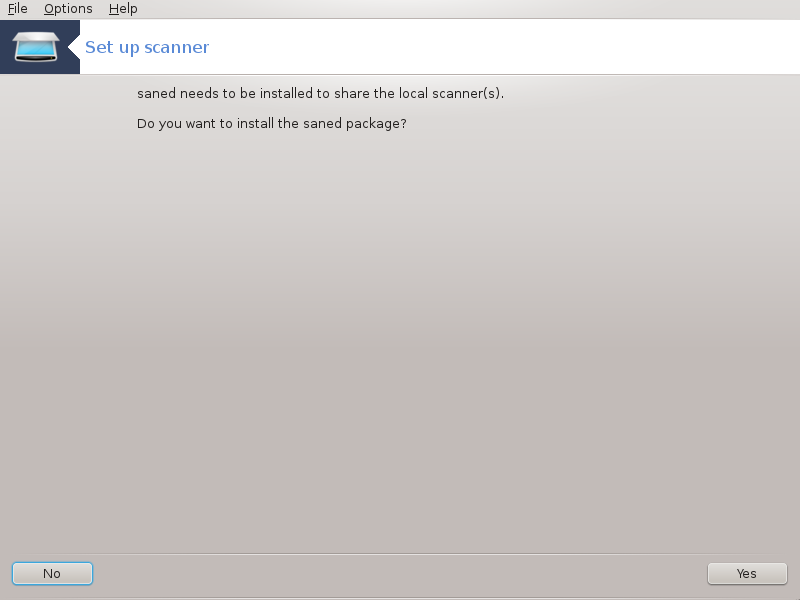
If the package saned is not yet installed, the tool offers to do it.
At the end, the tool will alter these files:
/etc/sane.d/saned.conf
/etc/sane.d/net.conf
/etc/sane.d/dll.conf to add or comment the directive "net"
It will also configure saned and xinetd to be started on boot.
Hewlett-Packard
Most HP scanners are managed from HP Device Manager (hplip) which also manages printers. In this case, this tool does not allow you to configure it and invites you to use HP Device Manager.
Epson
Drivers are available from this page. When indicated, you must install the iscan-data package first, then iscan (in this order). It is possible that the iscan package will generate a warning about a conflict with sane. Users have reported that this warning can be ignored.
It is possible that after selecting a port for your scanner in the Figura 1, “Choose port” screen, you need to take one or more extra steps to correctly configure your scanner.
In some cases, you're told the scanner needs its firmware to be uploaded each time it is started. This tool allows you to load it into the device, after you installed it on your system. In this screen you can install the firmware from a CD or a Windows installation, or install the one you downloaded from an Internet site of the vendor.
When your device's firmware needs to be loaded, it can take a long time at each first usage, possibly more than one minute. So be patient.
Also, you may get a screen telling you to adjust the /etc/sane.d/"name_of_your_SANE_backend".conf file.
Read those or other instructions you get carefully and if you don't know what to do, feel free to ask for help in the forums.

This page hasn't been written yet for lack of resources. If you think you can write this help, please contact the Doc team. Thanking you in advance.
You can start this tool from the command line, by typing drakups as root.
[11] You can start this tool from the command line, by typing harddrake2 as root.
[12] You can start this tool from the command line, by typing draksound as root.
[13] Podeu iniciar aquesta eina des de la línia d'ordres, escrivint drak3d com a root.
[14] You can start this tool from the command line, by typing XFdrake as normal user or drakx11 as root. Mind the capital letters.
[15] You can start this tool from the command line, by typing keyboarddrake as root.
[16] You can start this tool from the command line, by typing mousedrake as root.
[17] You can start this tool from the command line, by typing system-config-printer. The root password will be asked for.
[18] You can start this tool from the command line, by typing scannerdrake as root.
