

The particular Welcome Screen that you will see when booting with the NetInstall media depends on whether you are booting on a BIOS or UEFI system. See the following two screenshots:
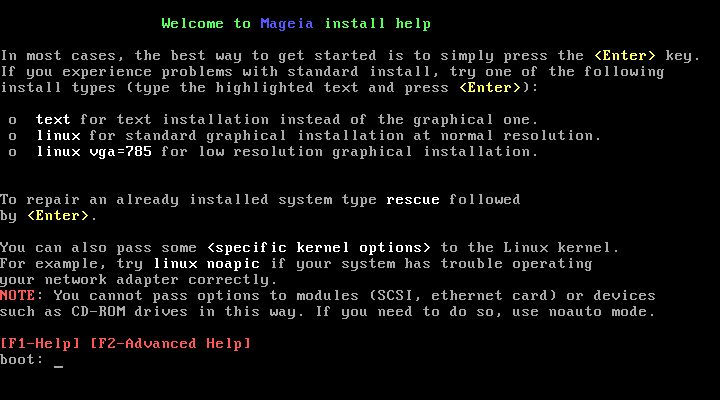
When booting up, you can choose to read the advanced help by pressing F2 and return to the installer screen by pressing F1. Otherwise, the boot will continue with default settings.
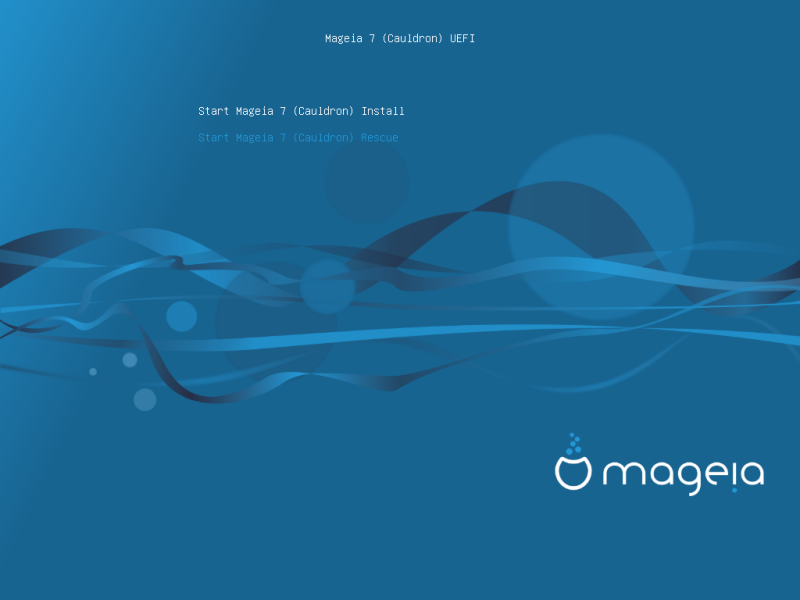
Use the arrow keys to highlight Start Mageia Install and then press Enter.
For both BIOS and UEFI systems, you will then see a pop-up notification saying that USB devices are being detected:

You can now choose an installation method via CDROM/HDD or Server (NFS, FTP or HTTP).
You also have the option to load third-party modules at this point.
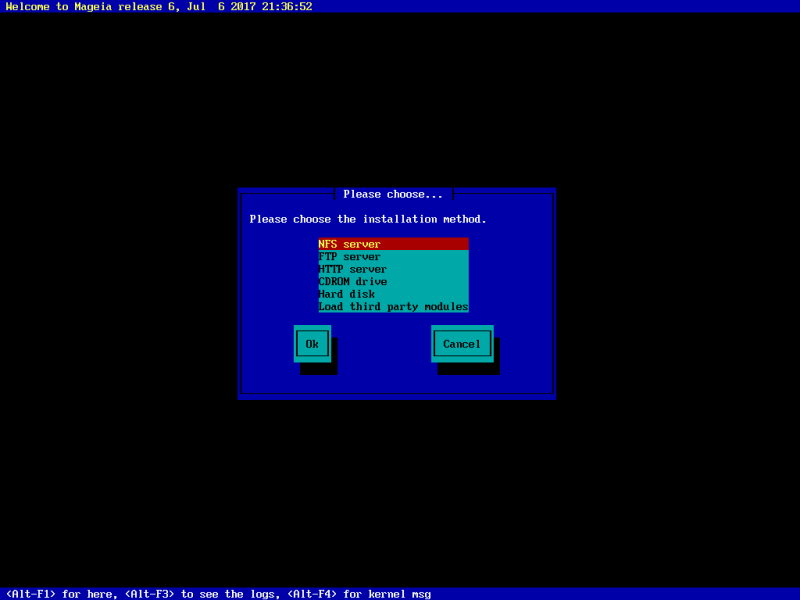
Move up or down the list using the arrow keys until the appropriate method of installation is highlighted.
Press the Tab key until Ok is highlighted and then press Enter.
If you don't know what to choose for a Network Installation, choose FTP server.
On an enterprise network, FTP and rsync may be blocked, so using HTTP server is a good choice in this case.
After choosing any of the server options you will automatically proceed to the Network Connection section.
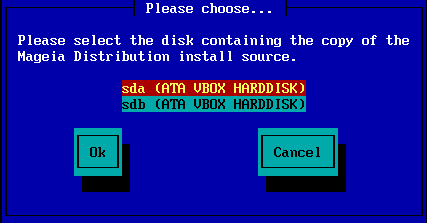
If you choose to install from either a CDROM or hard disk (or USB stick), a scan for storage devices will be performed:

First, select the relevant hard drive (or USB stick)
Followed by the relevant partition
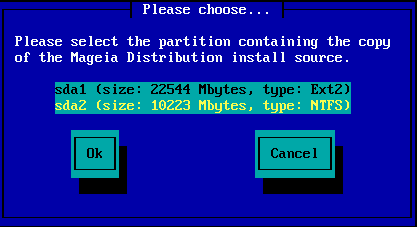
Then specify the directory or the file name of the ISO
Leaving this open, or using the directory is easier, because the installer then presents you with a list of directories and files from which you can make your selection using the up and down arrows, as seen in the second of the following images.

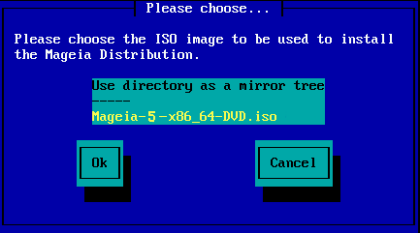
Once the information has been provided for the location of the ISO, either on CDROM or HDD, you will automatically proceed to Stage 2 (the actual installation stage).

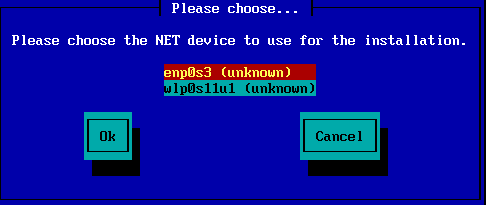
If you chose any of the server options at the Installation Method step, you will then be asked to choose a network device:
Now you need to choose whether the network device will use a DHCP, Static or ADSL connection:
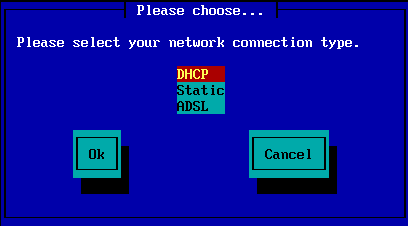
If you are unsure which option is suitable, then you should probably accept the default option (DHCP).
Si és necessari, ara podeu proporcionar els vostres noms d'amfitrió i domini:
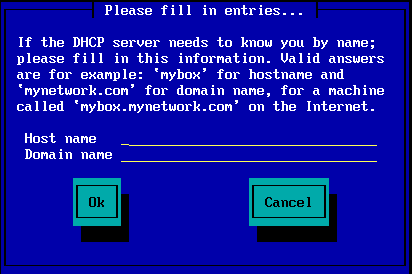
If you are unsure what this means then you can just leave the fields blank, highlight Ok and press Enter to proceed. The network connection will now be activated.
If you are using either FTP or HTTP, you will automatically proceed to the Mirrors section
If you are using NFS, you will be asked for the NFS server name and the directory containing the Mageia distribution:
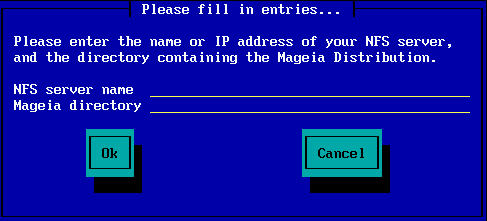
After entering the NFS details, you will automatically proceed to Stage 2 (the actual installation stage).
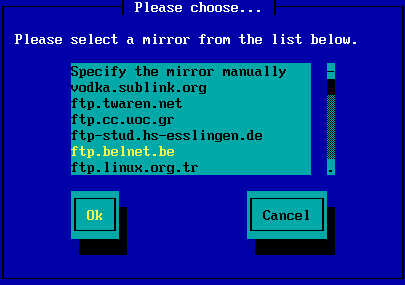
If using FTP or HTTP, you now have to specify a mirror to use. This can be done manually or by choosing from a list
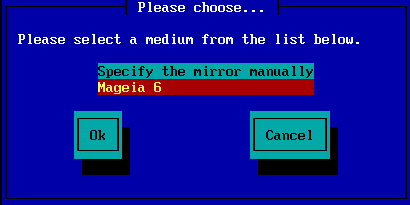
You will find a list of all available mirrors here: http://mirrors.mageia.org/
Whichever mirror you choose, it should use the same tree-like structure from "mageia" (or "Mageia") as used by the official Mageia mirrors. That means .../mageia/distrib/<version>/<arch>
A correct entry (when using an official mirror) in the Mageia directory field below, could be:
pub/linux/mageia/distrib/cauldron/i586
Another example (for Mageia 6 x86_64) could be:
pub/Mirrors/Mageia/distrib/6/x86_64
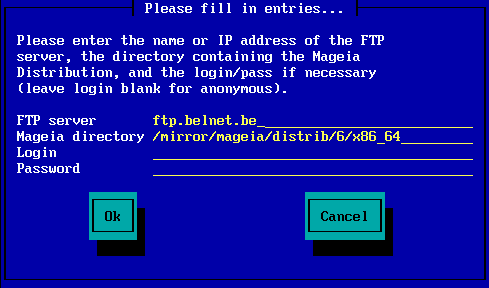
Other mirrors may have a different path structure and the screenshots below show such examples:
Si utilitzeu un servidor FTP:
Si utilitzeu un servidor HTTP:
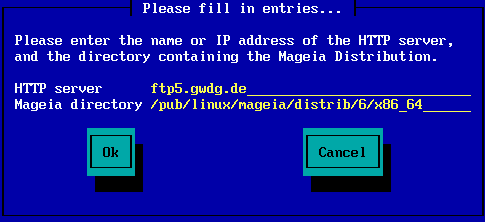
Once this information has been provided, you will automatically proceed to Stage 2 (the actual installation stage).
Si obteniu molts errors de dependències no resoltes després, a la instal·lació; reinicieu i proveu una rèplica diferent.
After choosing an FTP server, you will see a screen where you can optionally add a login name and password if required.

Once this information has been provided, you will automatically proceed to Stage 2 (the actual installation stage).
