

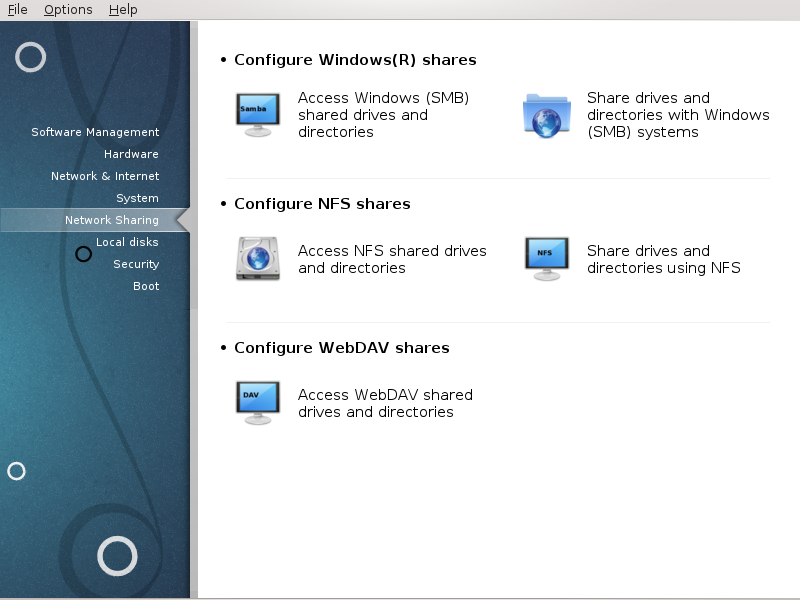
In this screen you can choose between several tools for sharing drives and directories. Click on a link below to learn more.
Konfiguracja udziałów Windows (R)
„Dostęp do napędów i katalogów udostępnianych przez systemy Windows (SMB)”
„Share directories and drives with Samba” = Share drives and directories with Windows (SMB) systems
Konfiguracja udziałów NFS
Konfiguracja udziałów WebDAV
This tool[35] allows you to declare which shared directories to be accessible to all users on the machine. The protocol used for this is SMB which has been popularized on Windows(R) systems. The shared directory will be available directly at boot. Shared directories can be also accessed directly in a single session by a user with tools such as file browsers.
Before starting the tool, it is a good idea to declare the names of available servers, for example with „Definicje hostów”
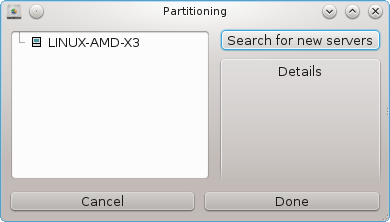
Select to obtain a list of servers who share directories.
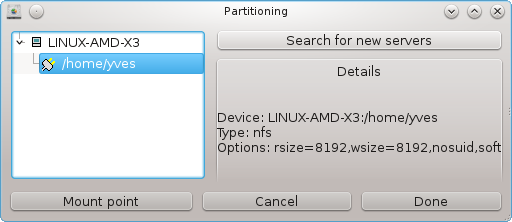
Click on the server name and on > before the server name to display the list of the shared directories and select the directory you want to access.
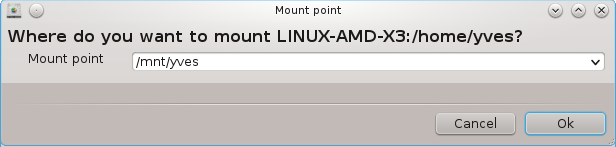
The button will become available, you have to specify where to mount the directory.
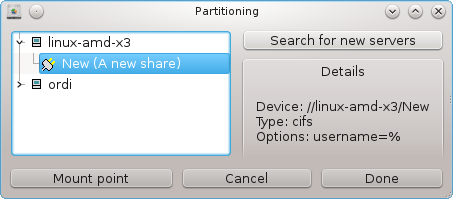
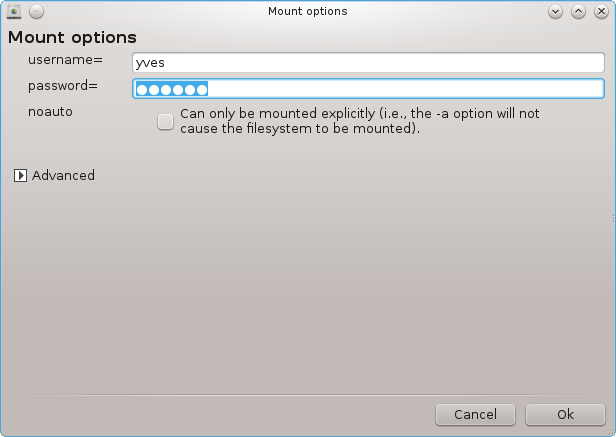
After choosing the mount point, it can be mounted with the . You can also verify and change some options with the button.
In options, you can specify the user name and the password of those able to connect to the SMB server. After mounting the directory, you can unmount it with the same button.

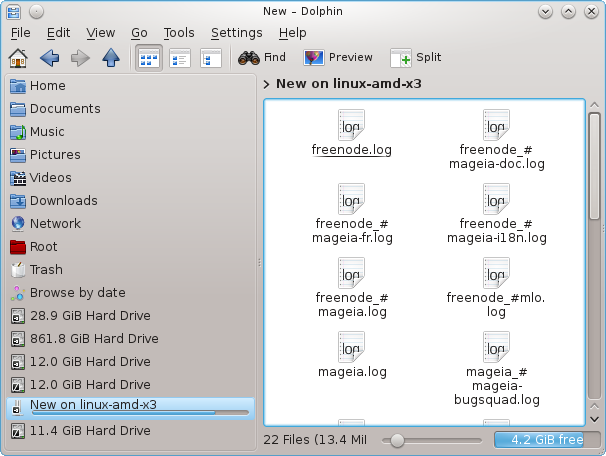
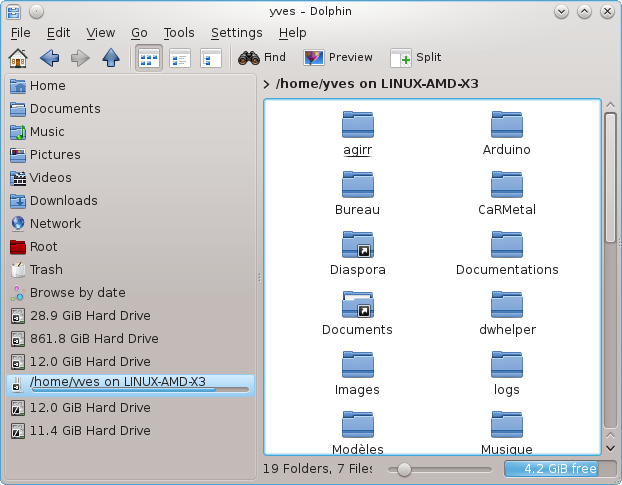
After accepting the configuration with the Done button, a message will ask "Do you want to save the /etc/fstab modifications". Saving, will allow directory to made available at each boot, if the network is accessible. The new directory is then available in your file browser, for example in dolphin.
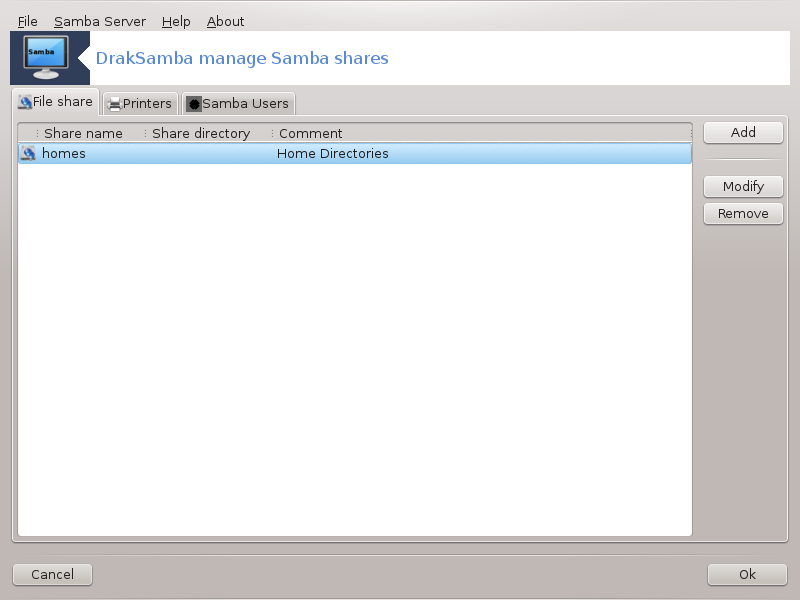
Samba is a protocol used in different Operating Systems to share some resources like directories or printers. This tool allows you to configure the machine as a Samba server using the protocol SMB/CIFS. This protocol is also used by Windows(R) and workstations with this OS can access the resources of the Samba server.
To be accessed from other workstations, the server has to have a fixed IP address. This can be specified directly on the server, for example with „Centrum konfiguracji sieci”, or at the DHCP server which identifies the station with its MAC-address and give it always the same address. The firewall has also to allow the incoming requests to the Samba server.
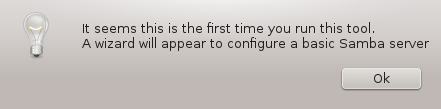
At the first run, the tools [36] checks if needed packages are installed and proposes to install them if they are not yet present. Then the wizard to configure the Samba server is launched.
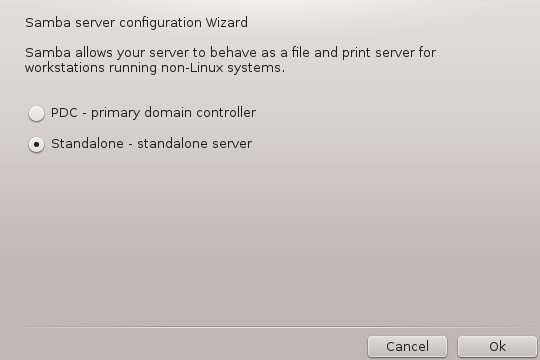
In the next window the Standalone server configuration option is already selected.
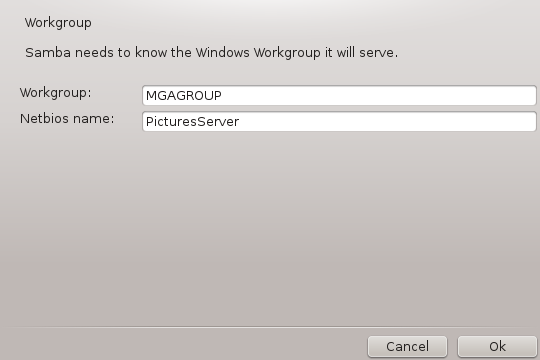
Then specify the name of the workgroup. This name should be the same for the access to the shared resources.
The netbios name is the name which will be used to designate the server on the network.
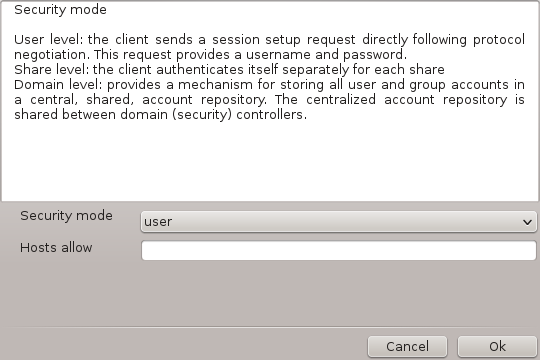
Choose the security mode:
user: the client must be authorized to access the resource
share: the client authenticates itself separately for each share
You can specify which hosts are allowed to access the resources, with IP address or host name.
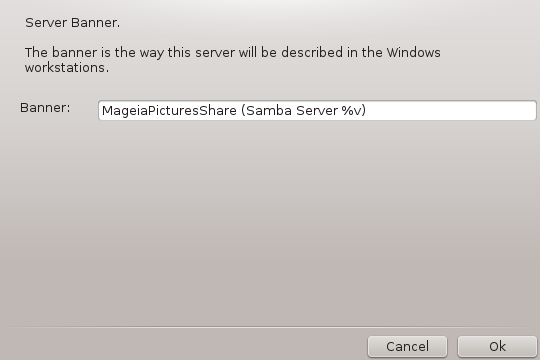
Specify the server banner. The banner is the way this server will be described in the Windows workstations.
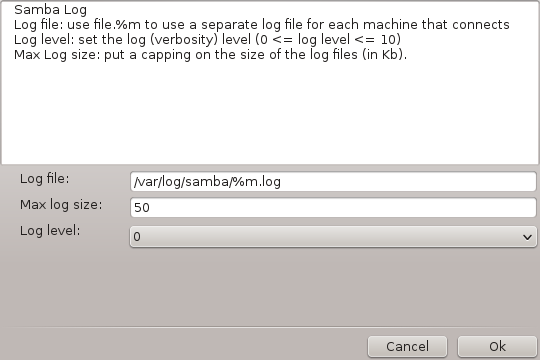
The place where Samba can log information can be specified at the next step.
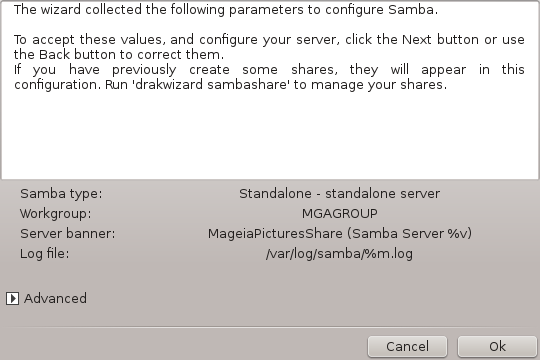
The wizard displays a list of the chosen parameters before you accept the
configuration. When accepted, the configuration will be written in
/etc/samba/smb.conf.
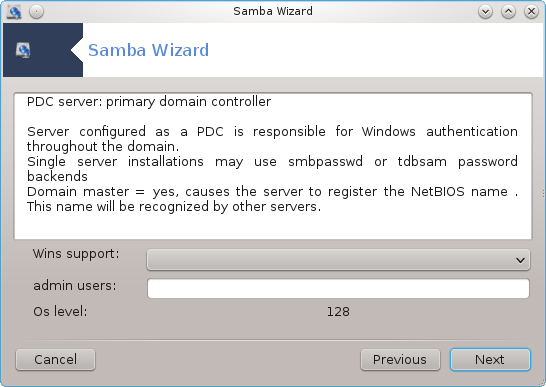
If the "Primary domain controller" option is selected, the wizard asks for indication if Wins is to support or not and to provide admin users names. The following steps are then the same as for standalone server, except you can choose also the security mode:
domain: provides a mechanism for storing all user and group accounts in a central, shared, account repository. The centralized account repository is shared between (security) controllers.
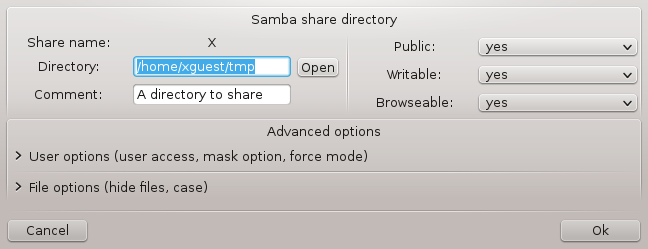
With the button, we get:
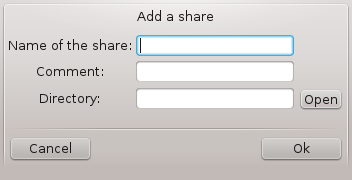
A new entry is thus added. It can be modified with the button. Options can be edited, such as whether the directory is visible to the public, writable or browseable. The share name can not be modified.
When the list has at least one entry, menu entries can be used.
File|Write conf. Save the current configuration in /etc/samba/smb.conf.
Samba server|Configure. The wizard can be run again with this command.
Samba server|Restart. The server is stopped and restarted with the current configuration files.
Samba Server|Reload. The configuration displayed is reloaded from the current configuration files.
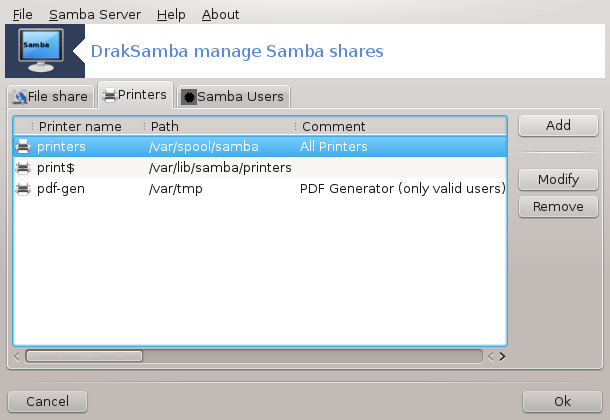
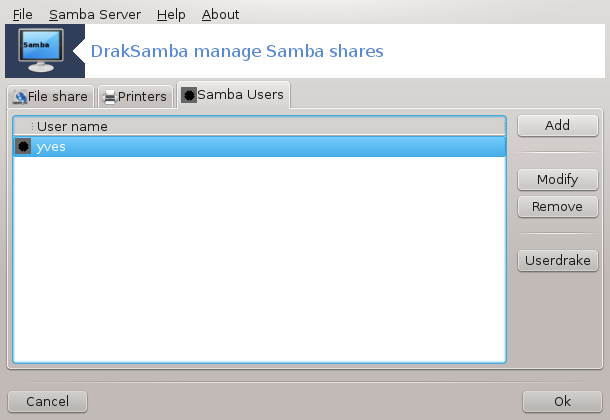
In this tab, you can add users who are allowed to access the shared resources when authentication is required. You can add users from „Użytkownicy i grupy”
.
This tool[37] allows you to declare some shared directories to be accessible to all users on the machine. The protocol used for this is NFS which is available on most Linux or Unix systems. The shared directory will be thus available directly at boot. Shared directories can be also accessible directly in a single session for a user with tools such as file browsers.
Select to obtain a list of servers which share directories.
Click on the > symbol before the server name to display the list of the shared directories and select the directory you want to access.
The button will be available and you have to specify where to mount the directory.
After choosing the mount point, You can mount it. You can also verify and change some options with the button. After mounting the directory, you can unmount it with the same button.
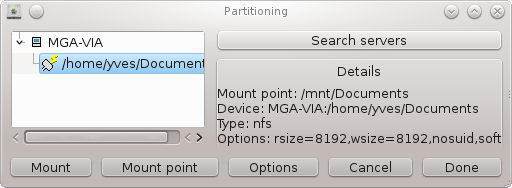
On accepting the configuration with the button, a message will displayed, asking "Do you want to save the /etc/fstab modifications". This will make the directory available at each boot, if the network is accessible. The new directory is then available in your file browser, for example in Dolphin.
When the wizard[38] is launched for the first time, it may display the following message:
The package nfs-utils needs to be installed. Do you want to install it?
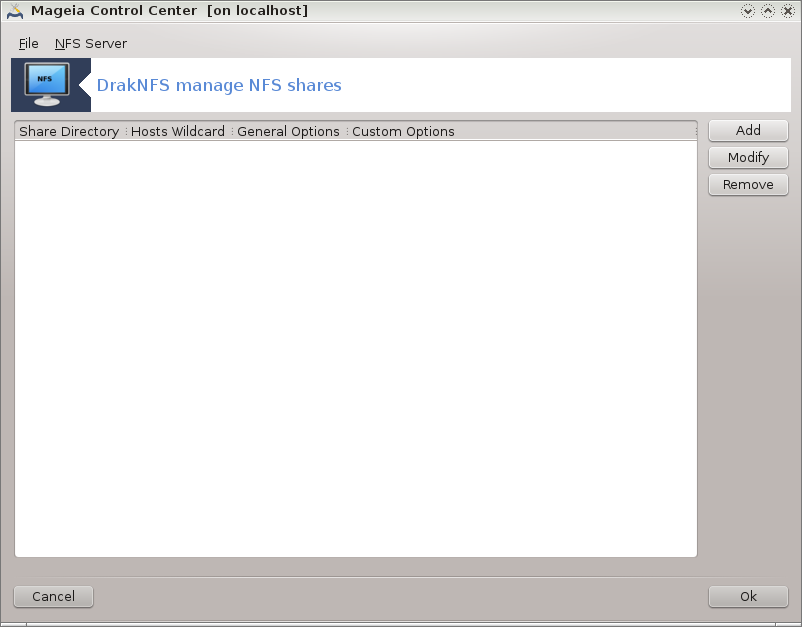
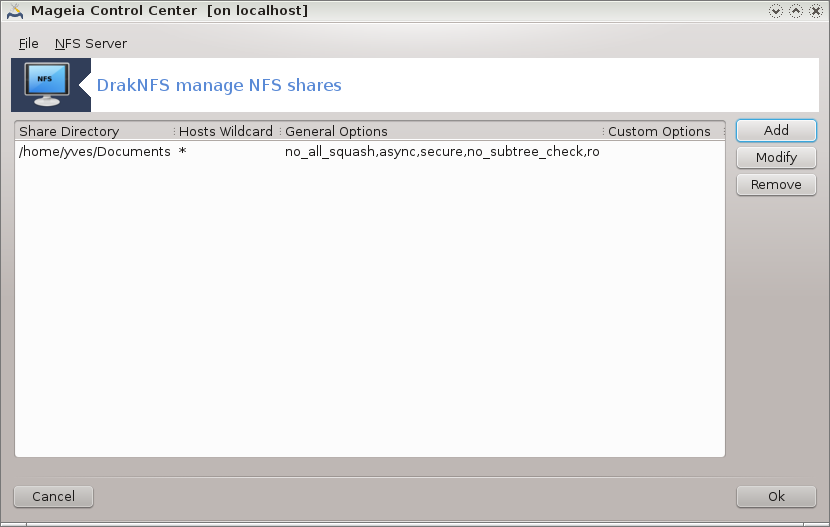
After completing the installation, a window with an empty list is displayed.
A list of directories which are shared is displayed. At this step, the list is empty. The button gives access to a configuration tool.
The configuration tool is labeled "Modify entry". It may be also launched with the button. The following parameters are available.
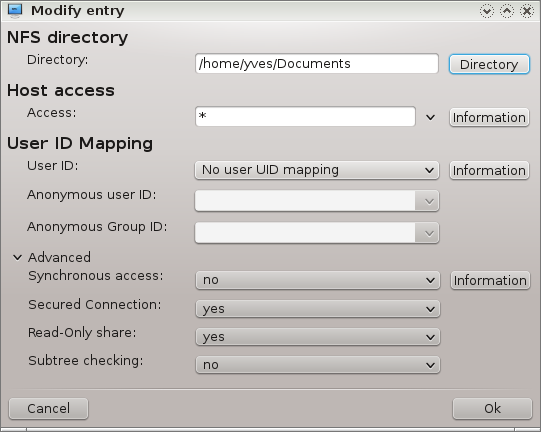
Here you can specify which directory is to be shared. The button gives access to a browser to choose it.
Here you can specify the hosts that are authorized to access the shared directory.
NFS clients may be specified in a number of ways:
single host: a host either by an abbreviated name recognized be the resolver, fully qualified domain name, or an IP address
netgroups: NIS netgroups may be given as @group.
wildcards: machine names may contain the wildcard characters * and ?. For instance: *.cs.foo.edu matches all hosts in the domain cs.foo.edu.
IP networks: you can also export directories to all hosts on an IP (sub-)network simultaneously. For example, either `/255.255.252.0' or `/22' appended to the network base address.
map root user as anonymous: maps requests from uid/gid 0 to the anonymous uid/gid (root_squash). The root user from the client cannot read or write to the files on the server which are created by root on the server itself.
allow real remote root access: turn off root squashing. This option is mainly useful for diskless clients (no_root_squash).
map all users to anonymous user: maps all uids and gids to the anonymous user (all_squash). Useful for NFS-exported public FTP directories, news spool directories, etc. The opposite option is no user UID mapping (no_all_squash), which is the default setting.
anonuid and anongid: explicitly set the uid and gid of the anonymous account.
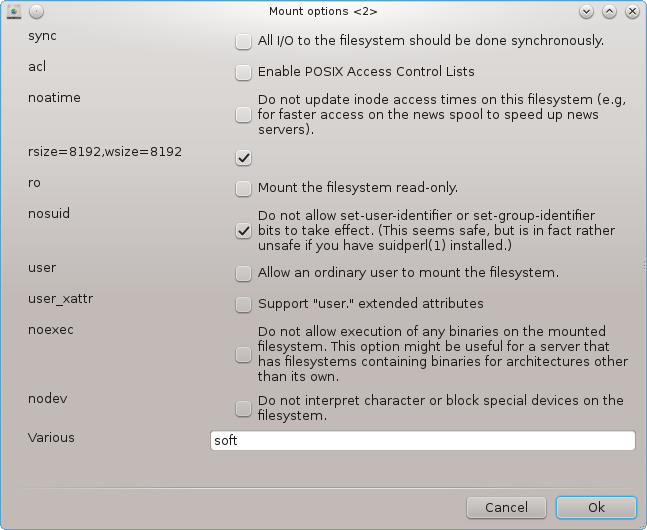
Secured Connection: this option requires that requests originate on an internet port less than IPPORT_RESERVED (1024). This option is on by default.
Read-Only share: allow either only read or both read and write requests on this NFS volume. The default is to disallow any request which changes the filesystem. This can also be made explicit by using this option.
Synchronous access: prevents the NFS server from violating the NFS protocol and to reply to requests before any changes made by these requests have been committed to stable storage (e.g. disc drive).
Subtree checking: enable subtree checking which can help improve security in some cases, but can decrease reliability. See exports(5) man page for more details.
To narzędzie[39] można znaleźć w Centrum Sterowania Mageia, pod zakladką Udostępnianie plików, etykietowane Konfiguracja udziałów WebDAV.
WebDAV to protokół umożliwiający zamontowanie katalogu z serwera WWW lokalnie, tak że wydaje się, że jest lokalnym katalogiem. Obecność oprogramowania WebDAV jest konieczna na zdalnym serwerze. Konfiguracja serwera WebDAV nie jest celem tego narzędzia.
Pierwszy ekran tego narzędzia wyświetla skonfigurowane wpisy, jeśli one istnieją, oraz przycisk . Aby utworzyć nowy wpis kliknij przycisk. Podaj URL serwera w odpowiedniej dziedzinie na nowym ekranie.
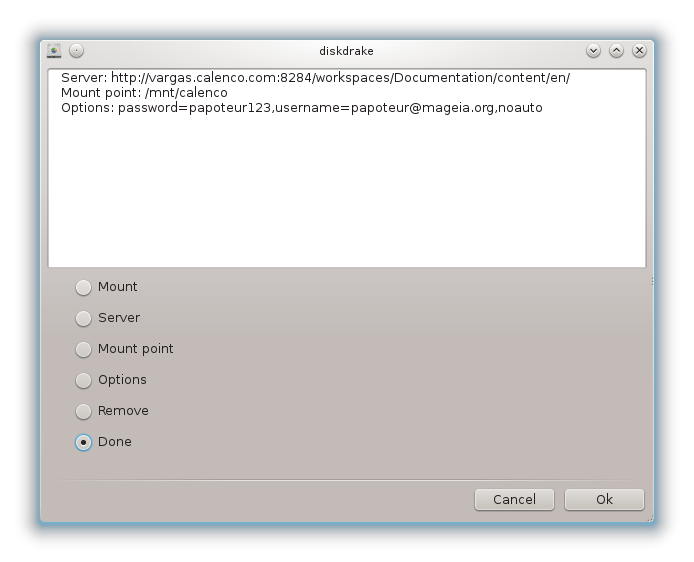
Then you get a screen with radio buttons to select some actions. Continue with the action by clicking after selecting the radio button, as the is already configured. You can however correct it, if needed.
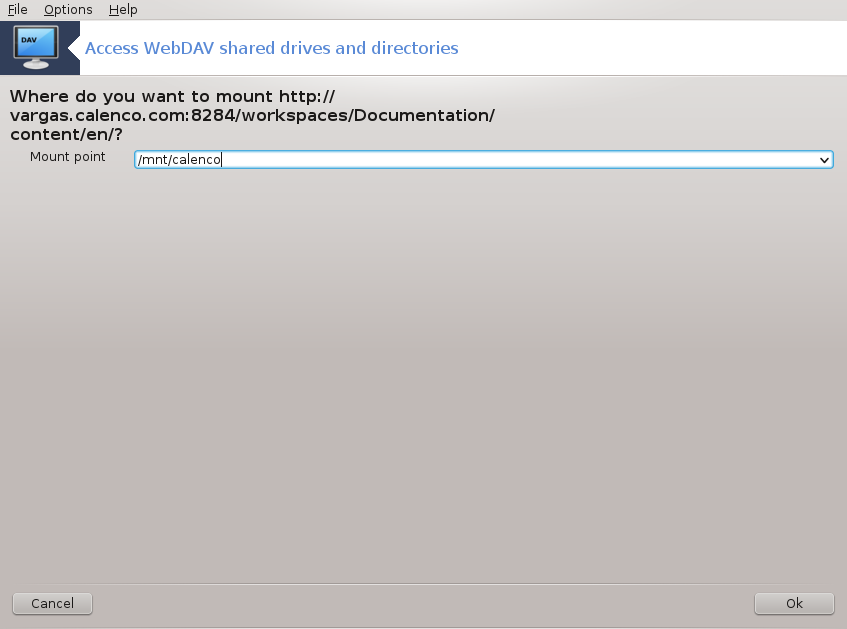
Zawartość katalogu zdalnego będzie dostępna poprzez tego punktu montowania.
In the next step, give your user name and password. If you need some other options, you can give them in the screen.

Opcja pozwala ci natychmiastowo uzyskać dostęp.
After you accepted the configuration with the radio button , the first screen is displayed again and your new mount point is listed. After you choose , you are asked whether or not to save the modifications in /etc/fstab. Choose this option if you want that the remote directory is available at each boot. If your configuration is for one-time usage, do not save it.
[35] You can start this tool from the command line, by typing diskdrake --smb as root.
[36] You can start this tool from the command line, by typing draksambashare as root.
[37] Możesz uruchomić to narzędzie z linii komend, wpisując diskdrake --nfs jako root.
[38] You can start this tool from the command line, by typing draknfs as root.
[39] Można uruchomić to narzędzie z wiersza poleceń, wpisując disdrake --dav jako root.
