

Whether you are new to GNU-Linux or an experienced user, the Mageia Installer is designed to help make your installation or upgrade as easy as possible.
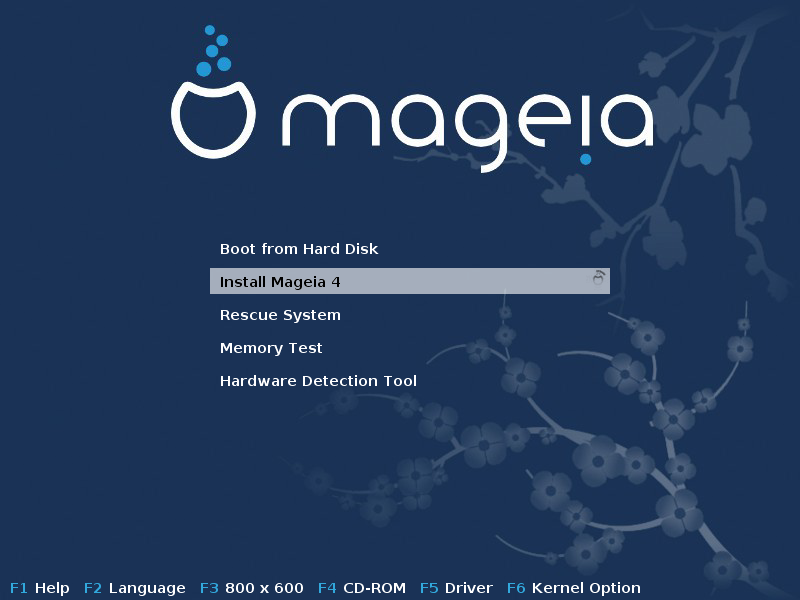
The initial menu screen has various options, however the default one will start the installer, which will normally be all that you will need.
Figure 1. Installation Welcome Screen
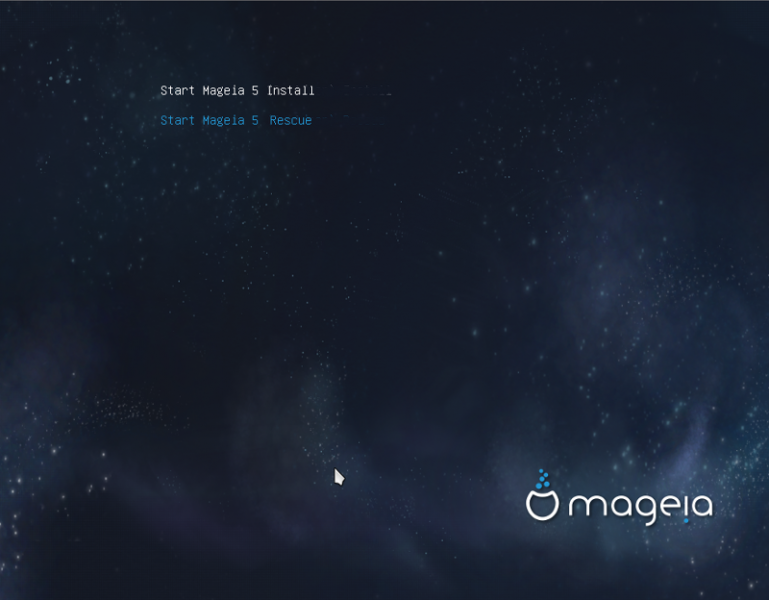
Here are the default welcome screens when using a Mageia DVD, The first one with a legacy system and the second one with an UEFI system:
From this first screen, it is possible to set some personal preferences:
The language (for the installation only, may be different that the chosen language for the system) by pressing the key F2 (Legacy mode only)
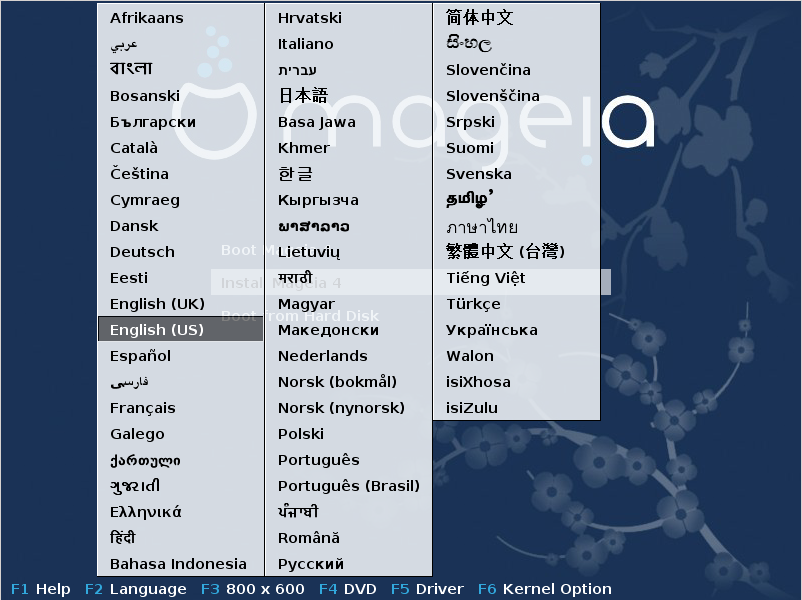
Use the arrow keys to select the language and press the key Enter.
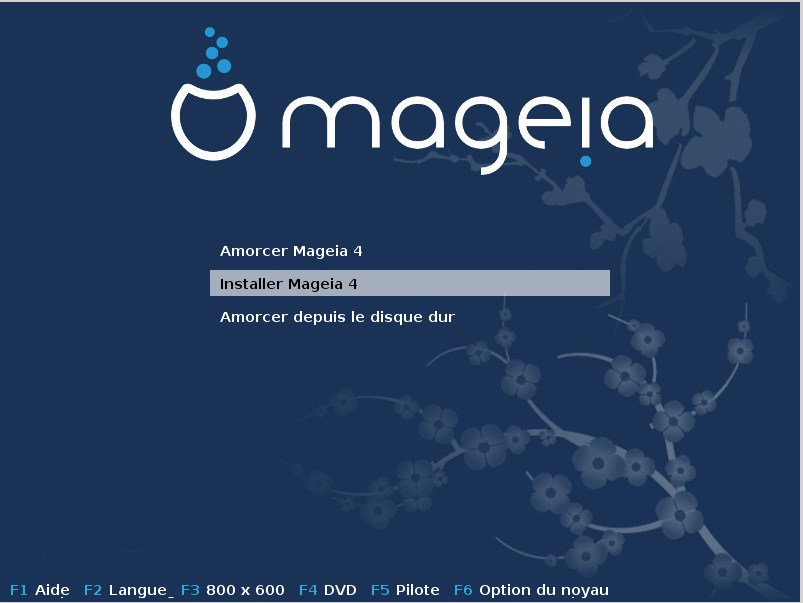
Here is for example, the French welcome screen when using a Live DVD/CD. Note that the Live DVD/CD menu does not propose: Rescue System, Memory test and Hardware Detection Tool.
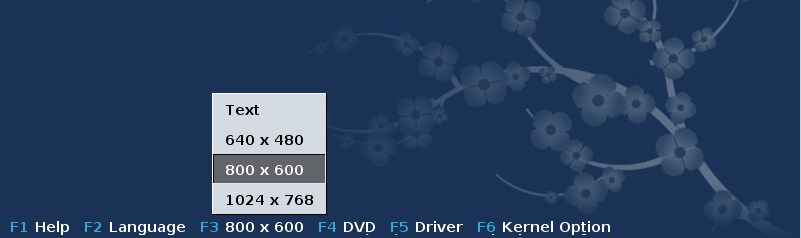
Change the screen resolution by pressing the F3 key (Legacy mode only).
Add some kernel options by pressing the F6 key for the legacy mode or the e key for the UEFI mode.
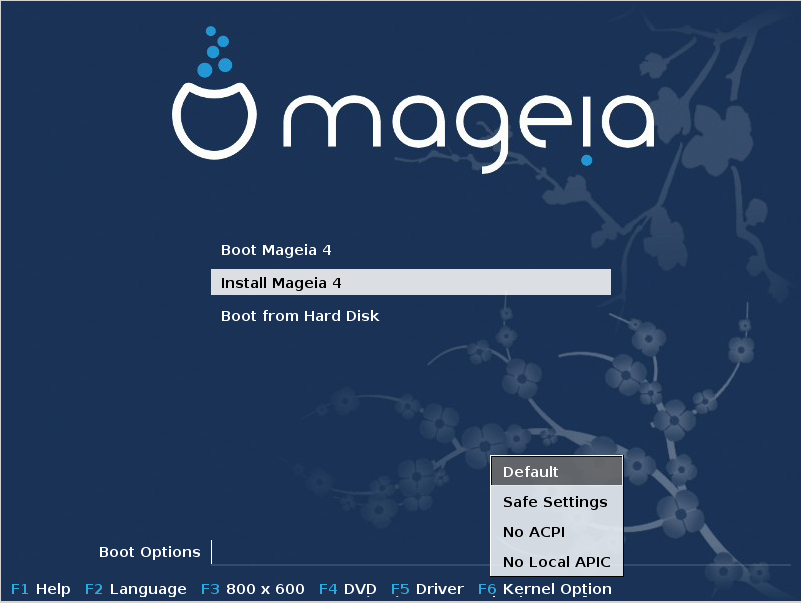
If the installation fails, then it may be necessary to try again using one of the extra options. The menu called by F6 displays a new line called Boot options and propose four entries:
- Default, it doesn't alter anything in the default options.
- Safe Settings, priority is given to the safer options to the detriment of performances.
- No ACPI (Advanced Configuration and Power Interface), power management isn't taken into account.
- No Local APIC (Local Advanced Programmable Interrupt Controller), it is about CPU interruptions, select this option if you are asked for.
When you select one of these entries, it modifies the default options displayed in the Boot Options line.
Note
In some Mageia releases, it may happen that the entries selected with the key F6 does not appear in the Boot Options line, however, they are really taken into account.
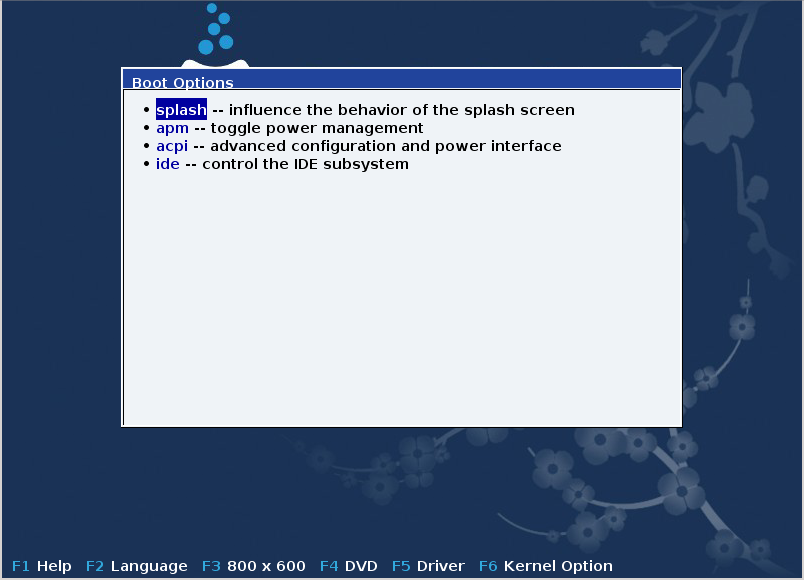
Add more kernel options by pressing the key F1 (Legacy mode only).
Pressing F1 opens a new window with more available options. Select one with the arrow keys and press Enter to have more details or press the Esc key to go back to the welcome screen.
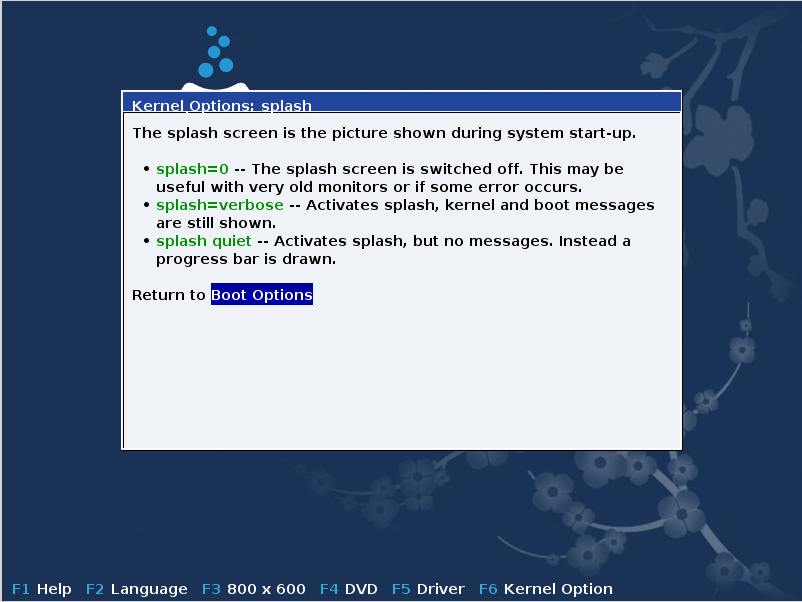
The detailed view about the option splash. Press Esc or select Return to Boot Options to go back to the options list. These options can by added by hand in the Boot options line.
Note
The help is translated in the chosen language with the F2 key.
For more information about kernel options on legacy and UEFI systems, see: https://wiki.mageia.org/en/How_to_set_up_kernel_options
Here is the default welcome screen when using a Wired Network-based Installation CD (Boot.iso or Boot-Nonfree.iso images):
It does not allow to change the language, the available options are described in the screen. For more information about using a Wired Network-based Installation CD, see the Mageia Wiki
Warning
The keyboard layout is the American one.

The install process is divided into a number of steps, which can be followed on the side panel of the screen.
Each step has one or more screens which may also have buttons with extra, less commonly required, options.
Most screens have buttons which give further explanations about the current step.
Note
If somewhere during install you decide to stop the installation, it is possible to reboot, but please think twice before you do this. Once a partition has been formatted or updates have started to be installed, your computer is no longer in the same state and rebooting it could very well leave you with an unusable system. If in spite of this you are very sure rebooting is what you want, go to a text terminal by pressing the three keys at the same time. After that, press simultaneously to reboot.
After the initial screen you did not reach the language selection screen. This can happen with some graphic cards and older systems. Try using low resolution by typing
vgaloat the prompt.If the hardware is very old, a graphical installation may not be possible. In this case it is worth trying a text mode installation. To use this hit ESC at the first welcome screen and confirm with ENTER. You will be presented with a black screen with the word "boot:". Type "text" and hit ENTER. Now continue with the installation in text mode.
If the system appeared to freeze during the installation, this may
be a problem with hardware detection. In this case the automatic
detection of hardware may be bypassed and dealt with later. To try this,
type noauto at the prompt. This option may also be combined
with other options as necessary.
These will rarely be needed, but in some cases the hardware may
report the available RAM incorrectly. To specify this manually, you can
use the mem=xxxM parameter, where xxx is the correct amount
of RAM. e.g. mem=256M would specify 256MB of RAM.
If you converted your hard disk from "basic" format to "dynamic" format on Microsoft Windows, you must know that it is impossible to install Mageia on this disc. To go back to a basic disk, see the Microsoft documentation: http://msdn.microsoft.com/en-us/library/cc776315.aspx.
