

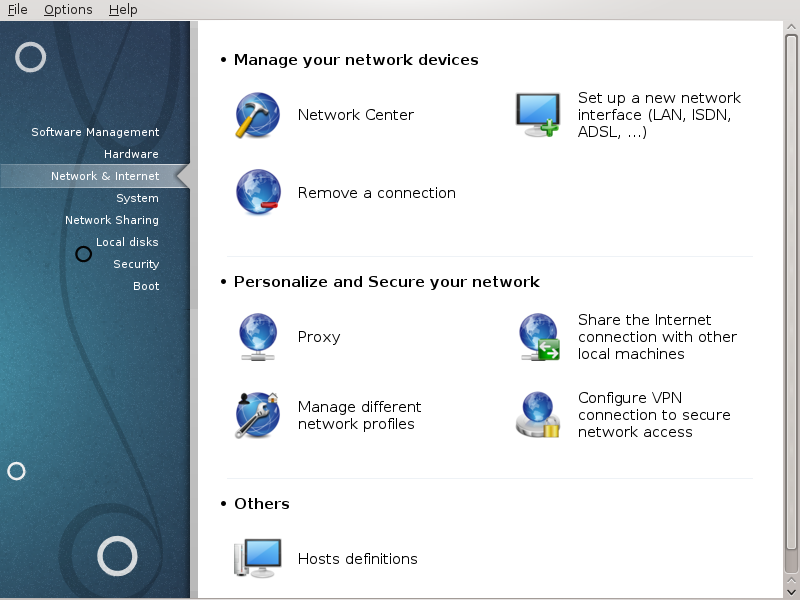
In this screen you can choose between several network tools. Click on a link below to learn more.
Upravljajte omrežne naprave
Ostalo
To orodje[19] je mogoče najti v Nadzorni plošči Mageje pod zavihkom Omrežje in Internet z imenom "Omrežni center"
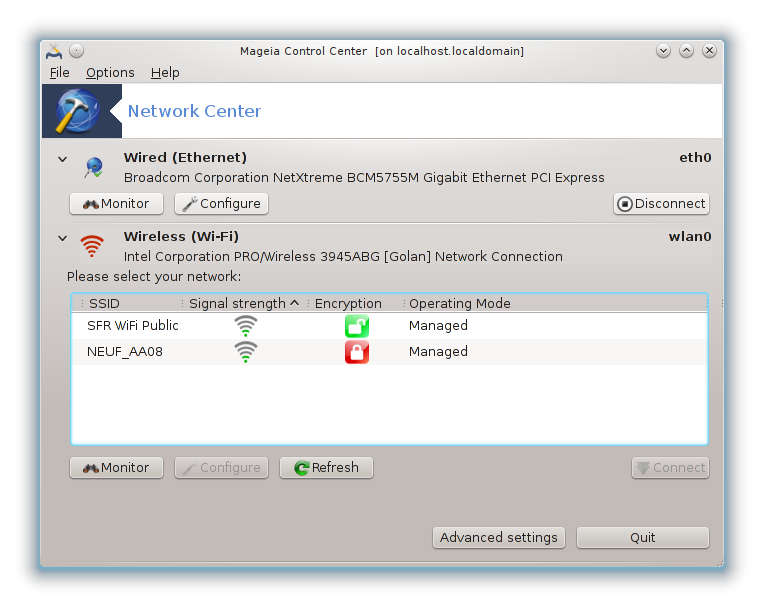
When this tool is launched, a window opens listing all the networks configured on the computer, whatever their type (wired, wireless, satellite, etc.). When clicking on one of them, three or four buttons appear, depending on the network type, to allow you to look after the network, change its settings or connect/disconnect. This tool isn't intended to create a network, for this see Set up a new network interface (LAN, ISDN, ADSL, ...) in the same MCC tab.
In the screenshot below, given as example, we can see two networks, the
first one is wired and connected, recognizable by this icon  (this one is not connected
 ) and the second section shows wireless
networks, not connected recognizable by this icon
) and the second section shows wireless
networks, not connected recognizable by this icon  and this one
  if connected. For the other network types,
the colour code is always the same, green if connected and red if not
connected.
if connected. For the other network types,
the colour code is always the same, green if connected and red if not
connected.
In the wireless part of the screen, you can also see all the detected networks, with the SSID, the Signal strengh, if they are encrypted (in red) or not (in green), and the Operating mode. Click on the chosen one and then either on , or . It is possible here to go from a network to another one. If a private network is selected, the Network Settings window (see below) will open and ask you for extra settings ( an encryption key in particular).
Click on to update the screen.
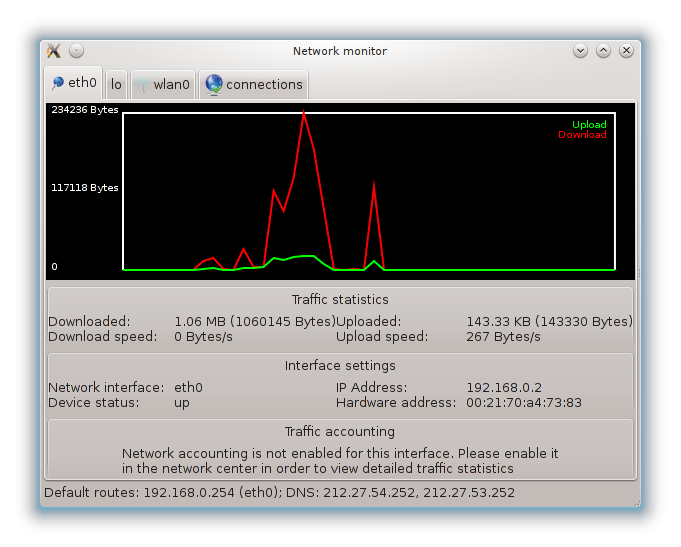
This button allows you to watch the network activity, downloads (toward the PC, in red) and uploads (toward the Internet, in green). The same screen is available by right clicking on the .
There is a tab for each network (here eth0 is the wired network, lo the local loopback and wlan0 the wireless network) and a tab connection which gives details about connection status.
Opomba
At the bottom of the window is a title Traffic accounting, we will look at that in the next section.
A - Za žično omrežje
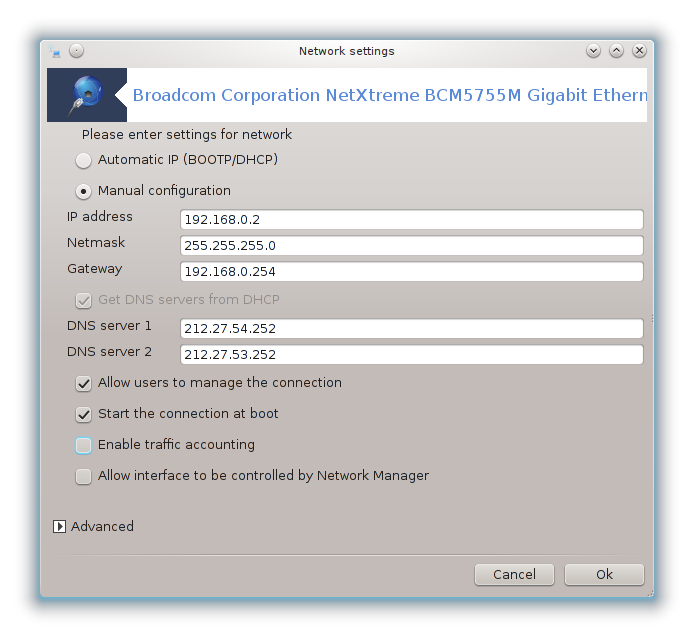
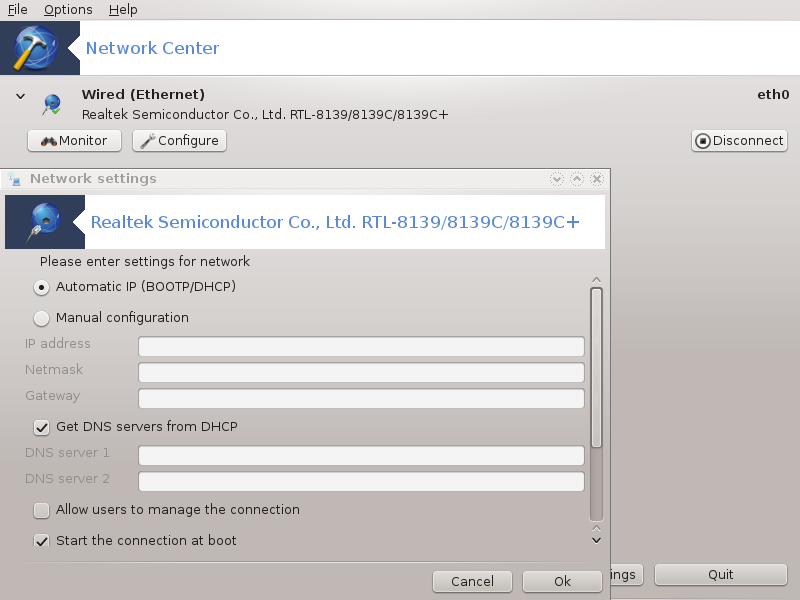
It is possible to change all the settings given during network creation. Most of the time, checking will do, but in case of problems, manual configuration may give better results.
For a residential network, the IP address always looks like 192.168.0.x, Netmask is 255.255.255.0, and the Gateway and DNS servers are available from your providers website.
if checked this will count the traffic on a hourly, daily or monthly basis. The results are visible in the Network monitor detailed in the previous section. Once enabled, you may have to reconnect to the network.
Dovoli Nadzornemu središču nadzor nad tem vmesnikom:
This section hasn't been written yet for lack of resources. If you think you can write this help, please contact the Doc team. Thanking you in advance.
This section hasn't been written yet for lack of resources. If you think you can write this help, please contact the Doc team. Thanking you in advance.
B - Za brezžično omrežje
Only the items not already seen above are explained.
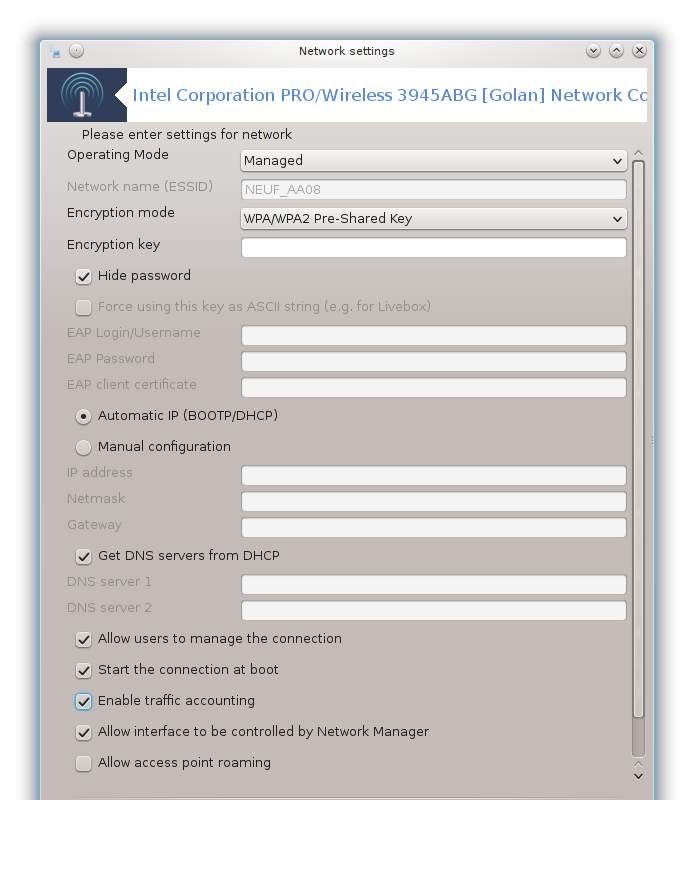
Delujoč način:
Select Managed if the connection is via an access point, there is an ESSID detected. Select Ad-hoc if it is a peer to peer network. Select Master if your network card is used as the access point, your network card needs to support this mode.
Encryption mode and Encryption key:
If it is a private network, you need to know these settings.
WEP uses a password and is weaker than WPA which uses a passphrase. WPA Pre-Shared Key is also called WPA personal or WPA home. WPA Enterprise is not often used in private networks.
Allow access point roaming:
Roaming is a technology which enables allows computer to change its access point while remaining connected to the network.
This page hasn't been written yet for lack of resources. If you think you can write this help, please contact the Doc team. Thanking you in advance.
This section hasn't been written yet for lack of resources. If you think you can write this help, please contact the Doc team. Thanking you in advance.

This tool[20] allows to configure much of local network or Internet access. You have to know some information from your access provider or your network administrator.
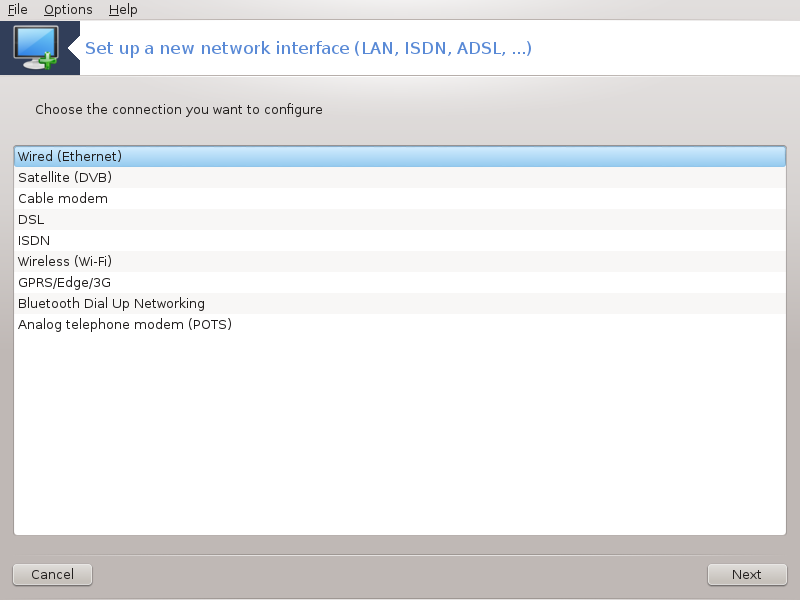
Select the type of connection you want to set, according to which hardware and provider you have.
The first window lists the interfaces which are available. Select the one to configure.
At this point, the choice is given between an automatic or a manual IP address.
Samodejni IP
Ethernet/IP settings: you have to select if DNS servers are declared by the DHCP server or are manually specified, as explained below. In the last case, the IP address of DNS servers has to be set. The HOSTNAME of the computer can be specified here. If no HOSTNAME is specified, the name
localhost.localdomainis attributed by default. The Hostname can also be provided by the DHCP server with the option Assign host name from DHCP server. Not all DHCP servers have such a function and if you're setting up your PC to get an IP address from a domestic ADSL router, it is unlikely.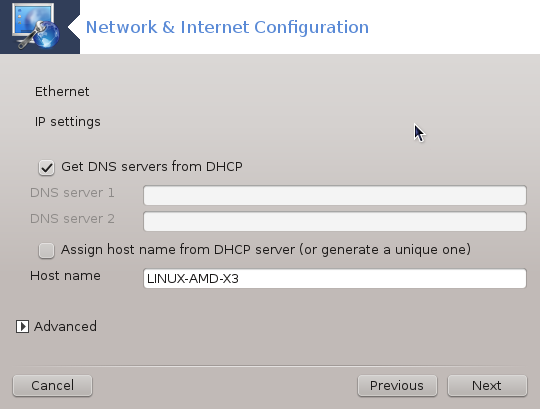
Z naprednim gumbom lahko izberete:
Search domain (not accessible, as provided by the DHCP server)
odjemalec DHCP
Čakanje na uspešnost povezave z DHCP
Get YP server from DHCP (checked by default): specify the NIS server
Pridobi strežnike NTPD prek DHCP (sinhronizacija ure)
the HOSTNAME required by DHCP. Only use this option if the DHCP server requires the client to specify a hostname before receiving an IP address. This option is not dealt by some DHCP servers.
After accepting, the last steps which are common to all connection configurations are explained: “Zaključevanje nastavitev”
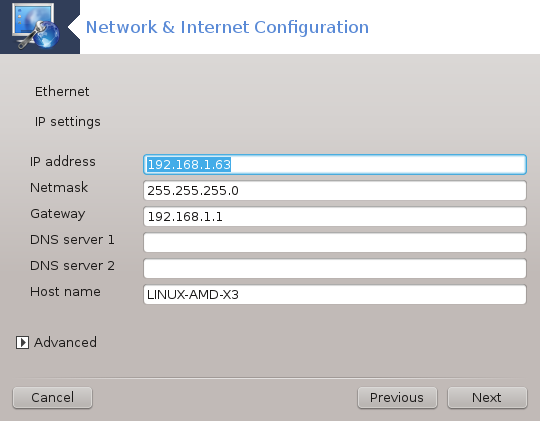
Ročna nastavitev
Ethernet/IP settings: you need to declare what DNS servers to use. The HOSTNAME of the computer can be specified here. If no HOSTNAME is specified, the name
localhost.localdomainis attributed by default.For a residential network, the IP address usually looks like 192.168.x.x, Netmask is 255.255.255.0, and the Gateway and DNS servers are available from your service provider's website.
In advanced settings, you can specified a Search domain. It would usually be your home domain, i.e. if your computer is called "splash", and it's full domain name is "splash.boatanchor.net", the Search Domain would be "boatanchor.net". Unless you specifically need it, it's ok not to define this setting. Again, domestic ADSL would not need this setting.
Naslednji koraki so bolje razloženi v “Zaključevanje nastavitev”
This section hasn't been written yet for lack of resources. If you think you can write this help, please contact the Doc team. Thanking you in advance.
The first window lists the interfaces which are available. Select the one to configure.
At this point, the choice is given between an automatic or a manual IP address.
Določiti morate način overjanja:
Brez
BPALogin (necessary for Telstra). In this case you have to provide User name and password.
Samodejni IP
Cable/IP settings: you have to select if DNS servers are declared by the DHCP server or are manually specified, as explained below. In the last case, the IP address of DNS servers has to be set. The HOSTNAME of the computer can be specified here. If no HOSTNAME is specified, the name
localhost.localdomainis attributed by default. The Hostname can also be provided by the DHCP server with the option Assign host name from DHCP server. Not all DHCP servers have such a function and if you're setting up your PC to get an IP address from a domestic ADSL router, it is unlikely.Z naprednim gumbom lahko izberete:
Search domain (not accessible, as provided by the DHCP server)
odjemalec DHCP
Čakanje na uspešnost povezave z DHCP
Get YP server from DHCP (checked by default): specify the NIS server
Pridobi strežnike NTPD prek DHCP (sinhronizacija ure)
the HOSTNAME required by DHCP. Only use this option if the DHCP server requires the client to specify a hostname before receiving an IP address. This option is not dealt by some DHCP servers.
After accepting, the last steps which are common to all connection configurations are explained: “Zaključevanje nastavitev”
Ročna nastavitev
Cable/IP settings: you need to declare what DNS servers to use. The HOSTNAME of the computer can be specified here. If no HOSTNAME is specified, the name
localhost.localdomainis attributed by default.For a residential network, the IP address usually looks like 192.168.x.x, Netmask is 255.255.255.0, and the Gateway and DNS servers are available from your service provider's website.
In advanced settings, you can specified a Search domain. It would usually be your home domain, i.e. if your computer is called "splash", and it's full domain name is "splash.boatanchor.net", the Search Domain would be "boatanchor.net". Unless you specifically need it, it's ok not to define this setting. Again, domestic connection would not need this setting.

Naslednji koraki so bolje razloženi v “Zaključevanje nastavitev”
If the tool detects network interfaces, it offers to select one and to configure it.
A list of providers is proposed, classified by countries. Select your provider. If it is not listed, select the option Unlisted and then enter the options your provider gave.
Izberite enega izmed protokolov, ki so na voljo:
Protokol za dinamično dodeljevanje naslova IP napravi (DHCP)
Ročne nastavitve TCP/IP
Protokol med točkama prek ADSL (PPPoA)
Protokol med točkama prek eterneta (PPPoE)
Tunelski protokol od točke do točke (PPTP)
Nastavitve dostopa
Uporabniško ime za prijavo
Geslo uporabniškega računa
(Napredna) navidezna pot do identitete (VPI):
Identiteta (Naprednega) navideznega vezja (VCI)
Naslednji koraki so bolje razloženi v “Zaključevanje nastavitev”
Čarovnik sprašuje po napravah za nastavitev:
Ročna izbira (notranja kartica ISDN)
Zunanji modem ISDN
A list of hardware is proposed, classified by category and manufacturer. Select your card.
Izberite enega izmed protokolov, ki so na voljo:
Protokol za preostali svet razen Evrope (DHCP)
Evropski protokol (EDSS1)
A list of providers is then offered, classified by countries. Select your provider. If it is not listed, select the option Unlisted and then enter the options your provider gave you. Then it is asked for parameters:
Ime povezave
Telefonska številka
Identiteta za prijavo
Geslo uporabniškega računa
Način overjanja
After that, you have to select if you get the IP address by automatic or manual method. In the last case, specify IP address and Subnet mask.
The next step is to choose how DNS servers address are obtained, by automatic or manual method. In the case of manual configuration, you have to put:
Ime domene
Prvi in drugi strežnik DNS
Select if the hostname is set from IP. This option is to select only if you are sure that your provider is configured to accept it.
The next step is to choose how the gateway address is obtained, by automatic or manual method. In the case of manual configuration, you have to enter the IP address.
Naslednji koraki so bolje razloženi v “Zaključevanje nastavitev”
A first window lists the interfaces which are available and an entry for Windows driver (ndiswrapper). Select the one to configure. Use ndiswrapper only if the other configuration methods did not work.
At this step, the choice is given between the different access points that the card has detected.
Specific parameter for the wireless card are to provide:
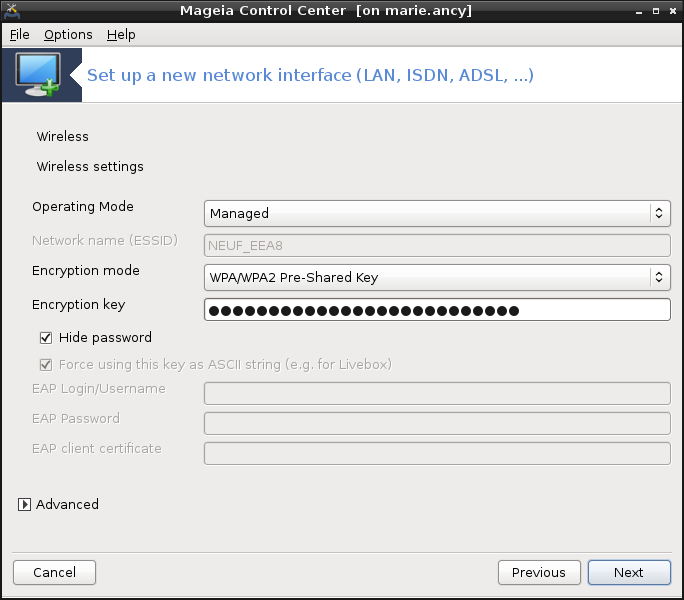
Način delovanja:
- Upravljano
To access to an existing access point (the most frequent).
- Ad-hoc
To configure direct connection between computers.
Omrežno ime (ESSID)
Encryption mode: it depends of how the access point is configured.
- WPA/WPA2
This encryption mode is to prefer if your hardware allows it.
- WEP
Some old hardware deals only this encryption method.
Šifrirni ključ
It is generally provided with the hardware which give the access point.
At this step, the choice is given between an automatic IP address or a manual IP address.
Samodejni IP
IP settings: you have to select if DNS servers are declared by the DHCP server or are manually specified, as explained below. In the last case, IP address of DNS servers has to be set. The HOSTNAME of the computer can be specified here. If no HOSTNAME is specified, the name localhost.localdomain is attributed by default. The Hostname can also be provided by the DHCP server with the option Assign host name from DHCP server
Z naprednim gumbom lahko izberete:
Search domain (not accessible, as provided by the DHCP server)
odjemalec DHCP
Čakanje na uspešnost povezave z DHCP
Get YP server from DHCP (checked by default): specify the NIS servers
Pridobi strežnike NTPD prek DHCP (sinhronizacija ure)
the HOSTNAME required by DHCP. Only use this option if the DHCP server requires the client to specify a hostname before receiving an IP address. This option is not dealt by some DHCP servers.
After accepting the configuration the step, which is common to all connection configurations, is explained: “Zaključevanje nastavitev”
Ročna nastavitev
IP settings: you have to declare DNS servers. The HOSTNAME of the computer can be specified here. If no HOSTNAME is specified, the name
localhost.localdomainis attributed by default.For a residential network, the IP address always looks like 192.168.x.x, Netmask is 255.255.255.0, and the Gateway and DNS servers are available from your providers website.
In advanced settings, you can specified a Search domain. It must seem to your hostname without the first name, before the period.
Naslednji koraki so bolje razloženi v “Zaključevanje nastavitev”
If the tool detects wireless interfaces, it offers to select one and to configure it.
Številka PIN? Če ni potrebna, pustite prazno.
The wizard asks for network. If it is not detected, select the option Unlisted.
A list of providers is proposed, classified by countries. Select your provider. If it is not listed, select the option Unlisted and then enter the options your provider gave.
Podajte nastavitve dostopa
Ime dostopne točke
Uporabniško ime za prijavo
Geslo uporabniškega računa
Naslednji koraki so bolje razloženi v “Zaključevanje nastavitev”
This section hasn't been written yet for lack of resources. If you think you can write this help, please contact the Doc team. Thanking you in advance.
Čarovnik sprašuje po napravah za nastavitev:
Ročna izbira
Zaznana strojna oprema.
Predlagan je seznam vrat. Izberite jih.
If not yet installed, it will be suggested that you install the package kppp-provider.
A list of providers is proposed, classified by countries. Select your provider. If it is not listed, select the option Unlisted and then enter the options your provider gave. Then it is asked for Dialup options:
Ime povezave
telefonska številka
ime za prijavo
Geslo
Izberite Overitev:
PAP/CHAP
Na osnovi ukazne datoteke
PAP
Na osnovi terminala
CHAP
Naslednji koraki so bolje razloženi v “Zaključevanje nastavitev”
V naslednjem koraku lahko izberete:
Omogoči uporabnikom upravljanje s povezavo
Omogoči povezavo ob zagonu sistema
Omogoči spremljanje prometa
Dovoli Nadzornemu središču nadzor nad tem vmesnikom
In the case of a wireless connection, a supplemental box is Allow access point roaming which give the possibility to switch automatically between access point according to the signal strength.
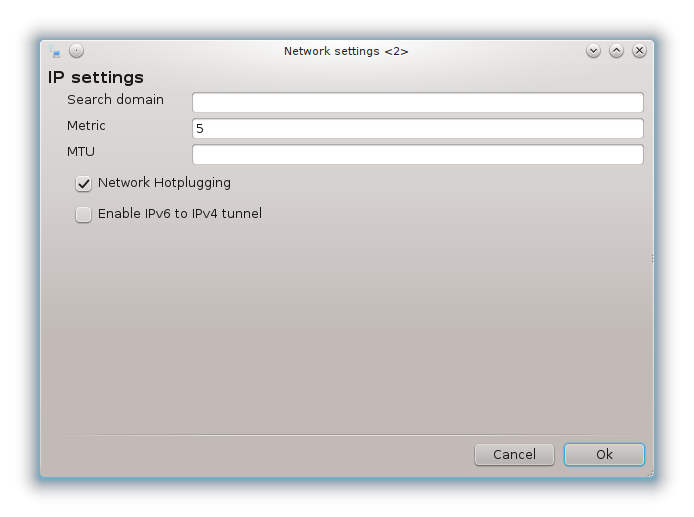
Z naprednim gumbom lahko izberete:
Metrični sistem (privzeto 10)
MTU
Samodejna vključitev omrežja (hotplugging)
Omogoči tunel med IPv6 in IPv4
The last step allows you to specify if the connection is to start immediately or not.

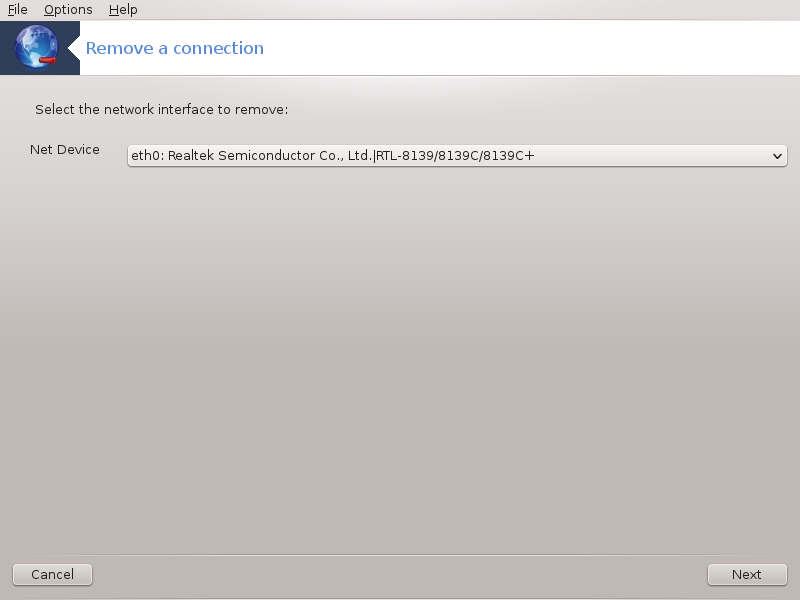
Here, you can delete a network interface[21].
Click on the drop down menu, choose the one you want to remove and then click next.
You'll see a message that the network interface has been deleted successfully.
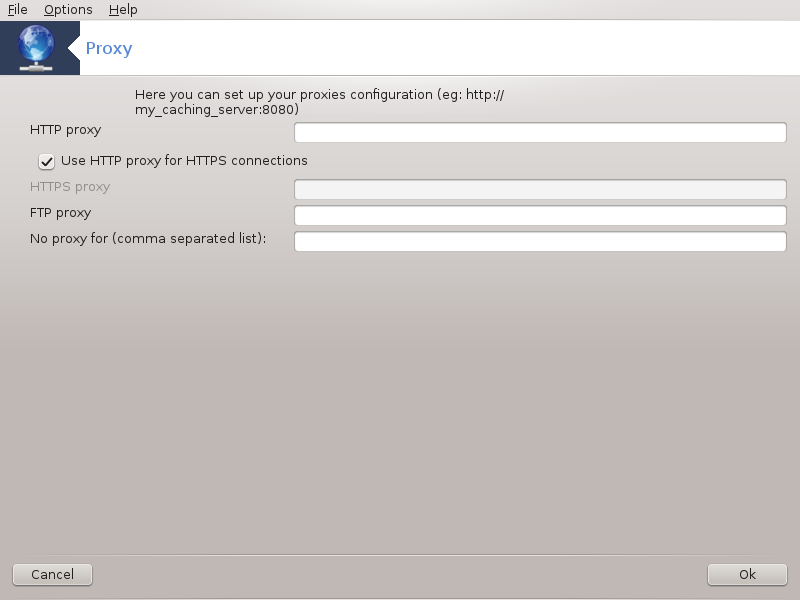
If you have to use a proxy server to access to the internet, you can use this tool[22] to configure it. Your net administrator will give you the information you need. You can also specify some services which can be accessed without the proxy by exception.
From Wikipedia, on 2012-09-24, article Proxy server: In computer networks, a proxy server is a server (a computer system or an application) that acts as an intermediary for requests from clients seeking resources from other servers. A client connects to the proxy server, requesting some service, such as a file, connection, web page, or other resource available from a different server. The proxy server evaluates the request as a way to simplify and control their complexity.
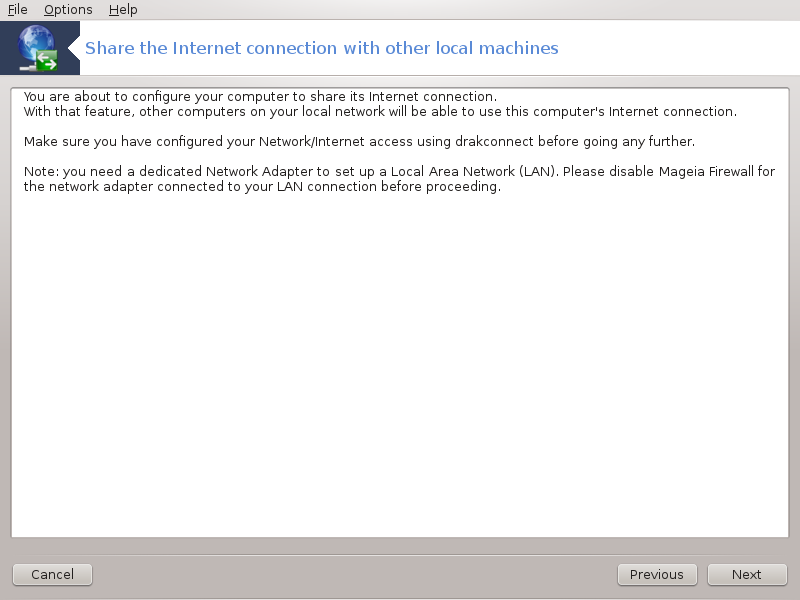
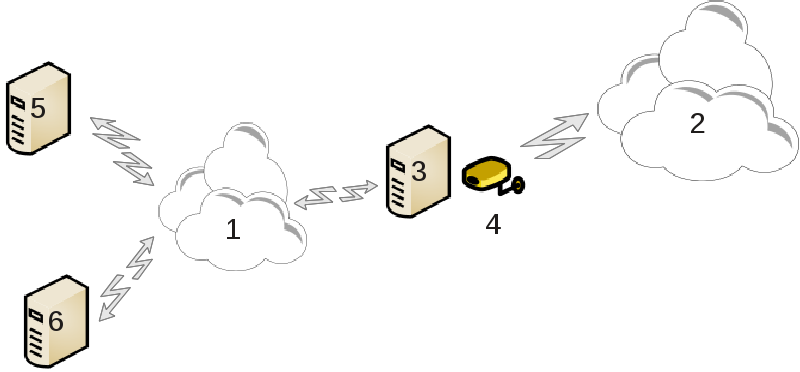
This is useful when you have a computer (3) which has Internet (2) access and is connected also to a local network (1). You can use computer (3) as a gateway to give that access to other workstations (5) and (6) in the local network (1). For this, the gateway must have two interfaces; the first one such as an ethernet card must be connected to the local network, and the second one (4) connected to the Internet (2).
The first step is to verify that the network and the access to Internet are set up, as documented in “Omrežno središče”.
The wizard[23] offers successive steps which are shown below:
If the wizard does not detect at least two interfaces, it warns about this and asks to stop the network and configure the hardware.
specify the interface used for the Internet connection. The wizard automatically suggests one of the interfaces, but you should verify that what is proposed is correct.
specify which interface is used for the Lan access. The wizard also proposes one, check that this is correct.
The wizard proposes parameters for the Lan network, such as IP address, mask and domain name. Check that these parameters are compatible with the actual configuration. It is recommended that you accept these values.
specify if the computer has to be used as a DNS server. If yes, the wizard will check that
bindis installed. Otherwise, you have to specify the address of a DNS server.specify if the computer is to be used as a DHCP server. If yes, the wizard will check that
dhcp-serveris installed and offer to configure it, with start and end addresses in the DHCP range.specify if the computer is to be used as a proxy server. If yes, the wizard will check that
squidis installed and offer to configure it, with the address of the administrator (admin@mydomain.com), name of the proxy (myfirewall@mydomaincom), the port (3128) and the cache size (100 Mb).The last step allows you to check if the gateway machine is connected to printers and to share them.
You will be warned about the need to check the firewall if it is active.
If you have configured the gateway machine with DHCP, you only need to specify in the network configuration tool that you get an address automatically (using DHCP). The parameters will be obtained when connecting to the network. This method is valid whatever operating system the client is using.
If you must manually specify the network parameters, you must in particular specify the gateway by entering the IP-address of the machine acting as the gateway.

This page hasn't been written yet for lack of resources. If you think you can write this help, please contact the Doc team. Thanking you in advance.
To orodje lahko zaženete v ukazni vrstici z ukazom draknetprofile kot skrbnik.
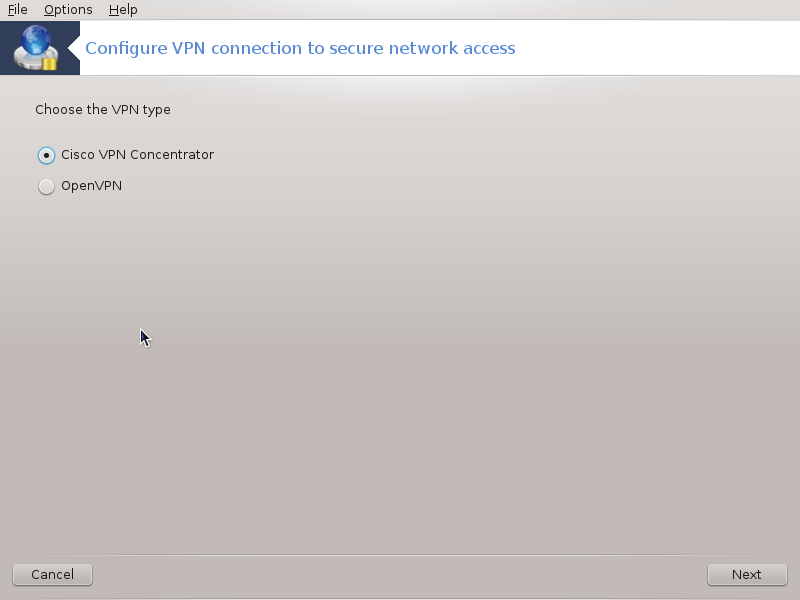
This tool[24] allows to configure secure access to a remote network establishing a tunnel between the local workstation and the remote network. We discuss here only of the configuration on the workstation side. We assume that the remote network is already in operation, and that you have the connection information from the network administrator, like a .pcf configuration file .
First, select either Cisco VPN Concentrator or OpenVPN, depending on which protocol is used for your virtual private network.
Then give your connection a name.
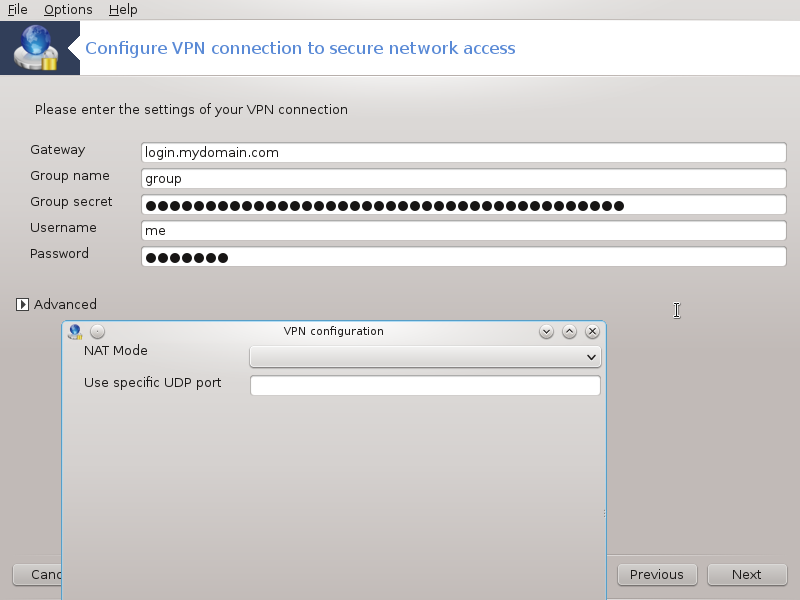
At the next screen, provide the details for your VPN connection.
Za Cisco VPN
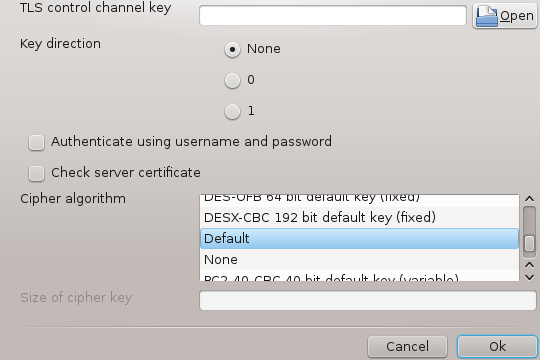
For openvpn. The openvpn package and its dependencies will be installed the first time the tool is used.

Select the files that you received from the network administrator.
Napredne možnosti:
The next screen asks for IP-address of the gateway.
When the parameters are set, you have the option of starting the VPN connection.
This VPN connection can be set to start automatically with a network connection. To do this, reconfigure the network connection to always connect to this VPN.
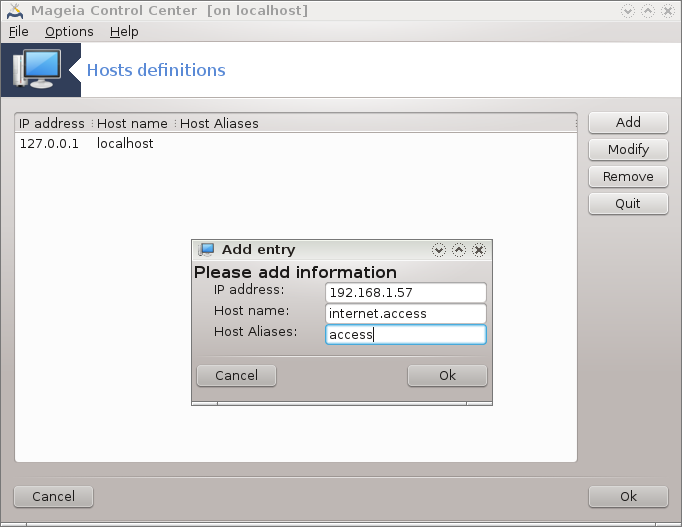
If some systems on your network grant you services, and have fixed IP-addresses, this tool[25] allows to specify a name to access them more easily. Then you can use that name instead of the IP-address.
With this button, you add the name for a new system. You will get a window to specify the IP-address, the host name for the system, and optionally an alias which can be used in the same way that the name is.
You can access the parameters of an entry previously defined. You get the same window.
[19] To orodje lahko zaženete v ukazni vrstici z ukazom draknetcenter kot skrbnik.
[20] To orodje lahko zaženete v ukazni vrstici z ukazom drakconnectkot skrbnik.
[21] To orodje lahko zaženete v ukazni vrstici z ukazom drakconnect --del kot skrbnik.
[22] To orodje lahko zaženete v ukazni vrstici z ukazom drakproxy kot skrbnik.
[23] To orodje lahko zaženete v ukazni vrstici z ukazom drakgw kot skrbnik.
[24] To orodje lahko zaženete v ukazni vrstici z ukazom drakvpn kot skrbnik.
[25] To orodje lahko zaženete v ukazni vrstici z ukazom drakhosts kot skrbnik.
