

By default, Mageia uses exclusively:
Grub2 (with or without graphical menu) for a Legacy/MBR or Legacy/GPT system
Grub2-efi for a UEFI system.
Podpowiedź
Graficzne menu Magei są niezłe:


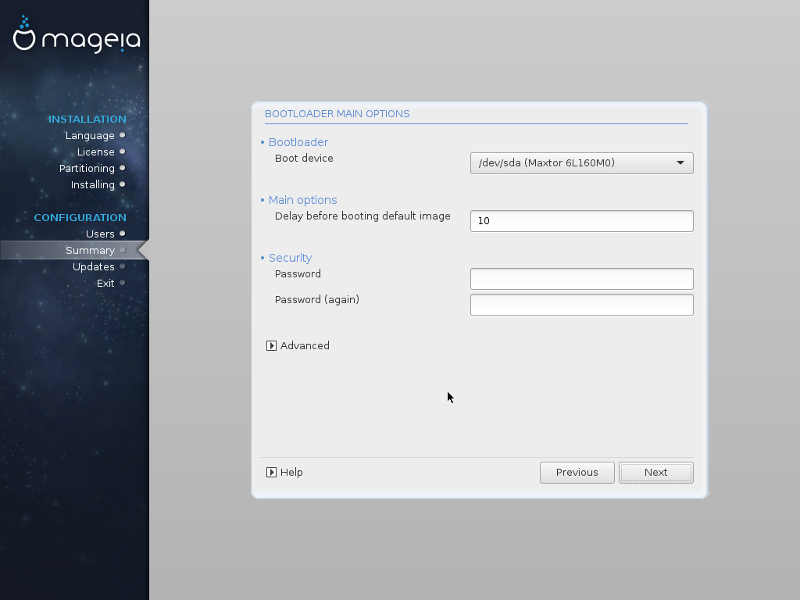
Nie modyfikuj "Boot Device", chyba że masz pojęcie, co robisz.
With an UEFI system, the user interface is slightly different as you cannot choose between with or without graphical menu

If Mageia is the first system installed on your computer, the installer created an ESP (EFI System Partition) to receive the bootloader (Grub2-efi). If there was already UEFI operating systems previously installed on your computer (Windows 8 for example), the Mageia installer detected the existing ESP created by Windows and adds grub2-efi. Although it is possible to have several ESPs, only one is advised and enough whatever the number of operating systems you have.
Nie modyfikuj "Boot Device", chyba że masz pojęcie, co robisz.
By default, according to your system, Mageia writes a new:
GRUB2 bootloader either into the MBR (Master Boot Record) of your first hard drive or in the BIOS boot partition.
Grub2-efi bootloader into the ESP
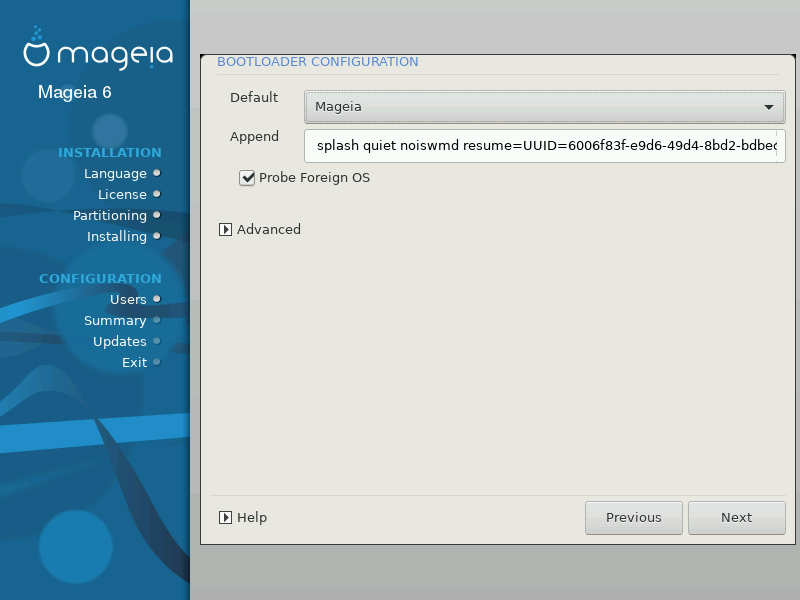
If you already have other operating systems installed, Mageia attempts to add them to your new Mageia boot menu. If you don't want this behaviour, click on and then uncheck the box Probe Foreign OS

The exact procedure for adding your Mageia system to an existing bootloader is beyond the scope of this help, however in most cases it will involve running the relevant bootloader installation program which should detect and add it automatically. See the documentation for the operating system in question.
If you don't want a bootable Mageia, but chain load it from another OS, click on , then on and Check the box Do not touch ESP or MBR.
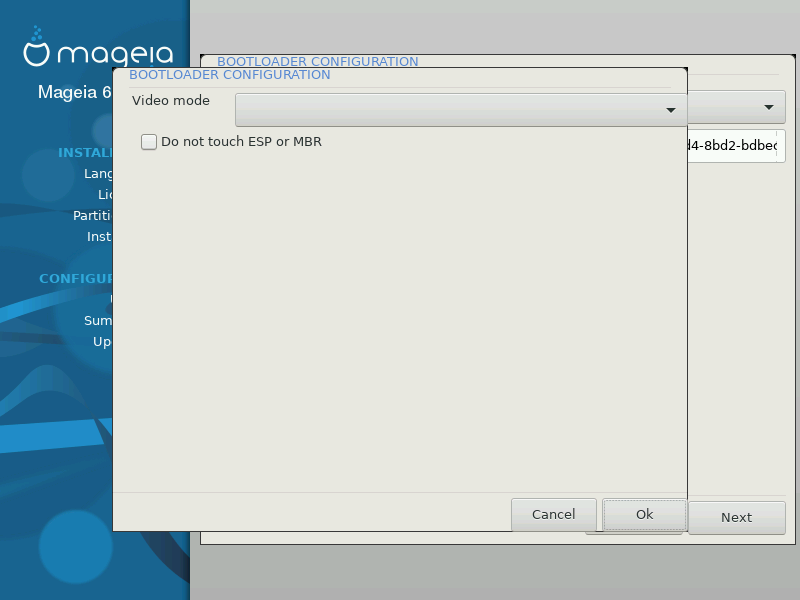

You will get a warning that the bootloader will lack, ignore it by a click on .

Delay before booting the default image: This text box lets you set a delay in seconds before the default operating system is started up.
Security: This allows you to set a password for the bootloader. This means other people can not enter single user mode or change settings at the boot time.
Password: This text box is where you actually put the password
Password (again): Retype the password and Drakx will check that it matches with the one set above.
Advanced
Enable ACPI: ACPI (Advanced Configuration and Power Interface) is a standard for the power management. It can save energy by stopping unused devices, this was the method used before APM. Uncheck it be useful, for example, if your computer does not support ACPI or if you think the ACPI implementation might cause some problems (for instance random reboots or system lockups).
Enable SMP: This option enables / disables symmetric multiprocessing for multi core processors.
Enable APIC: Enabling or disabling this gives the operating system access to the Advanced Programmable Interrupt Controller. APIC devices permit more complex priority models, and Advanced IRQ (Interrupt Request) management.
Enable Local APIC: Here you can set local APIC, which manage all external interrupts for some specific processor in an SMP system.
Default: Operating system started up by default
Append: This option lets you pass the kernel information or tell the kernel to give you more information as it boots.
Probe foreign OS: see above Using a Mageia bootloader
Advanced
Video mode: This sets the screen size and colour depth the boot menu will use. If you click the down triangle you will be offered other size and colour depth options.
Do not touch ESP or MBR: see above Using the chain loading
